TemplateMonster items typically include **6 months of free technical support** from the purchase date. To request support, you must submit a ticket via your TemplateMonster user account .
The support policy covers issues related to the product's advertised features, known bugs, and general guidance on using the template as documented.
IMPORTANT NOTE! We only provide support for features that are directly related to the template itself.
Support **does not** include:
Need help? Reach out to us anytime via the **TemplateMonster Ticket System** in your user dashboard. We aim to respond within 24 hours on business days (usually much faster).
Before submitting a ticket, we strongly recommend checking our **Product Documentation** and the **TemplateMonster Help Center** (or your specific FAQs link) for quick answers.
We are unable to offer support for third-party plugins, scripts, or tools. For assistance with these items, please contact the respective plugin author. We recommend checking the required software and basic technical requirements detailed in this documentation before starting any modifications.
Before installing this theme, make sure you have WordPress up and running. If you’re new to WordPress, the resources below will help you get started and deepen your understanding.
To use this theme you must be running at least
WordPress 5.0
,
PHP 5.6.20
or higher.
External plug-ins may require
additional limitations
, like
WooCommerce
-
PHP 7.2+
, etc.
If you use a hosting service with limited resources (e.g. GoDaddy!), you may experience issues with the "one-click" demo data installation.
We recommend that you contact your web hosting service provider to make sure that your server PHP configuration limits are as follows:
max_input_vars 3000
max_execution_time 600
max_input_time 300
memory_limit 512M
post_max_size 64M
upload_max_filesize 64M
If you are running unmanaged dedicated server or VPS,
you should check your
php.ini
file. Alternatively, you can edit
.htaccess
file at the root of your website and add the following values:
php_value max_input_vars 3000
php_value max_execution_time 600
php_value max_input_time 300
php_value memory_limit 512M
php_value post_max_size 64M
php_value upload_max_filesize 64M
Setting these values will ensure you will not get error messages during the installation. To safeguard your website, please use secure passwords and the latest version of WordPress and plug-ins.
Before you begin installing the theme, we recommend performing the following steps to avoid common issues and ensure a smooth setup process:
max_input_vars 3000
max_execution_time 600
max_input_time 300
memory_limit 512M
post_max_size 64M
upload_max_filesize 64M
Following these steps can help prevent timeout errors or missing content during the setup process.
Before installing the theme, please make sure you have **unzipped the main downloaded archive**. The file you downloaded from TemplateMonster is a large package that contains the theme files, documentation, and demo content.
You need to **extract the contents** of this main ZIP file to find the inner, installable theme folder. Look for the file named **
commexa.zip
**. This is the only ZIP file you should upload to your WordPress dashboard.
The screenshot below illustrates the typical structure of the main downloaded package after extraction.
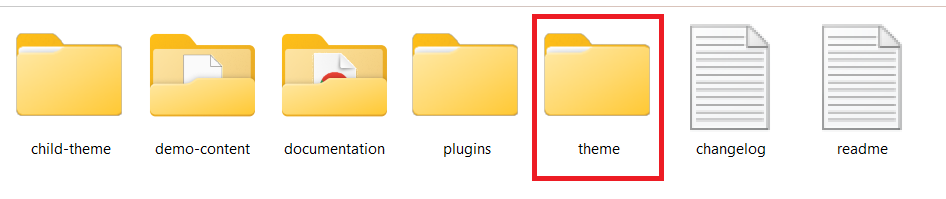
The archive contains: the theme, child theme, plugins, and documentation folders.
If you install the wrong zip file, you may get an error saying “The package could not be installed. The theme is missing the style.css stylesheet.” That means you're uploading an incorrect file.
Make sure WordPress is already installed before installing this theme. You can follow this guide to install WordPress: WordPress Installation Guide . It’s also recommended to use the latest WordPress version.
You can install the theme in two ways:
commexa.zip
and upload only the
/commexa
folder.
/wp-content/themes
.
commexa.zip
file and click “Install Now”.
Important: If you're planning to customize theme templates or core functions, activate the child theme before importing demo data. See the Child Theme section for more details.
Below is the list of the plug-ins that come included into the theme.
Some of these plug-ins can also be installed from the
WordPress.org
repository.
IMPORTANT! Please be aware that we do not include the rest of the plug-ins into the theme's package. They are for demonstration purposes only. In case you want to use these plug-ins you need to purchase them separately . Nevertheless, they are fully compatible with our theme.
You can find a detailed overview of each plug-in in the Plug-ins section of this documentation file.
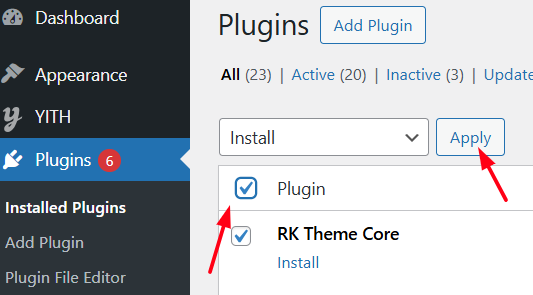
There is only one required plug-in for proper theme functioning, and that is RK Theme Core . The rest of the plug-ins are recommended for installation, but not required.
To make the theme look exactly as on the demo page, you would need to install the recommended plug-ins:

PLEASE NOTE!
The installation and activation of
bundled plug-ins
run
automatically
. Anyway, if you have any issues, please extract
plugins.zip
archive (from the theme package) and proceed with the plug-ins installation
manually
.
Planning to tweak or extend your theme’s core functionality? We highly recommend setting up a child theme . It allows you to safely customize your site without worrying about losing changes when the main theme is updated.
IMPORTANT! Be sure to install and activate the child theme before importing any demo content — this avoids resetting your theme settings later.
Installing a child theme works just like installing any other theme. In your download package, find the
commexa-child.zip
file and upload it via
WordPress admin → Appearance → Themes → Add New → Upload Theme
.
Alternatively, you can unzip it and upload the folder manually via FTP — just like in the
main theme installation
steps.
The child theme includes its own
functions.php
file. You can use this to:
If you need to modify something inside the restricted folders above, copy just the specific function you need into your child theme’s
functions.php
and override it there.
For everything else, go ahead and copy the file into your child theme and start editing.
When copying files, make sure to maintain the same folder structure as in the parent theme. This ensures WordPress can locate and prioritize your custom files correctly.
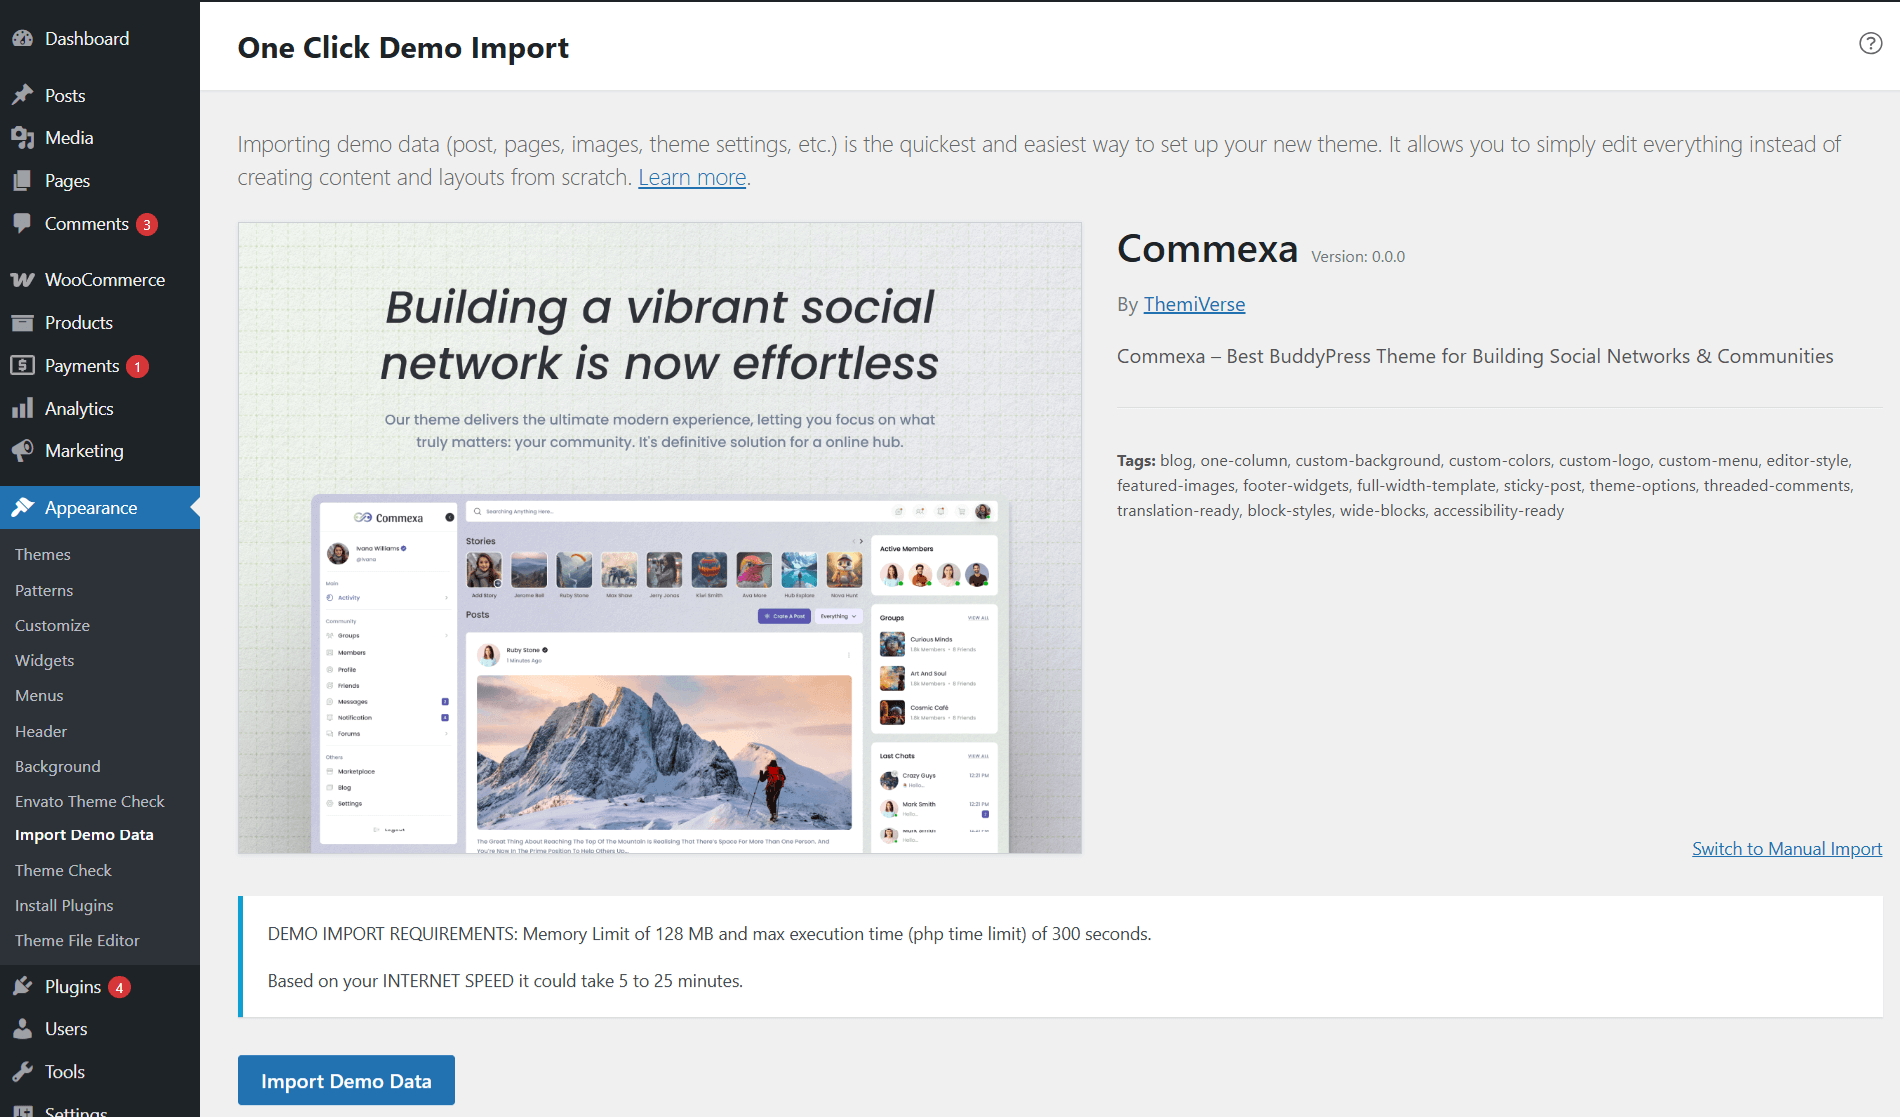
Our theme comes with an easy-to-use one-click demo data import feature, allowing your website to look exactly like the theme demo in just a few steps.
Before importing the demo content, please make sure your theme is activated via WP Dashboard > Appearance > Themes > Commexa , and that all required plugins are installed and activated. For details, refer to the Plugins Installation section.
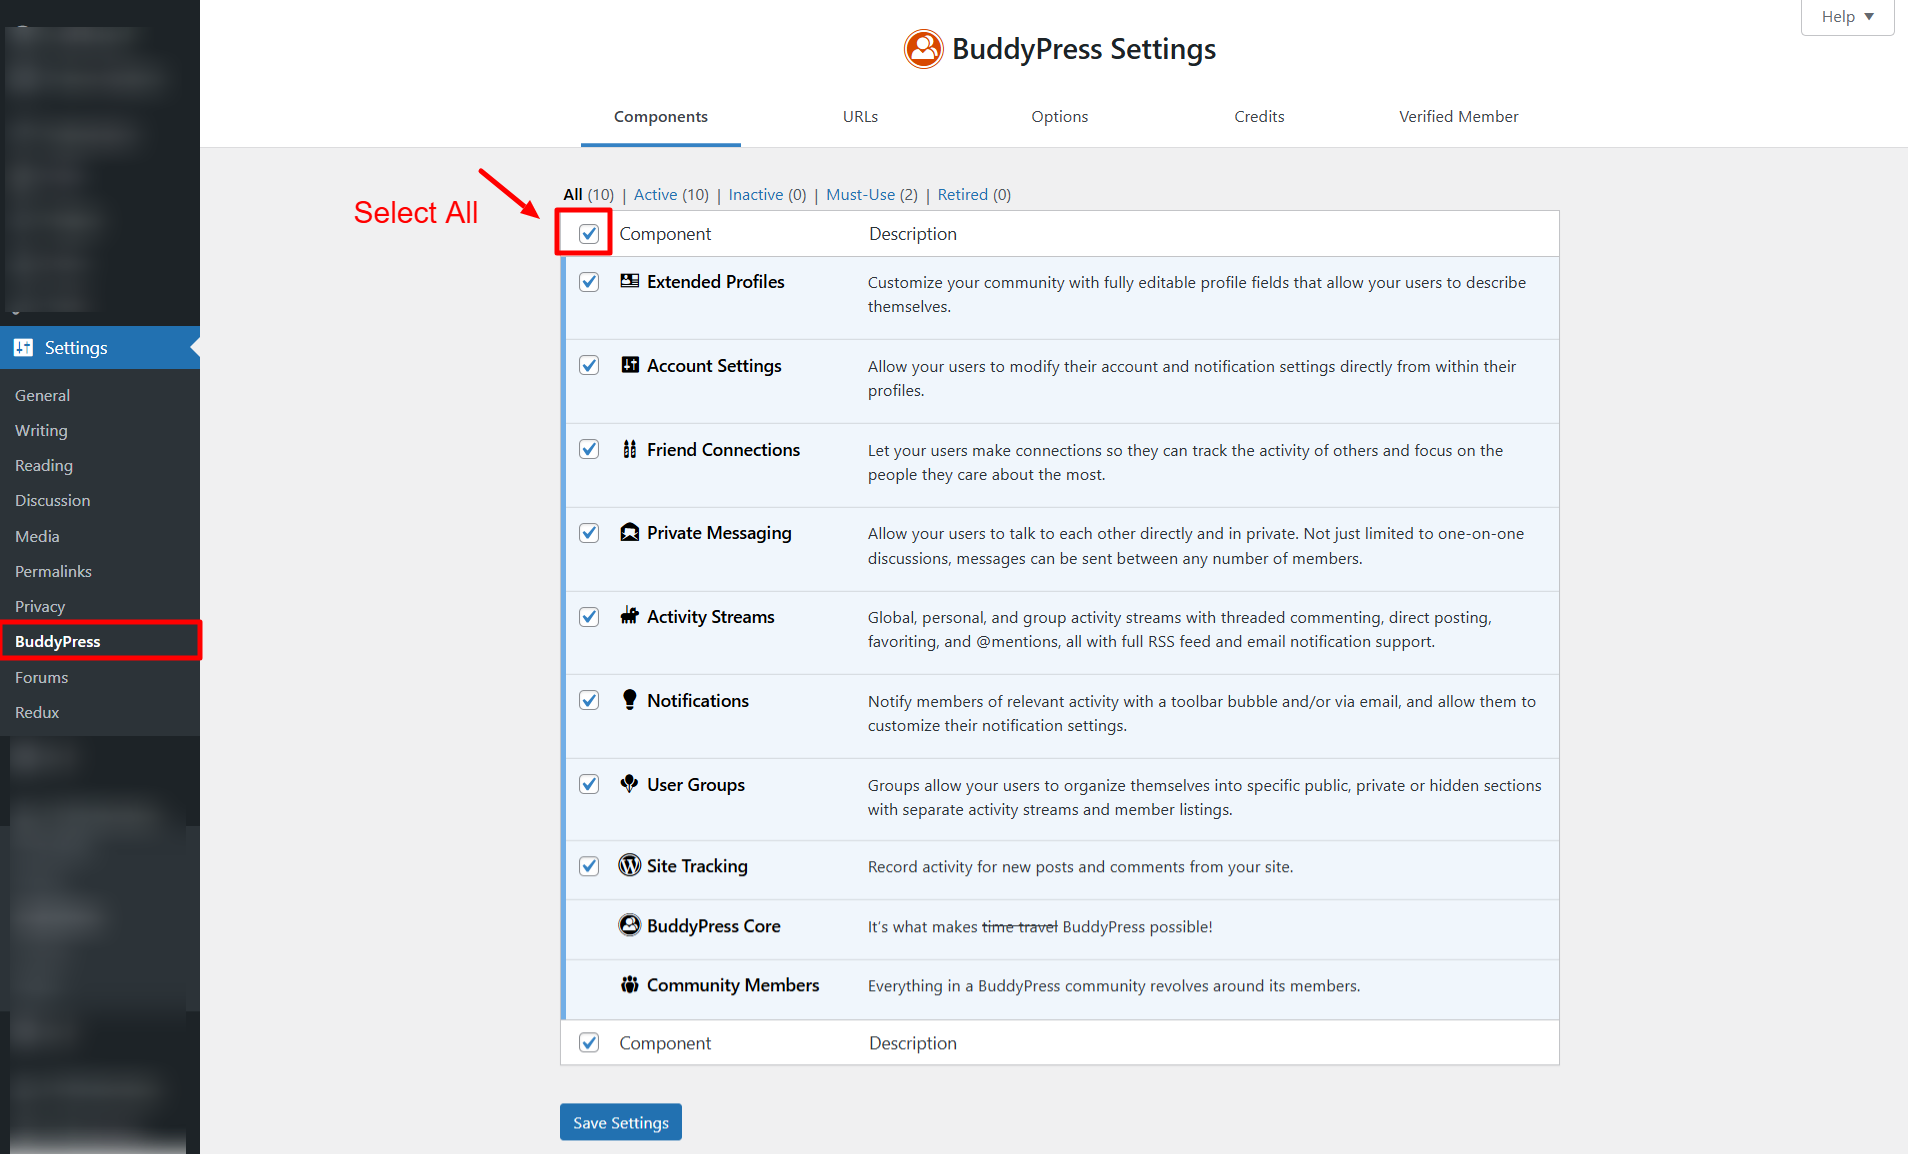
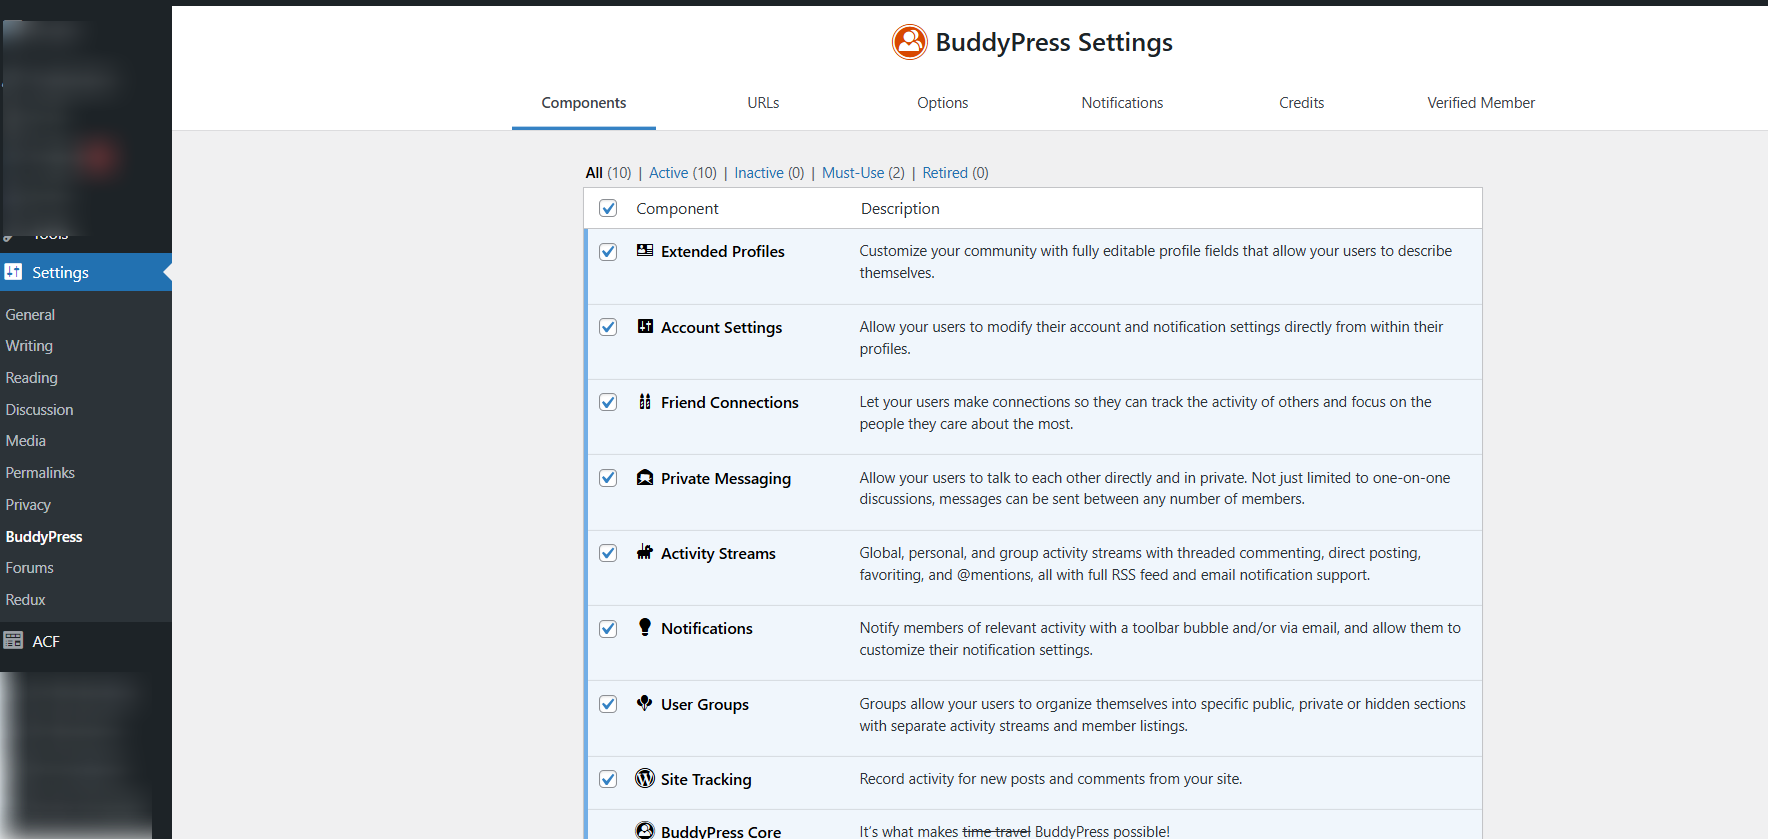
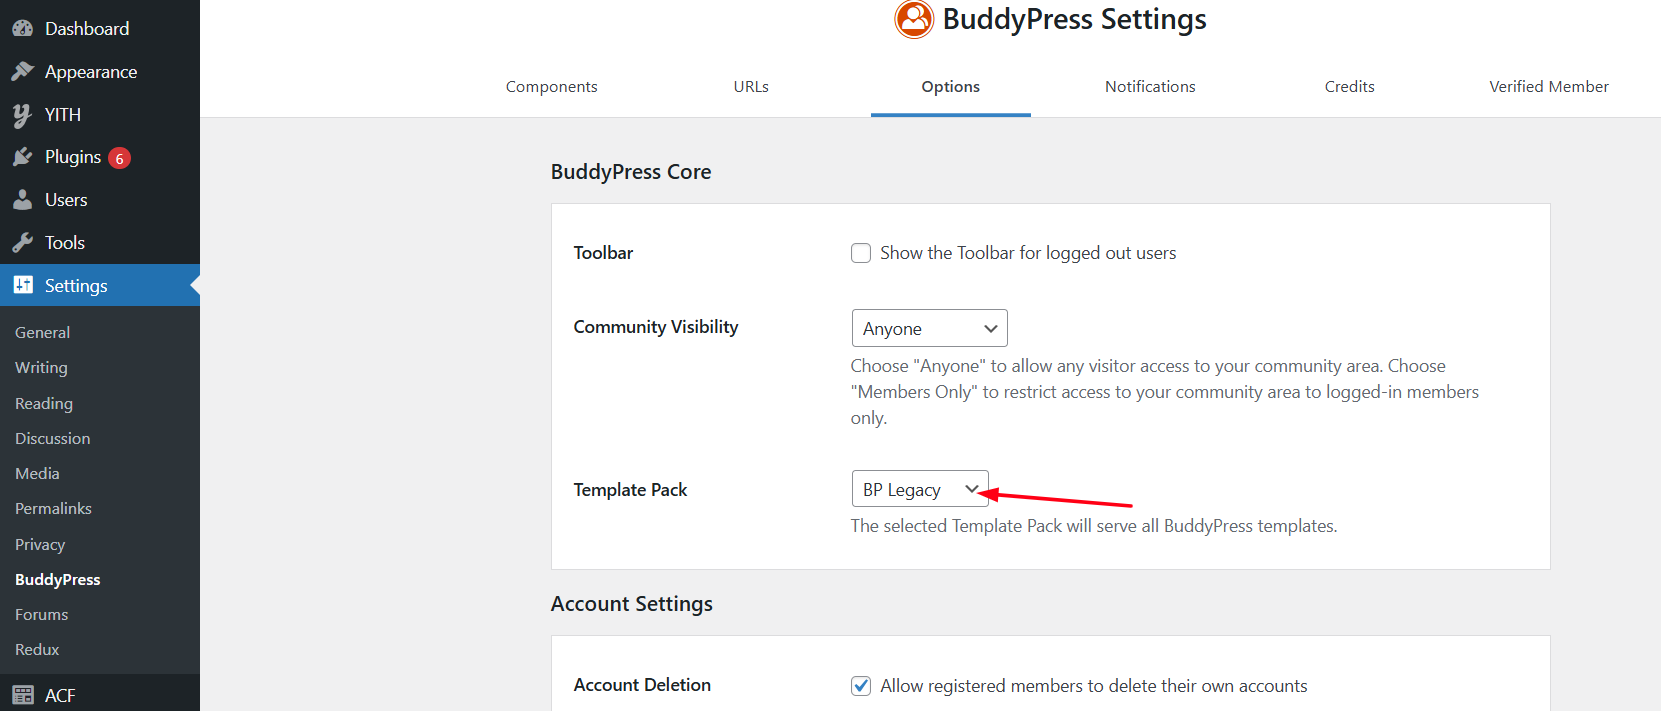
Before installing the demo content, please configure the BuddyPress settings as shown in the screenshot below. To access the settings, please click the following link: BuddyPress Settings
With Commexa, you can create a fully functional website by simply clicking a button to import our pre-built demo content.
You can import the demo content either automatically (recommended) via the WordPress admin import tool, or manually by uploading demo files via FTP or the host file manager.
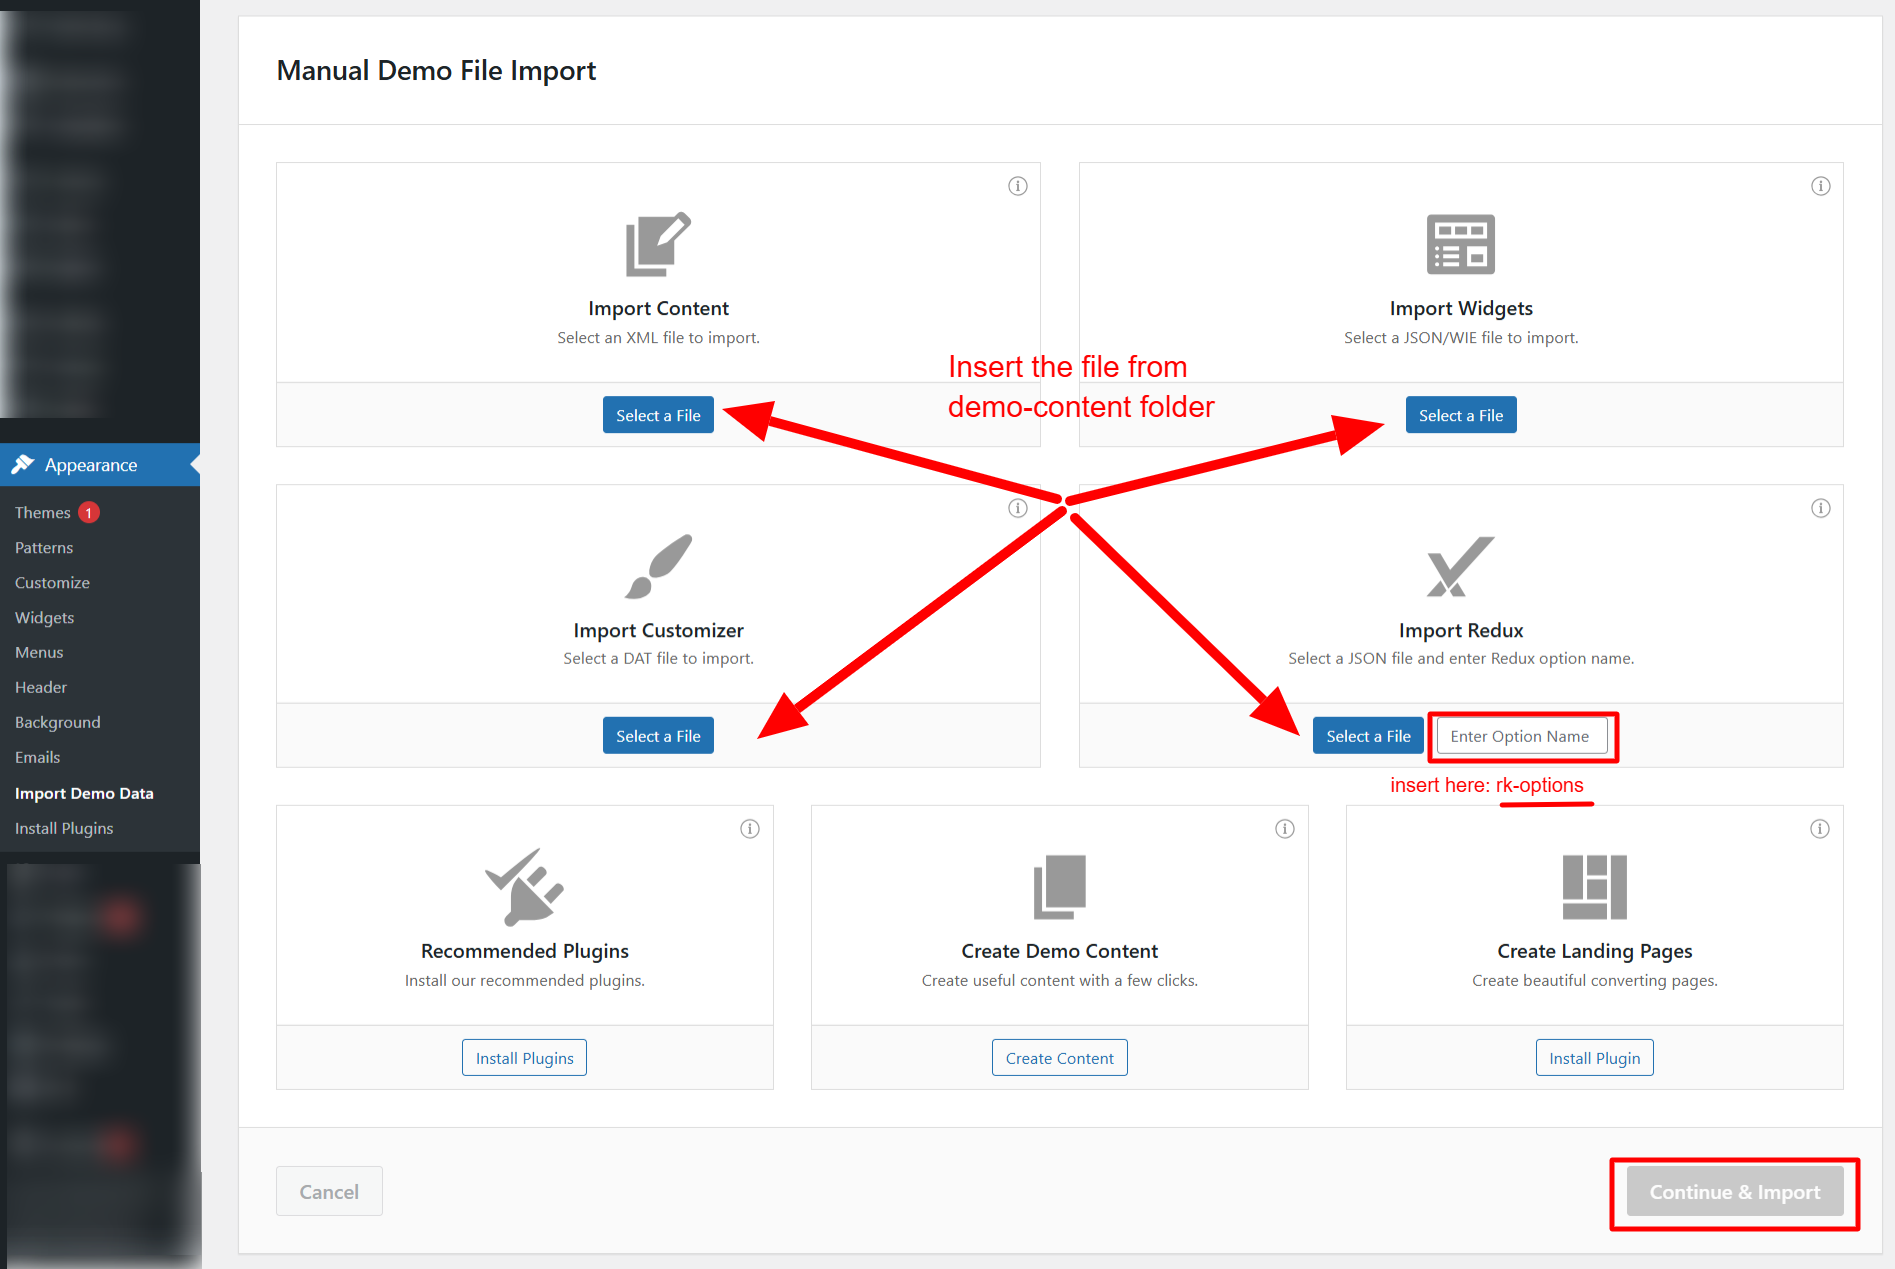
To import the demo content, navigate to WP Dashboard > Appearance > Import Demo Data , then click the Import button.

If the demo data installation gets stuck or you encounter a "failed" error message, you can manually upload the demo files.
demo-content
folder inside the package.
demo-content
folder
demo-content
folder and click
Upload
, followed by
Continue & Import
.
Once the import is complete, congratulations — your website is now set up with demo content. Visit your site to see it in action!
This step is required if you received the notification that a new version of the theme is available. You can see this information in Changelog section at the bottom of the item's details page.
Before you go ahead with the update make sure to back up your old theme's folder . Download it to your computer locally.
themes
folder of the main downloaded package.
/wp-content/themes
.
themes
folder.
IMPORTANT! All Customizer settings can also be accessed and edited via Backup plugins on WordPress.org . While updates usually install without issue, backing up ensures you can restore your site if anything goes wrong.
Will My Content Be Affected?
No — updating a plugin will not affect your posts, images, videos, or WordPress settings. Updates typically replace PHP, JS, and CSS files only — your database and core content remain unchanged.
Two Ways to Update Plugins:
wp-content/plugins/
wp-content/plugins/
with the new extracted folder.
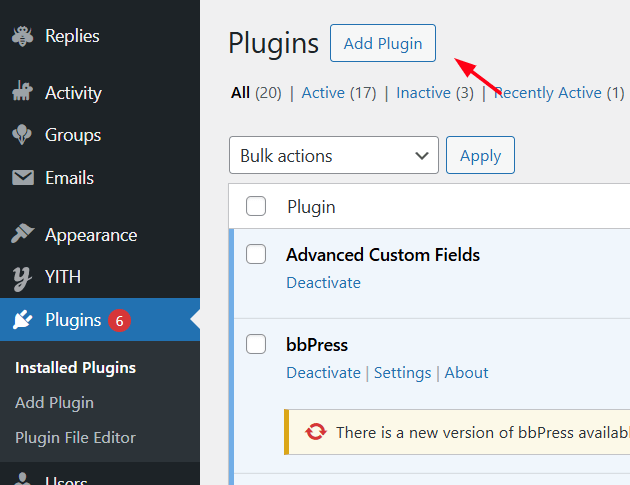
The above steps apply to all required plugins, including the RK Theme Core (essential for theme functionality) and other plugins located in the "Plugins" folder inside the ZIP package.
IMPORTANT! All Customizer settings can also be accessed and edited via Theme Options (WordPress Dashboard Menu) > Theme Options section.
Additionally, you can set the changes made in the Theme Options. Once you're satisfied, click the "Save Changes" button to apply them.
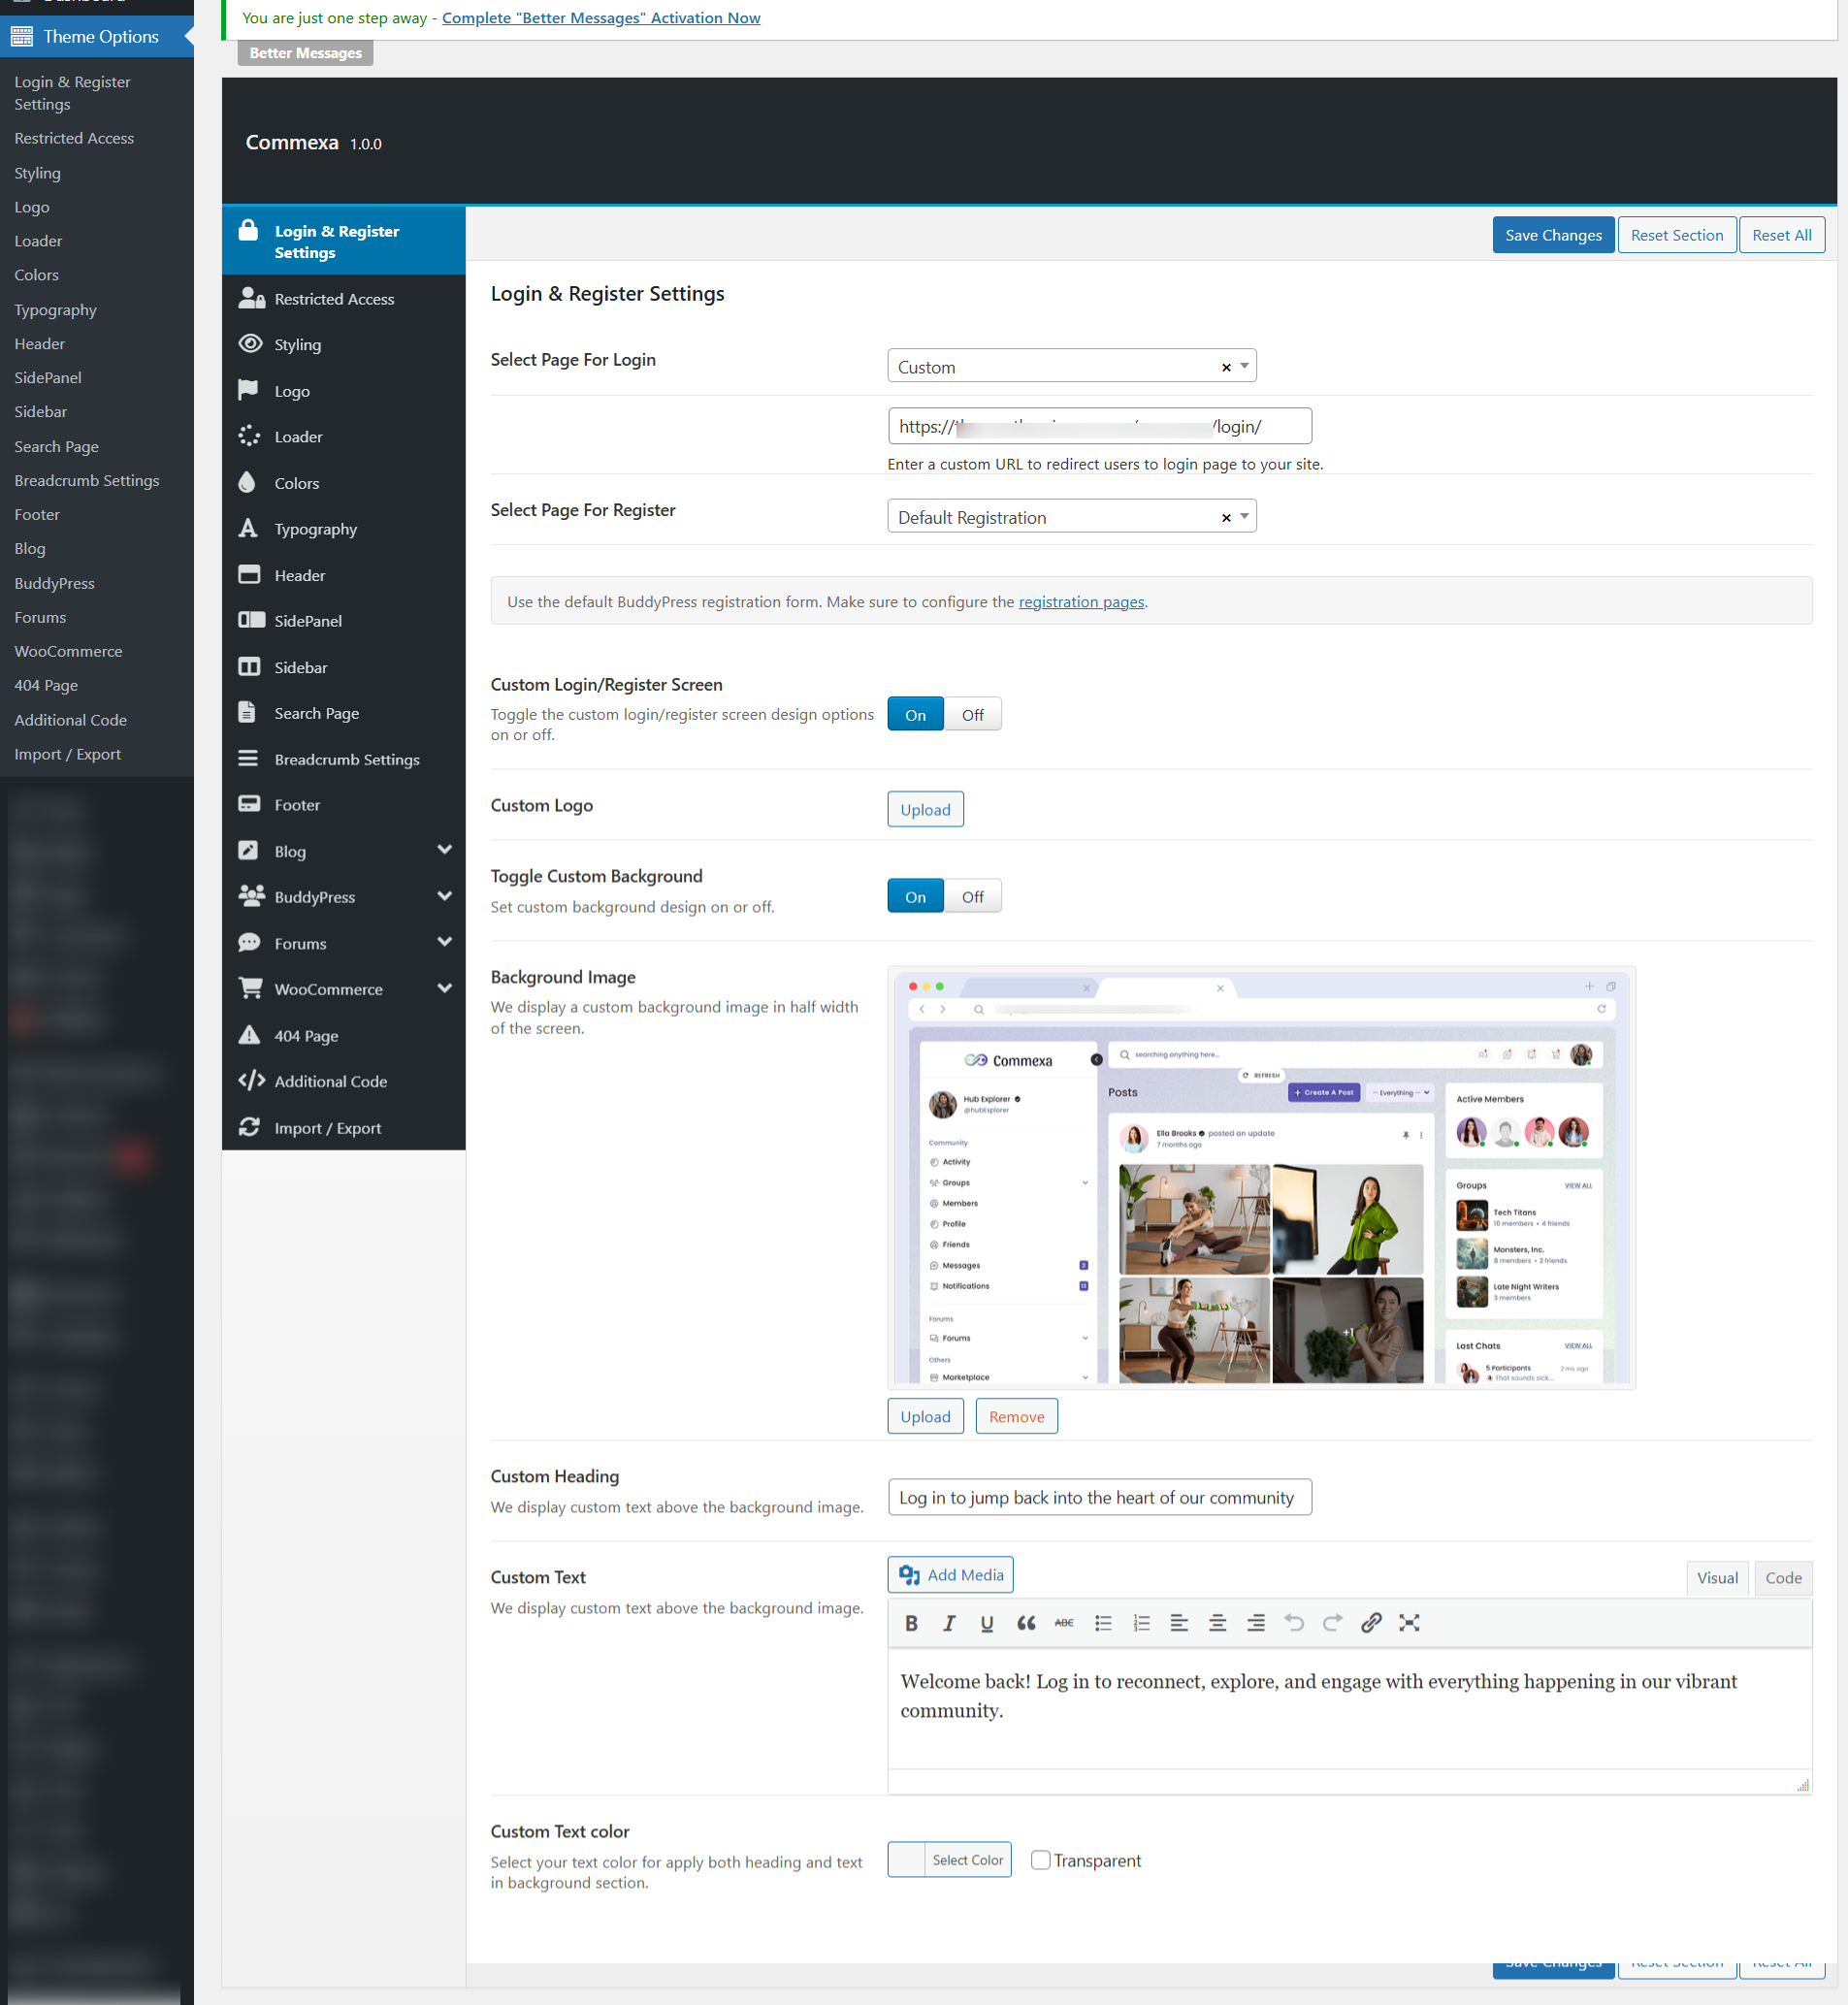
In the Theme Options > Login & Register Settings section , you can select the pages used for login and registration. You’ll also find options to customize the layout and design of these pages, along with other related settings.
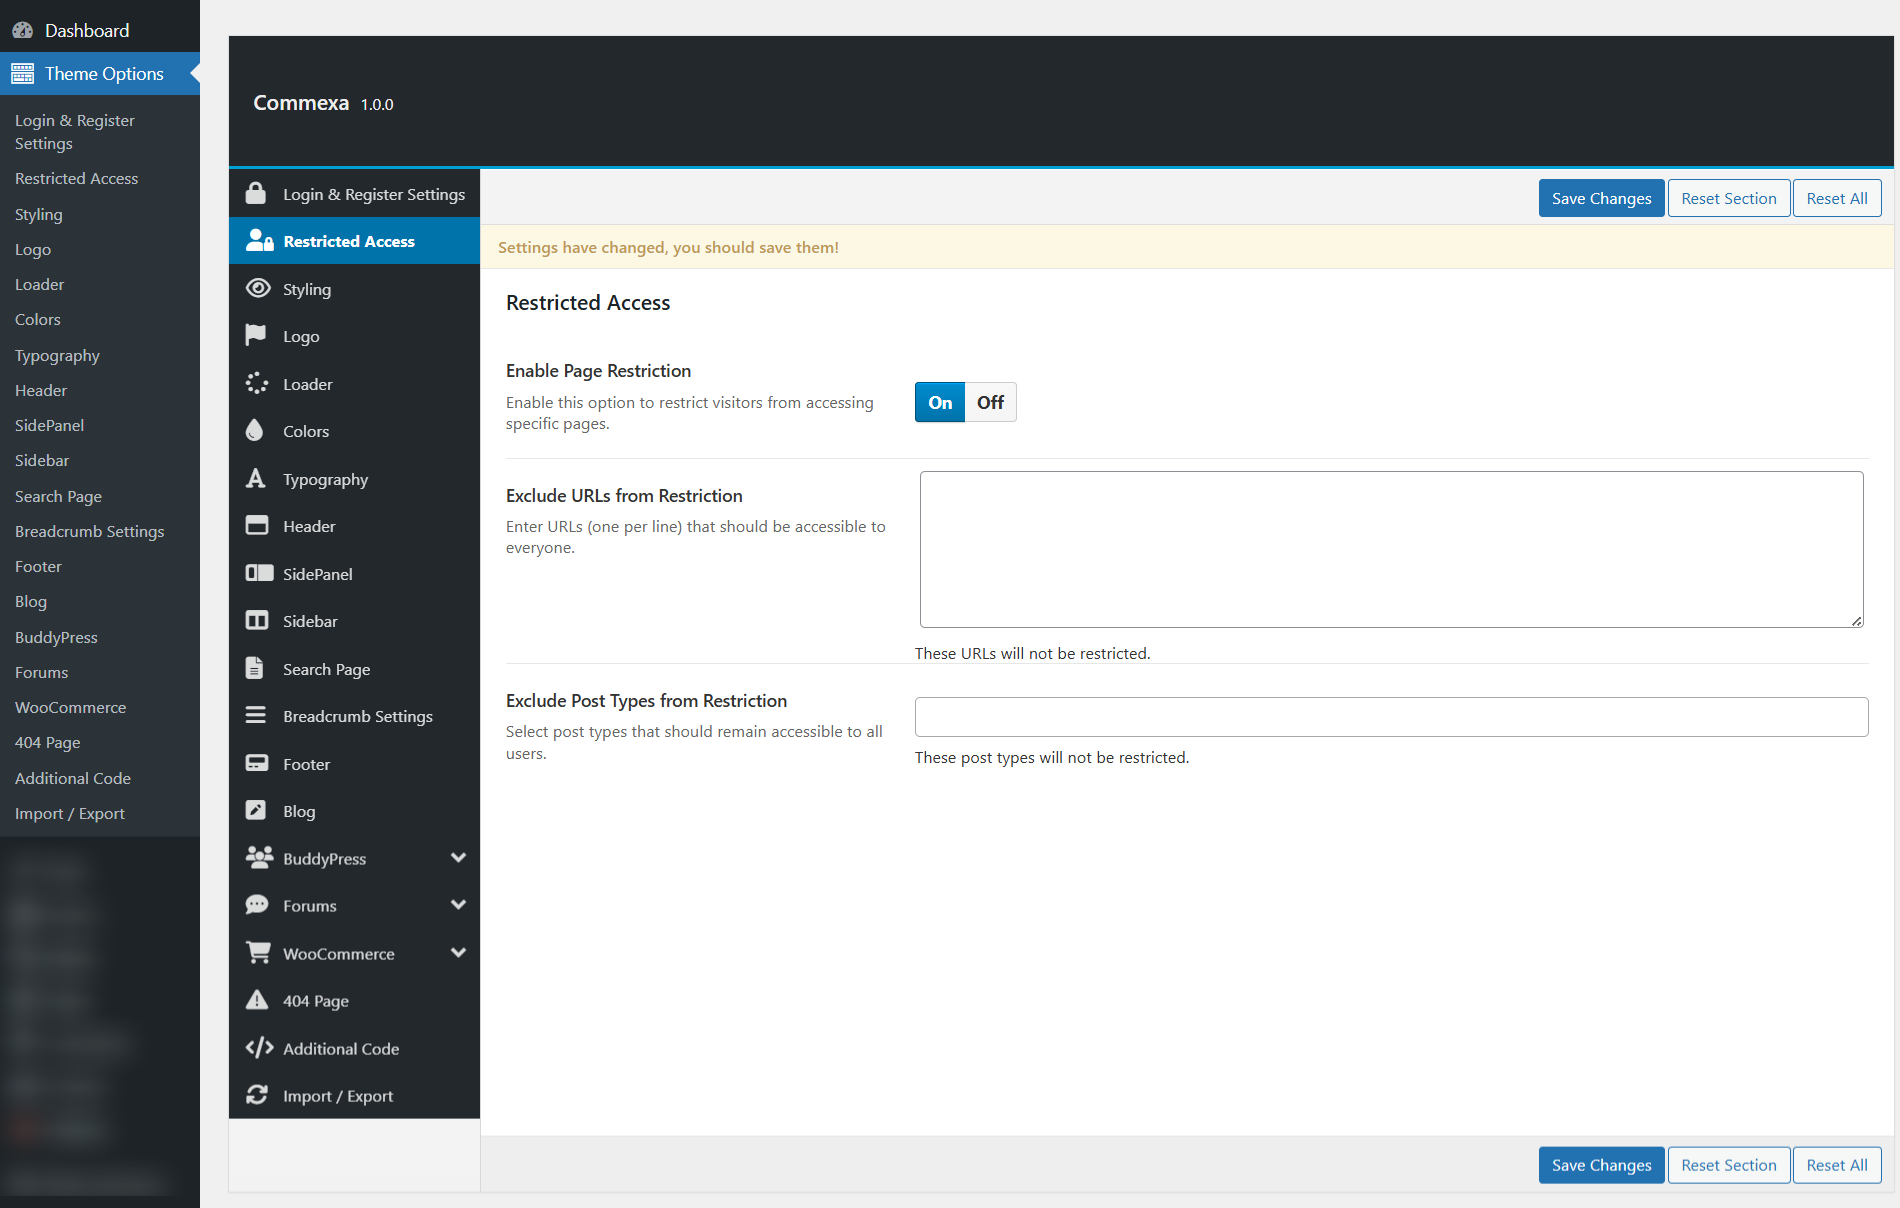
In the Theme Options >Restricted Access , you can control whether your website or specific pages are accessible with or without user login.This section allows you to:
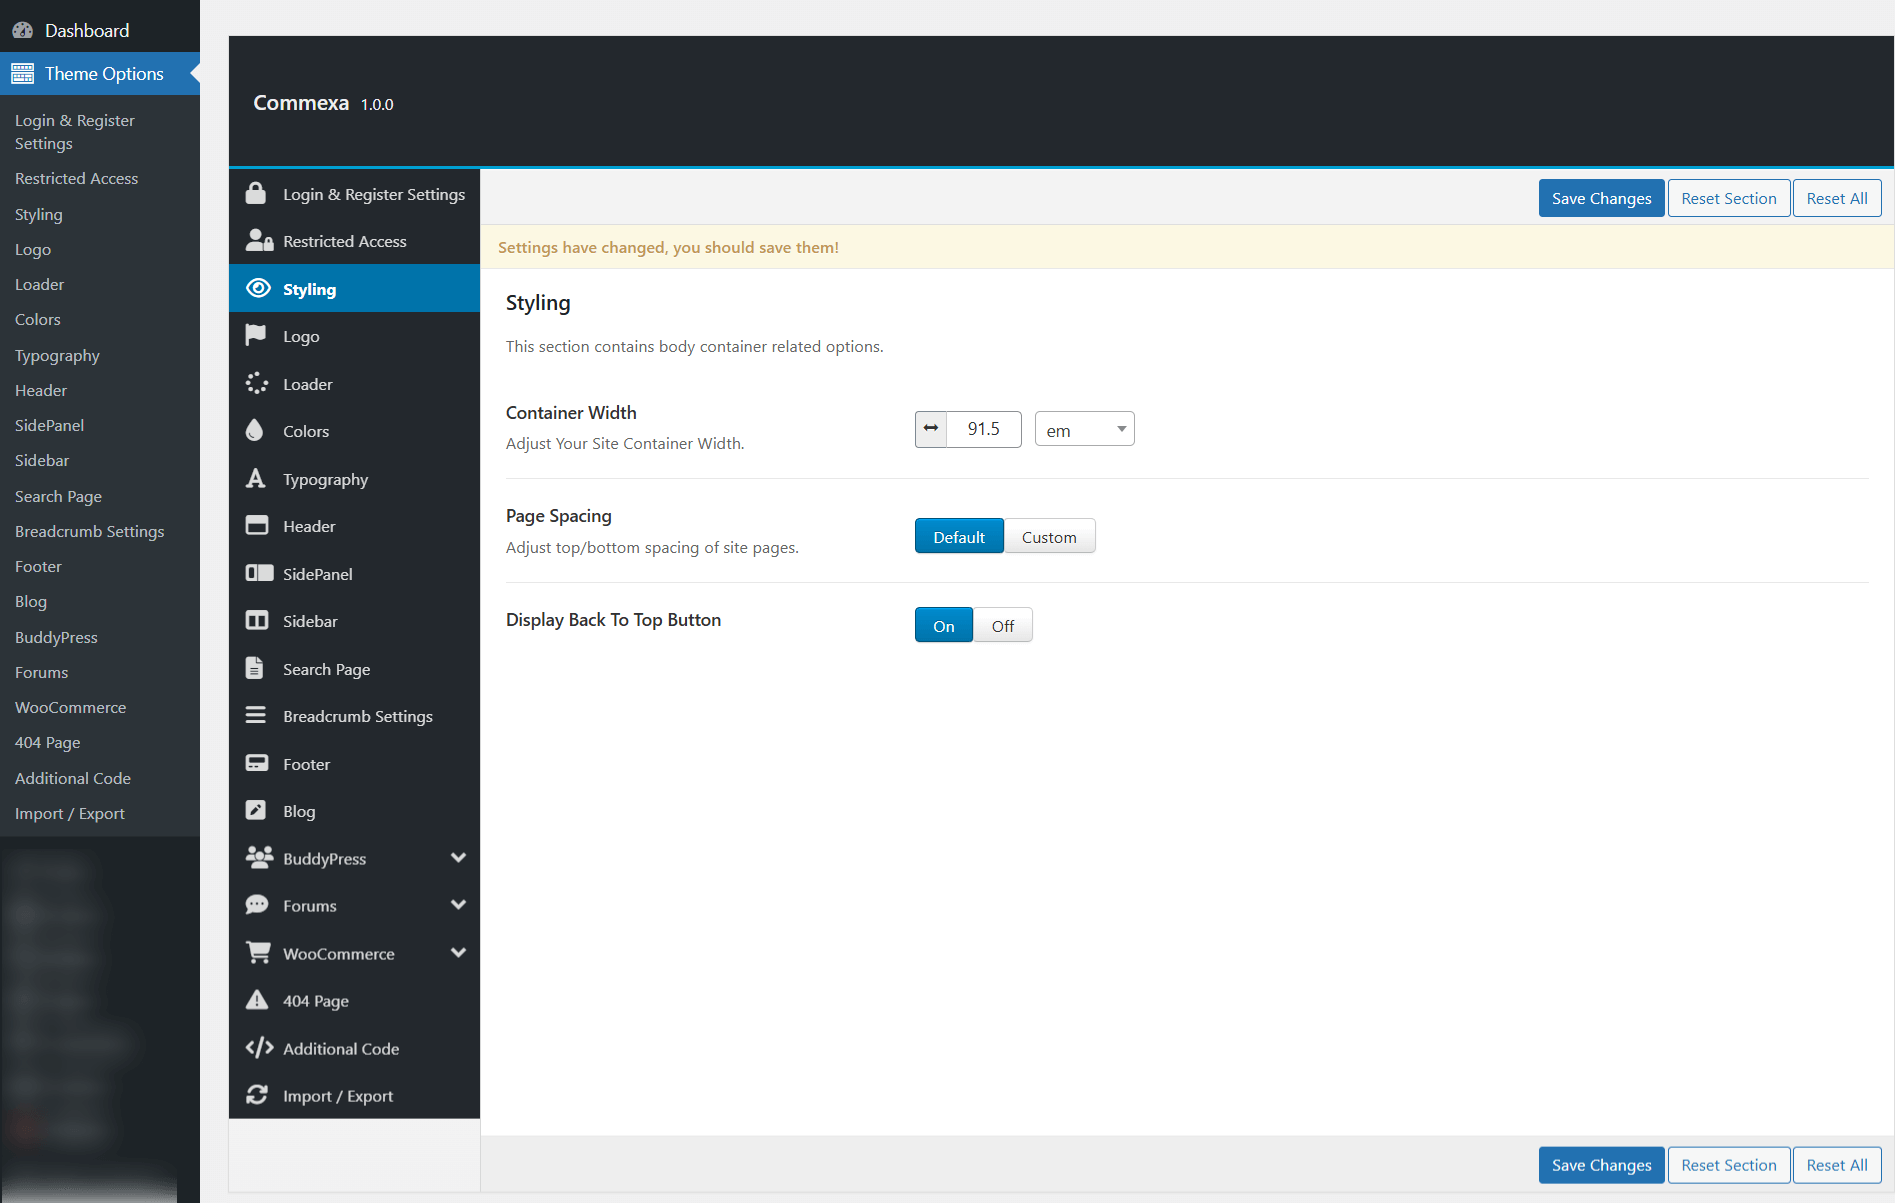
In the Theme Options > Styling , you can customize the overall appearance of your site, including switching between dark and light modes, adjusting spacing, container width, and other layout settings to match your desired design.
In the Theme Options > Logo , you can upload different logos for dark and light modes, ensuring they display correctly based on the selected theme style. You can also set the site icon (favicon) from this section.
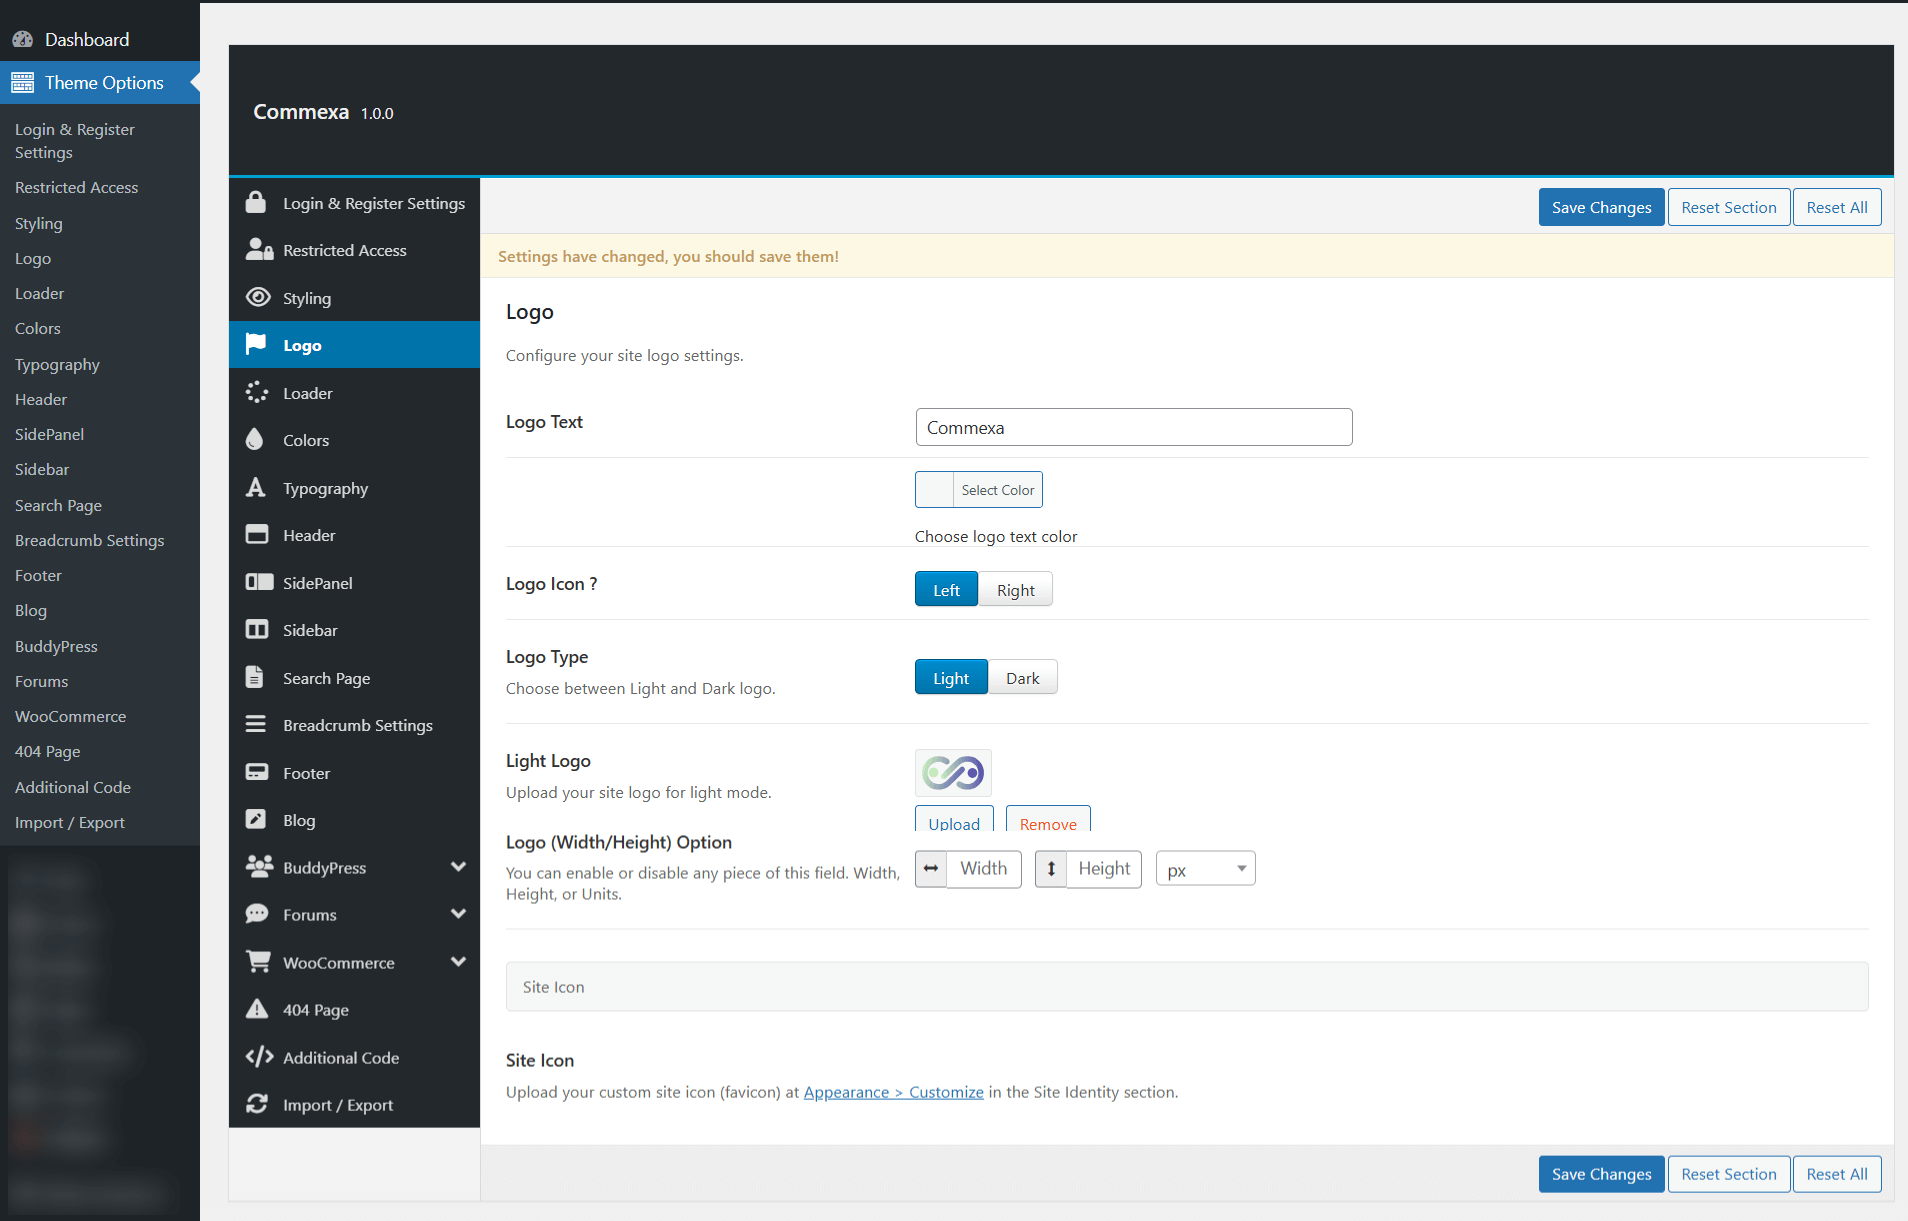
The text entered into this field appears as the logo title (if the image logo is not uploaded and "Use Site Name as Logo" option is enabled) and as the website's title in your browser tab.
The site icon (favicon) is used as a browser and app icon for your site.
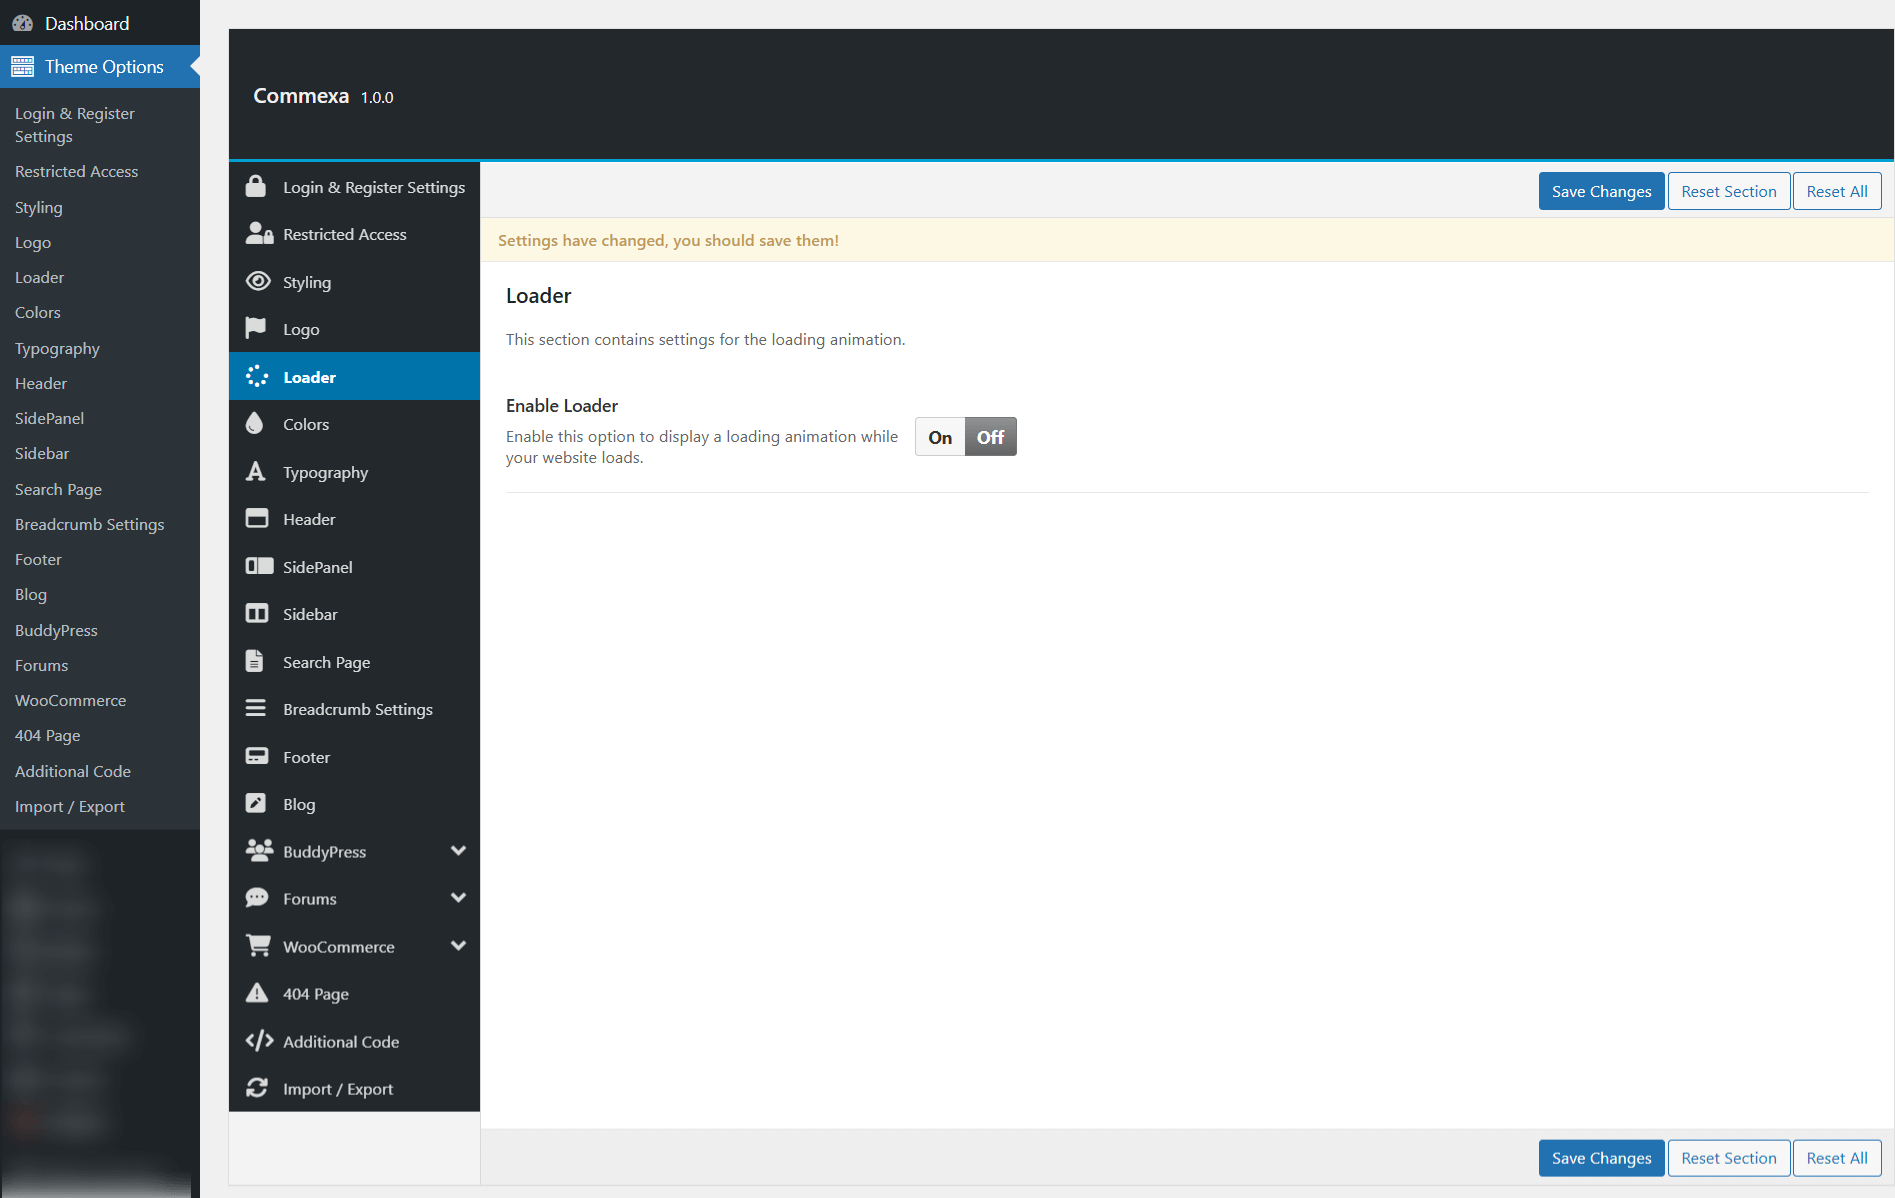
In the Theme Options > Loder ,you can set custom loader for your site.
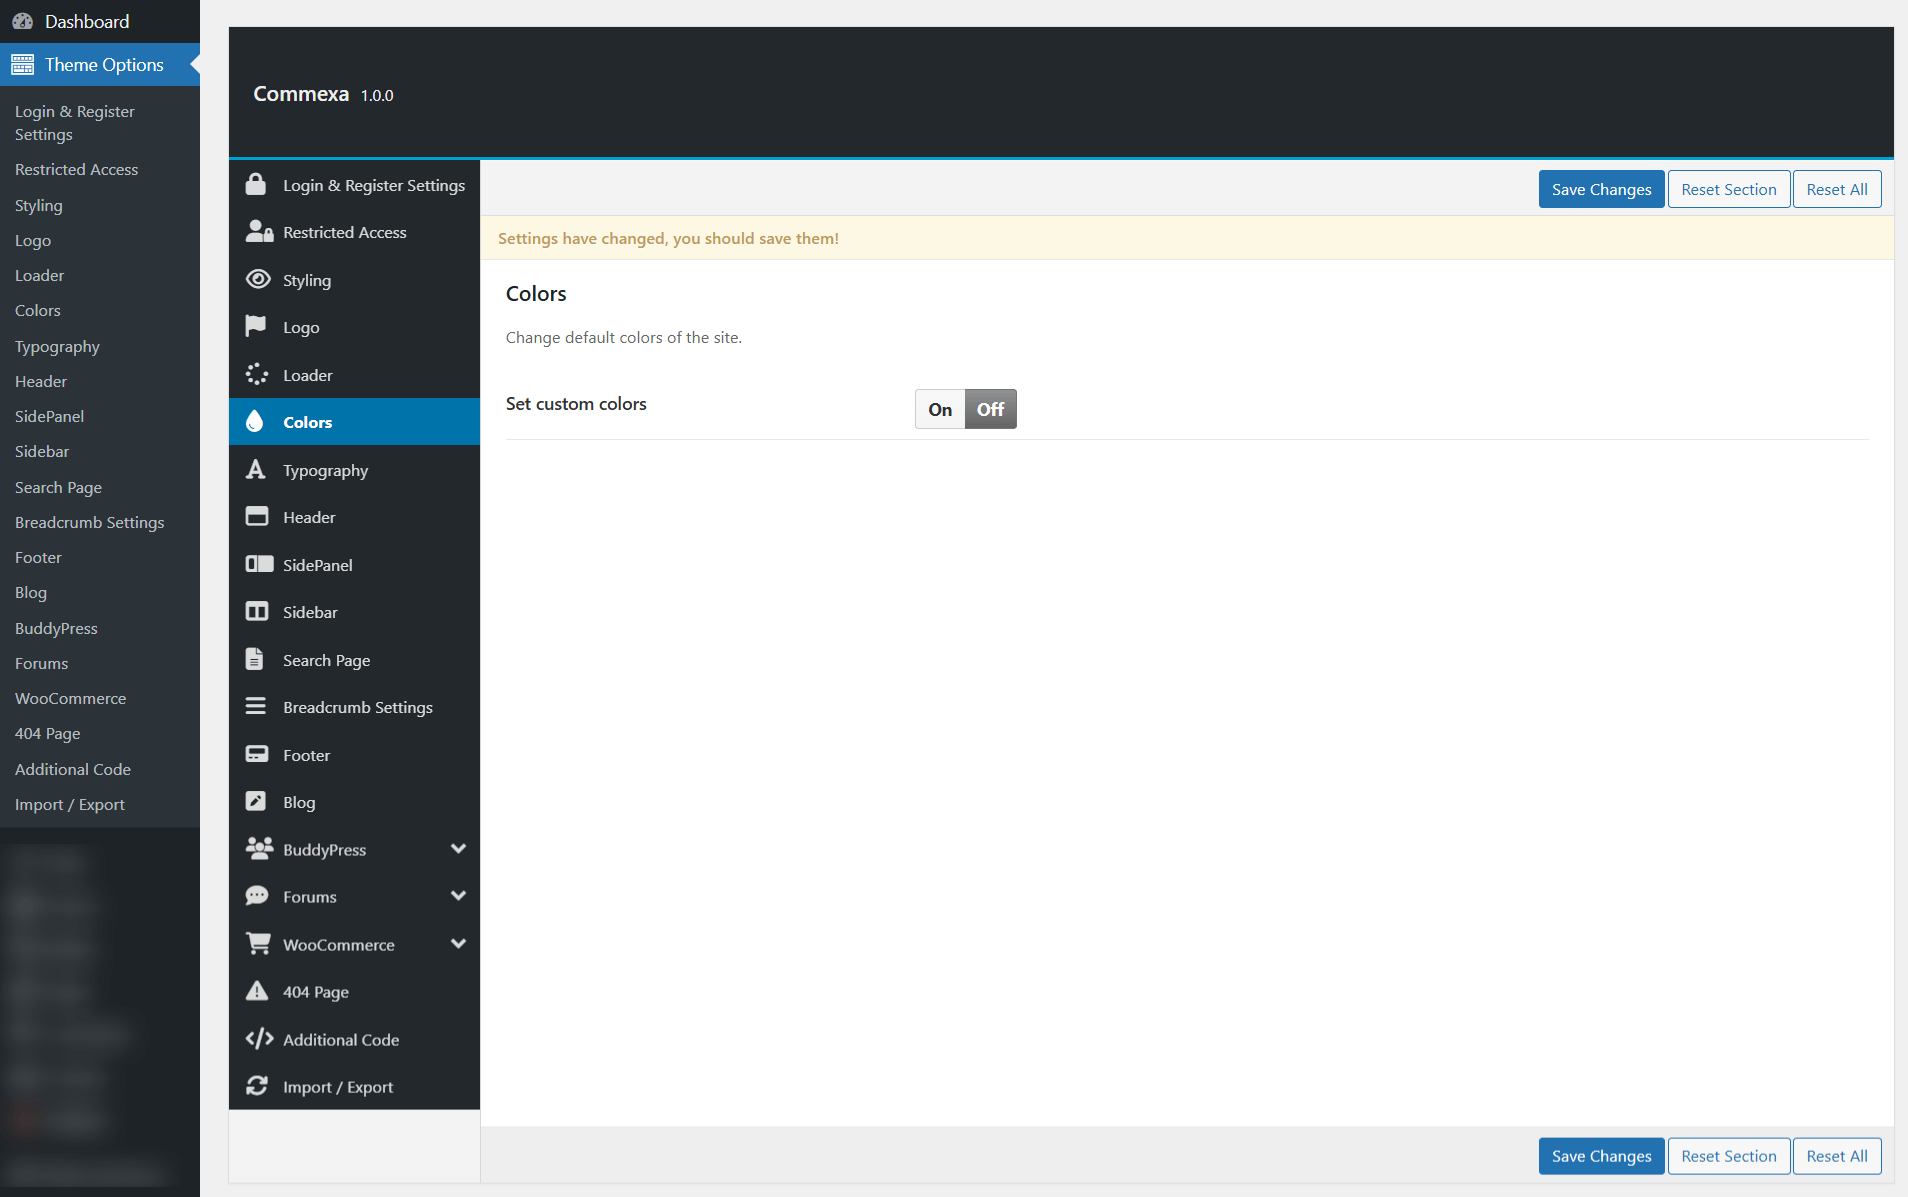
In the Theme Options > Colors , you can define the global custom color scheme for your site, including font colors, background colors, button styles, and more—ensuring a consistent visual appearance throughout the website.
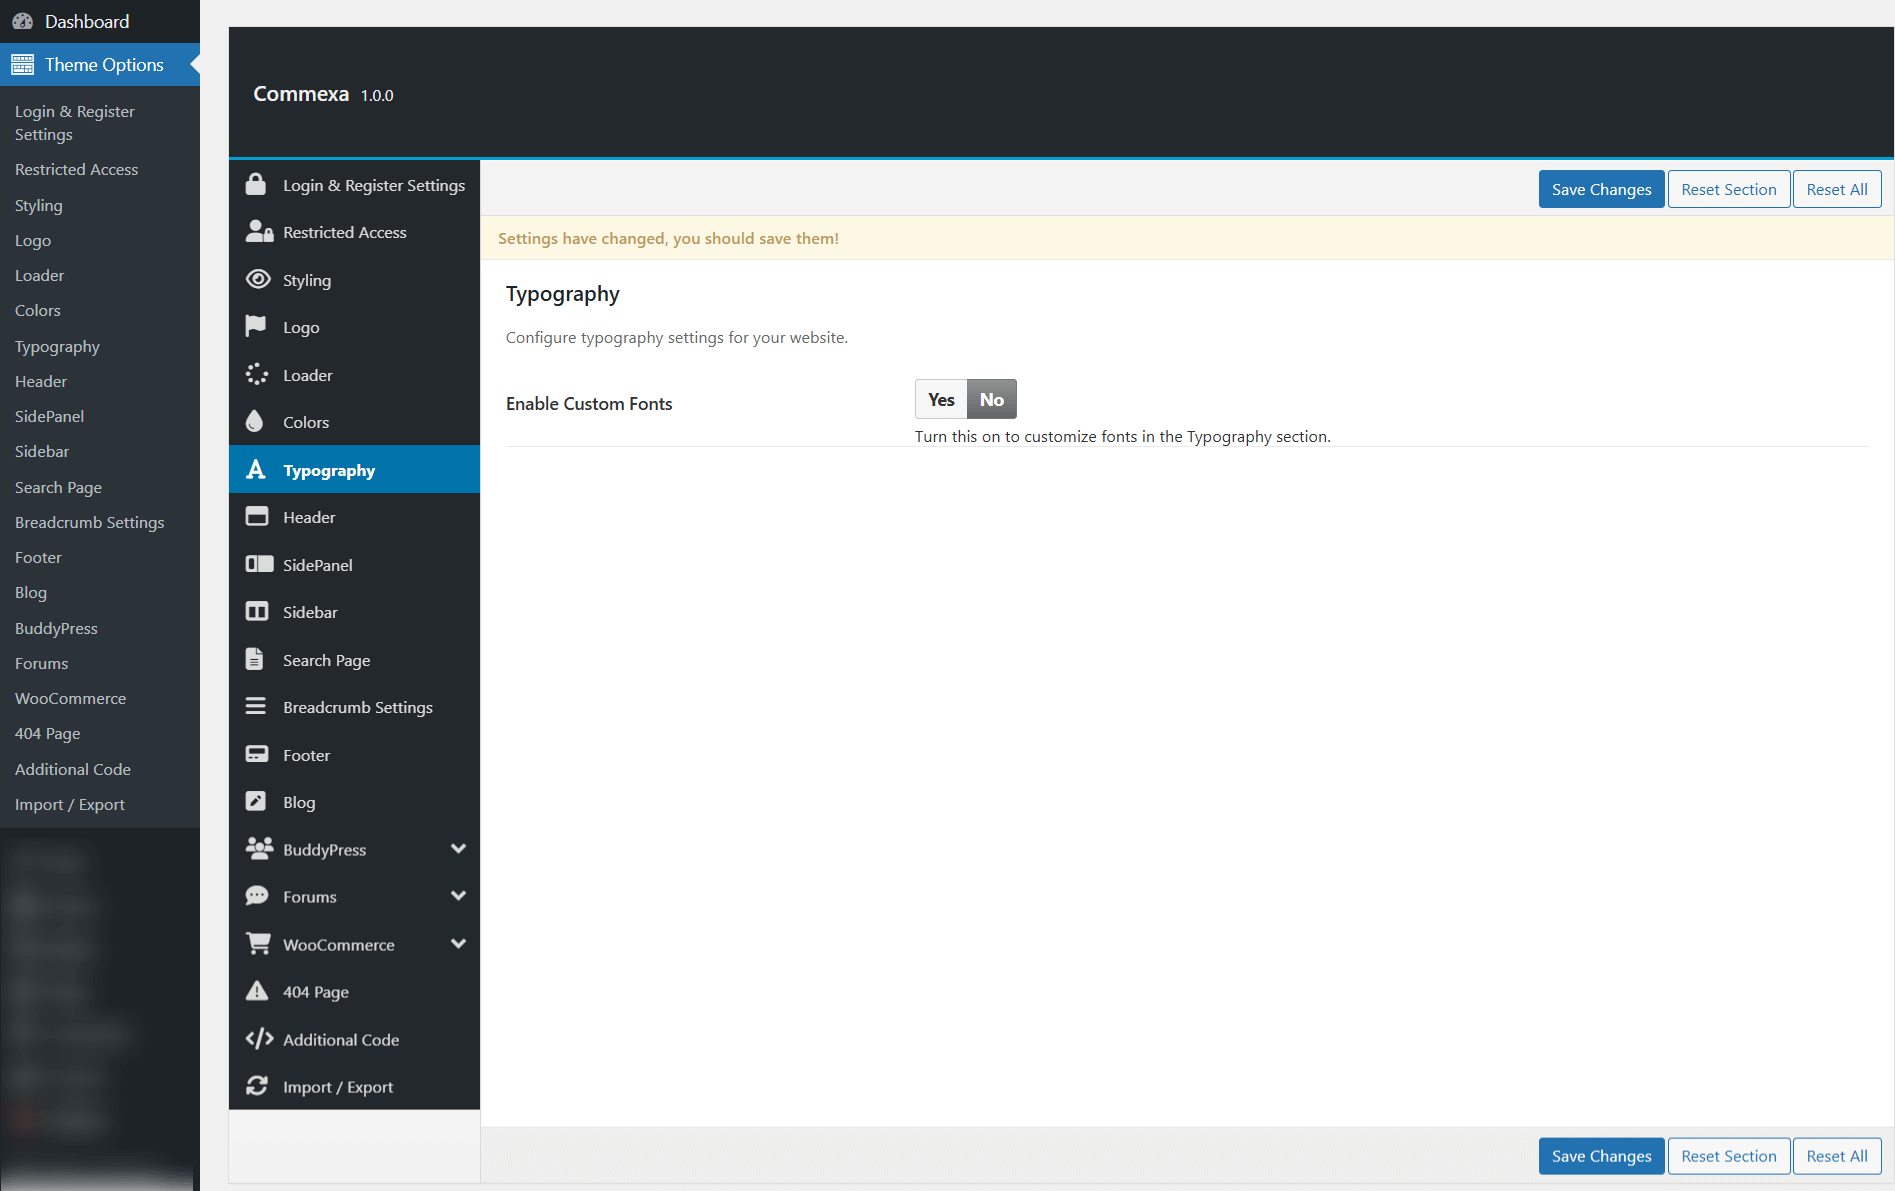
In the Theme Options > Typography ,you can set custom font styles for your site. This includes choosing fonts for headings, body text, and other elements, allowing you to personalize the look of your site’s typography.
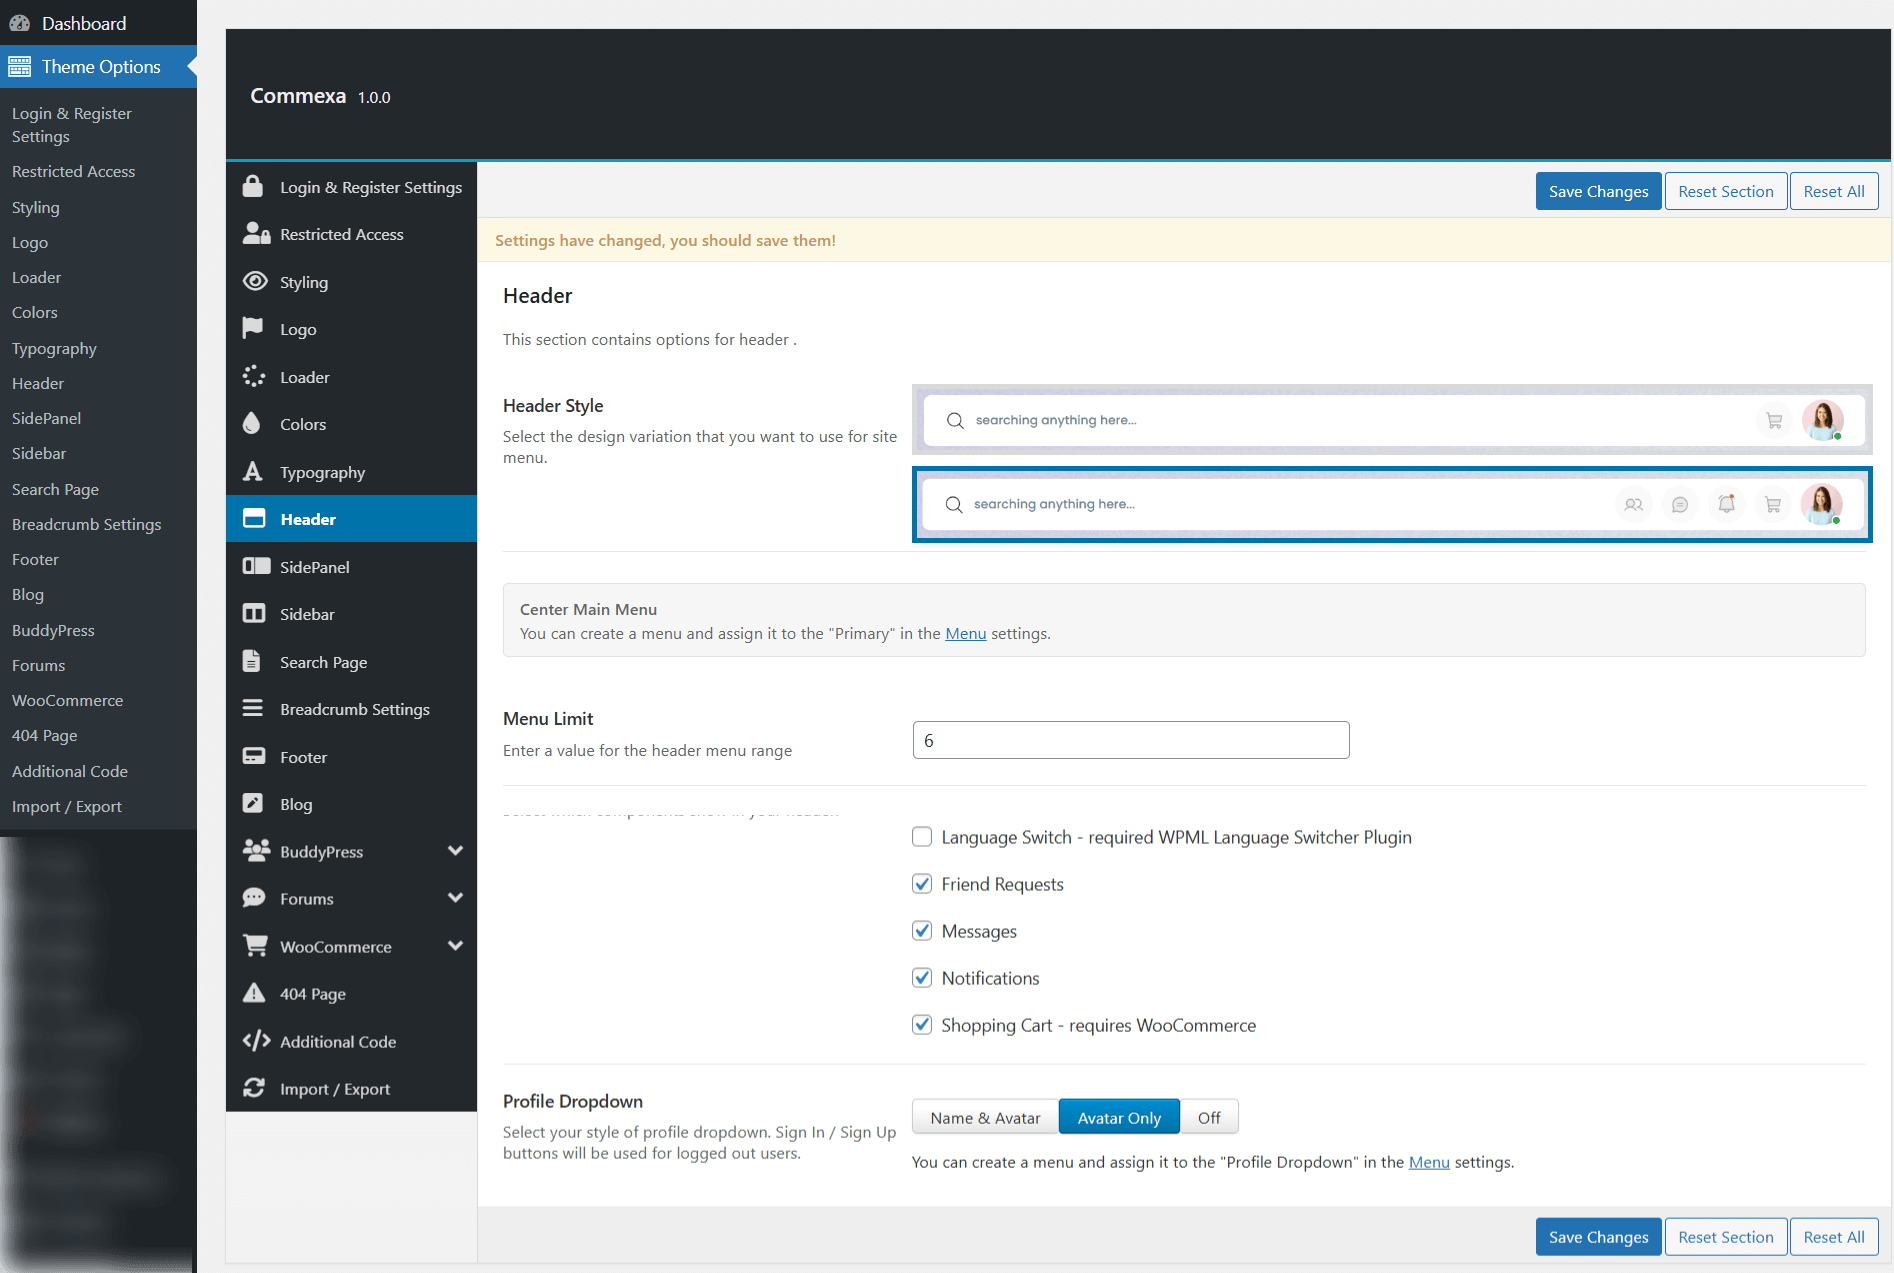
In the Theme Options > Header ,you can choose from multiple header layouts and customize header settings. This includes the option to enable or disable specific elements, such as the profile menu, navigation links, and other header features, giving you full control over the header design.
In the Theme Options > SidePanel , you can configure the settings for the sidepanel, allowing it to appear on the left side of the page. This option provides control over the visibility and content displayed within the sidepanel.

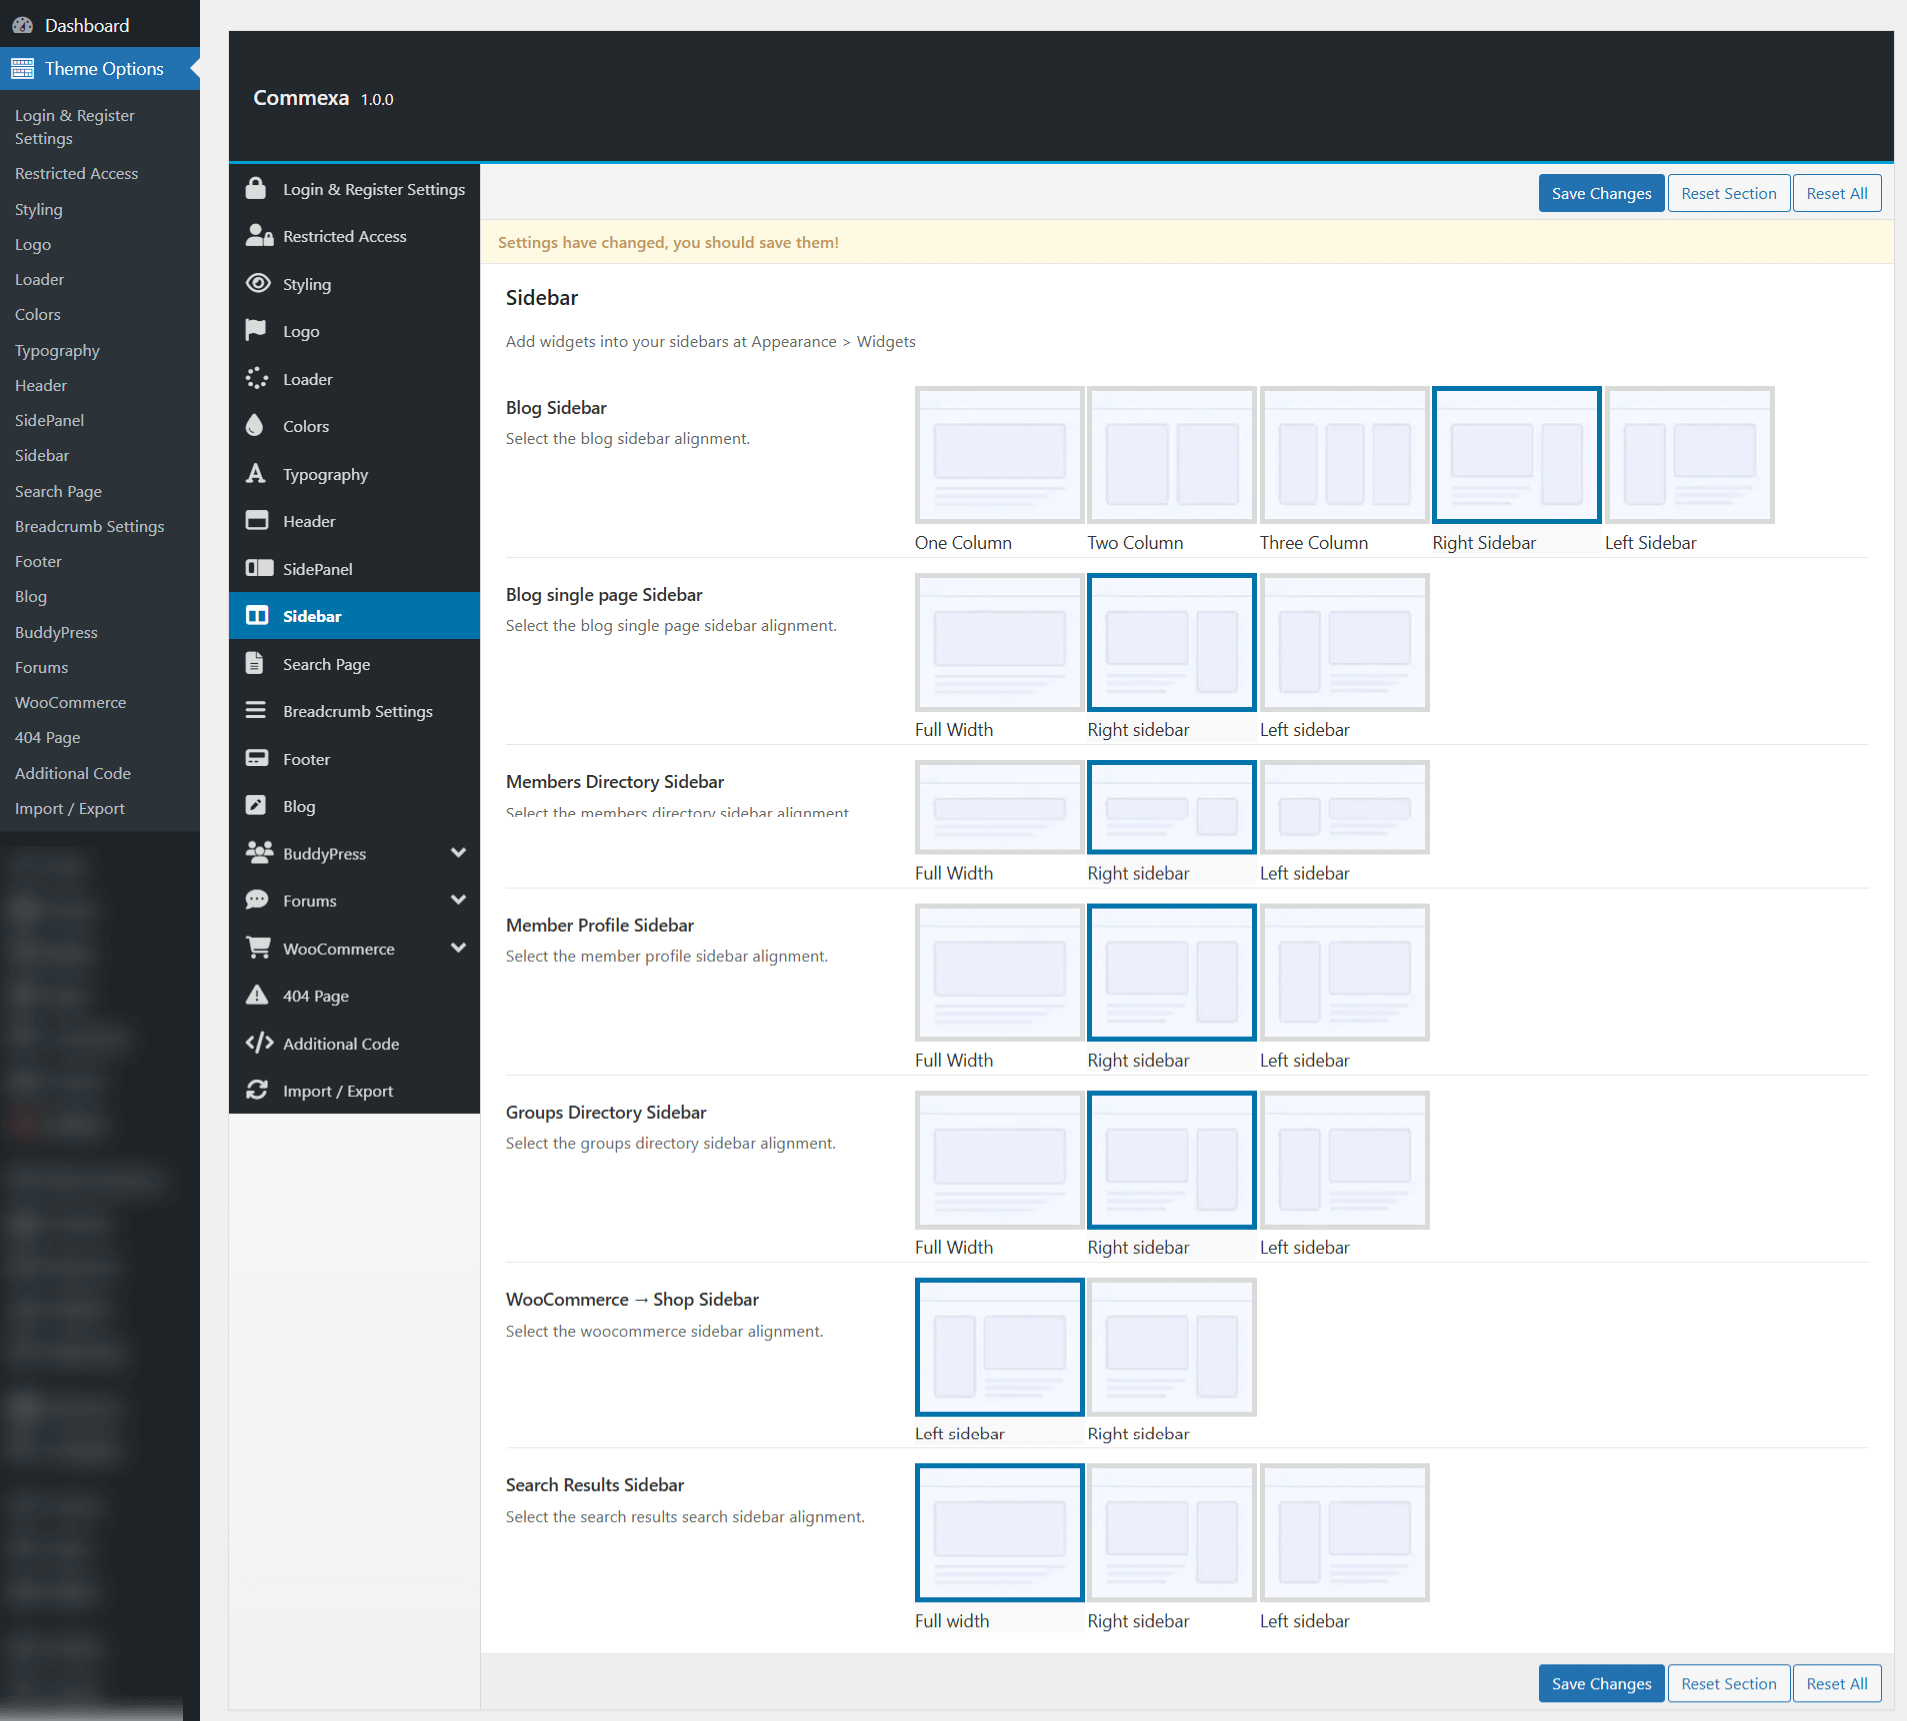
In the Theme Options > Sidebar , you can configure how the sidebar appears across different pages of your site. You can choose to display a sidebar on specific pages, use a full-screen layout, or customize the sidebar settings to suit different page types.
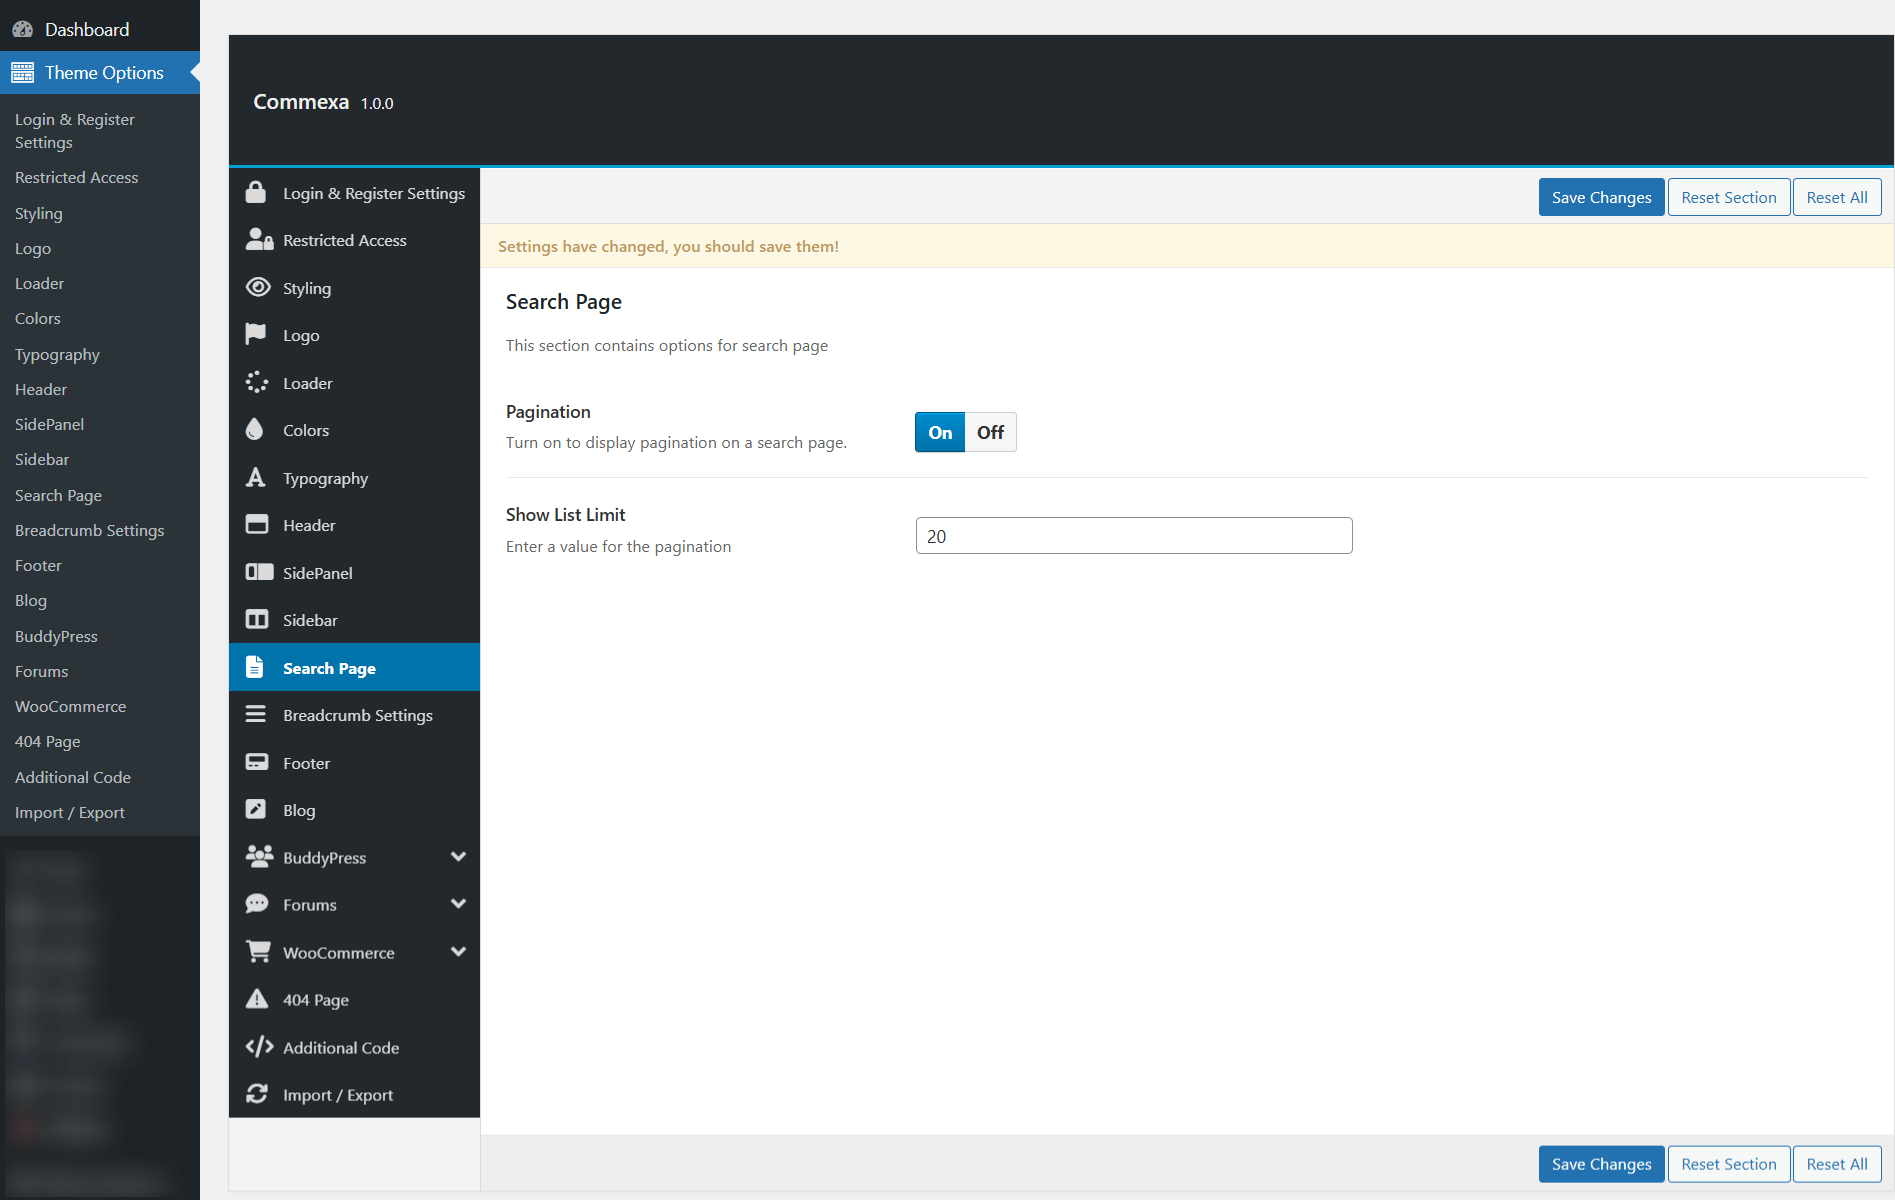
In the Theme Options > Search Page , you can customize the search results layout, including pagination options and limits for the number of results displayed per page. This allows you to control how search results are shown to users.
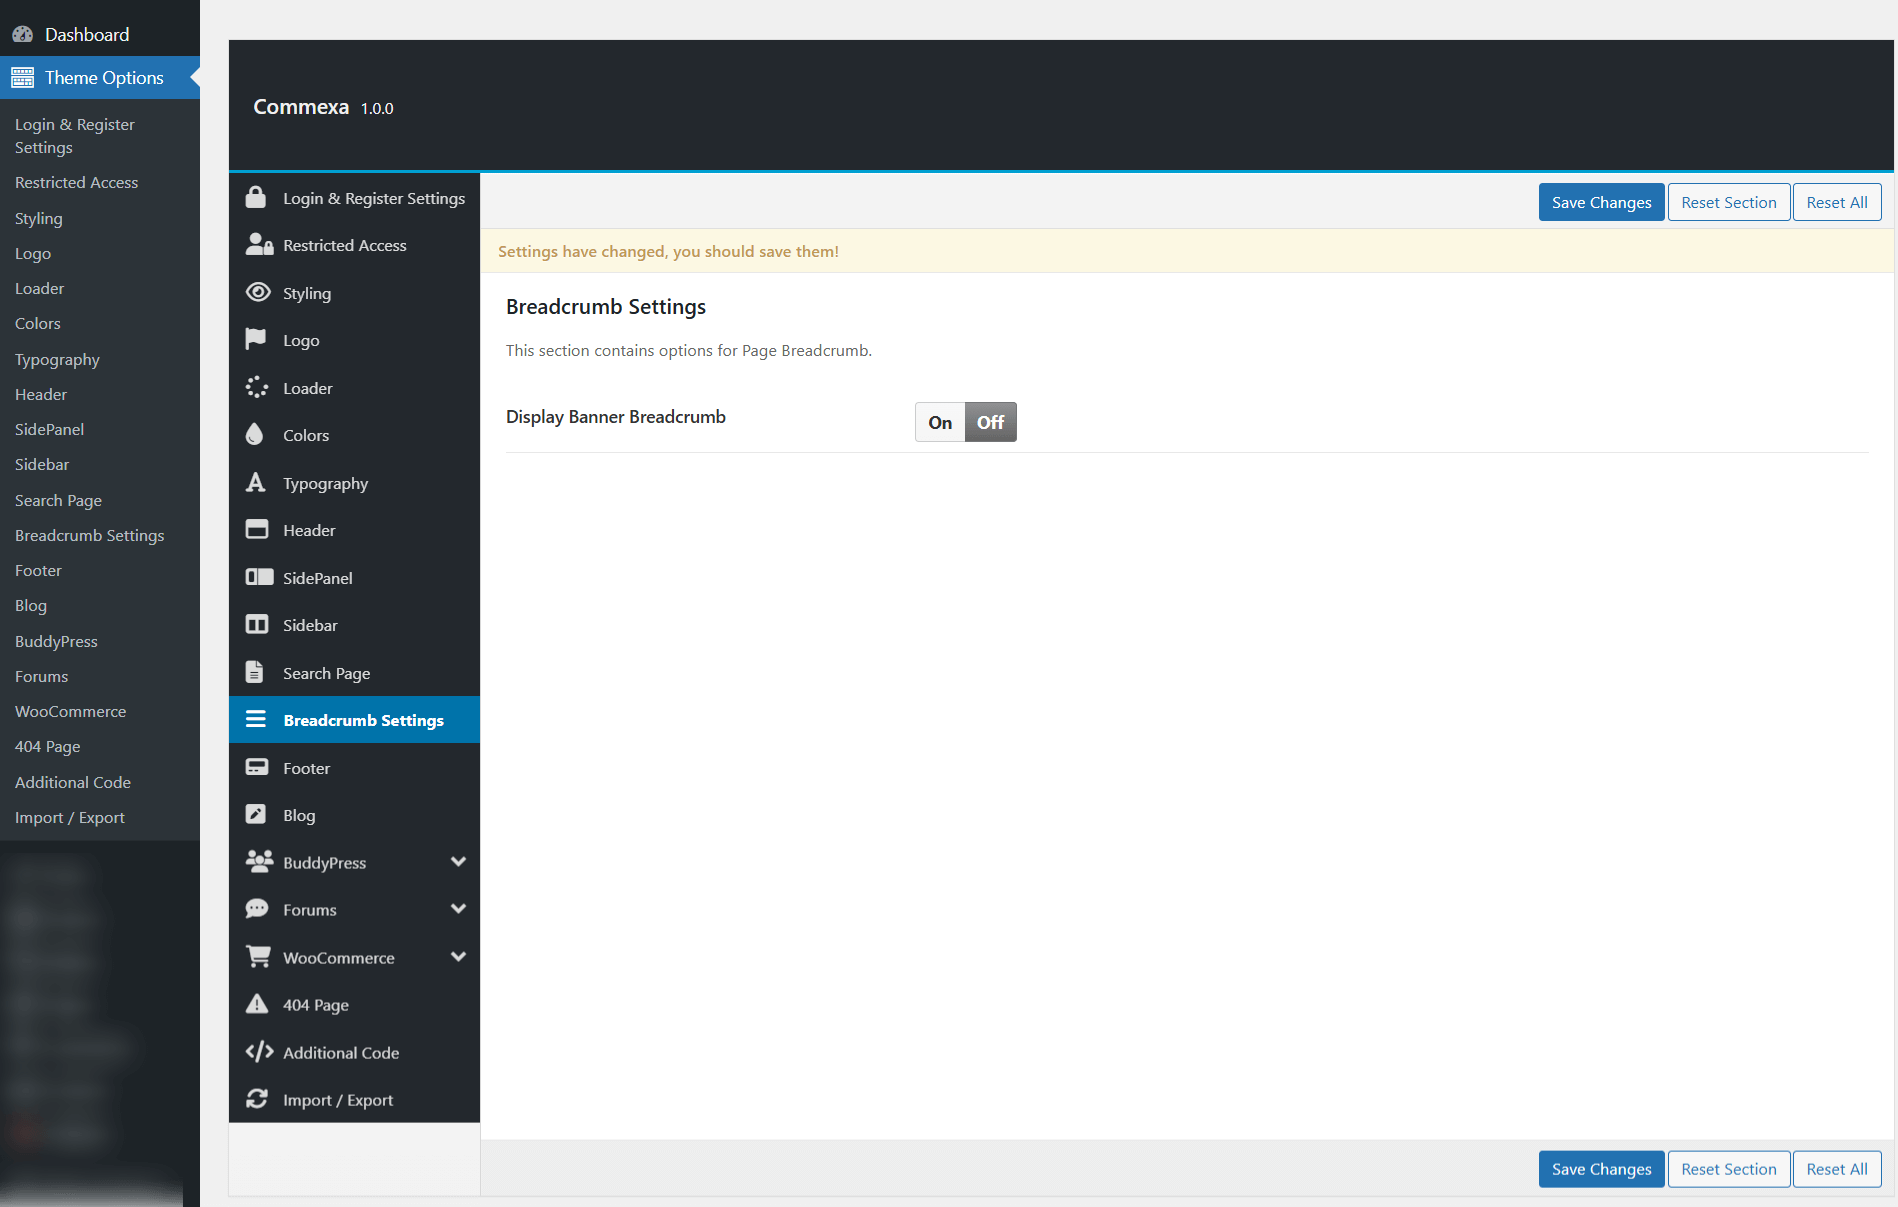
In the Theme Options > Breadcrumb Settings ,you can customize the breadcrumb style, including options for colors, font sizes, and the overall layout. Additionally, you can adjust the title display and other settings to match the look and feel of your site.
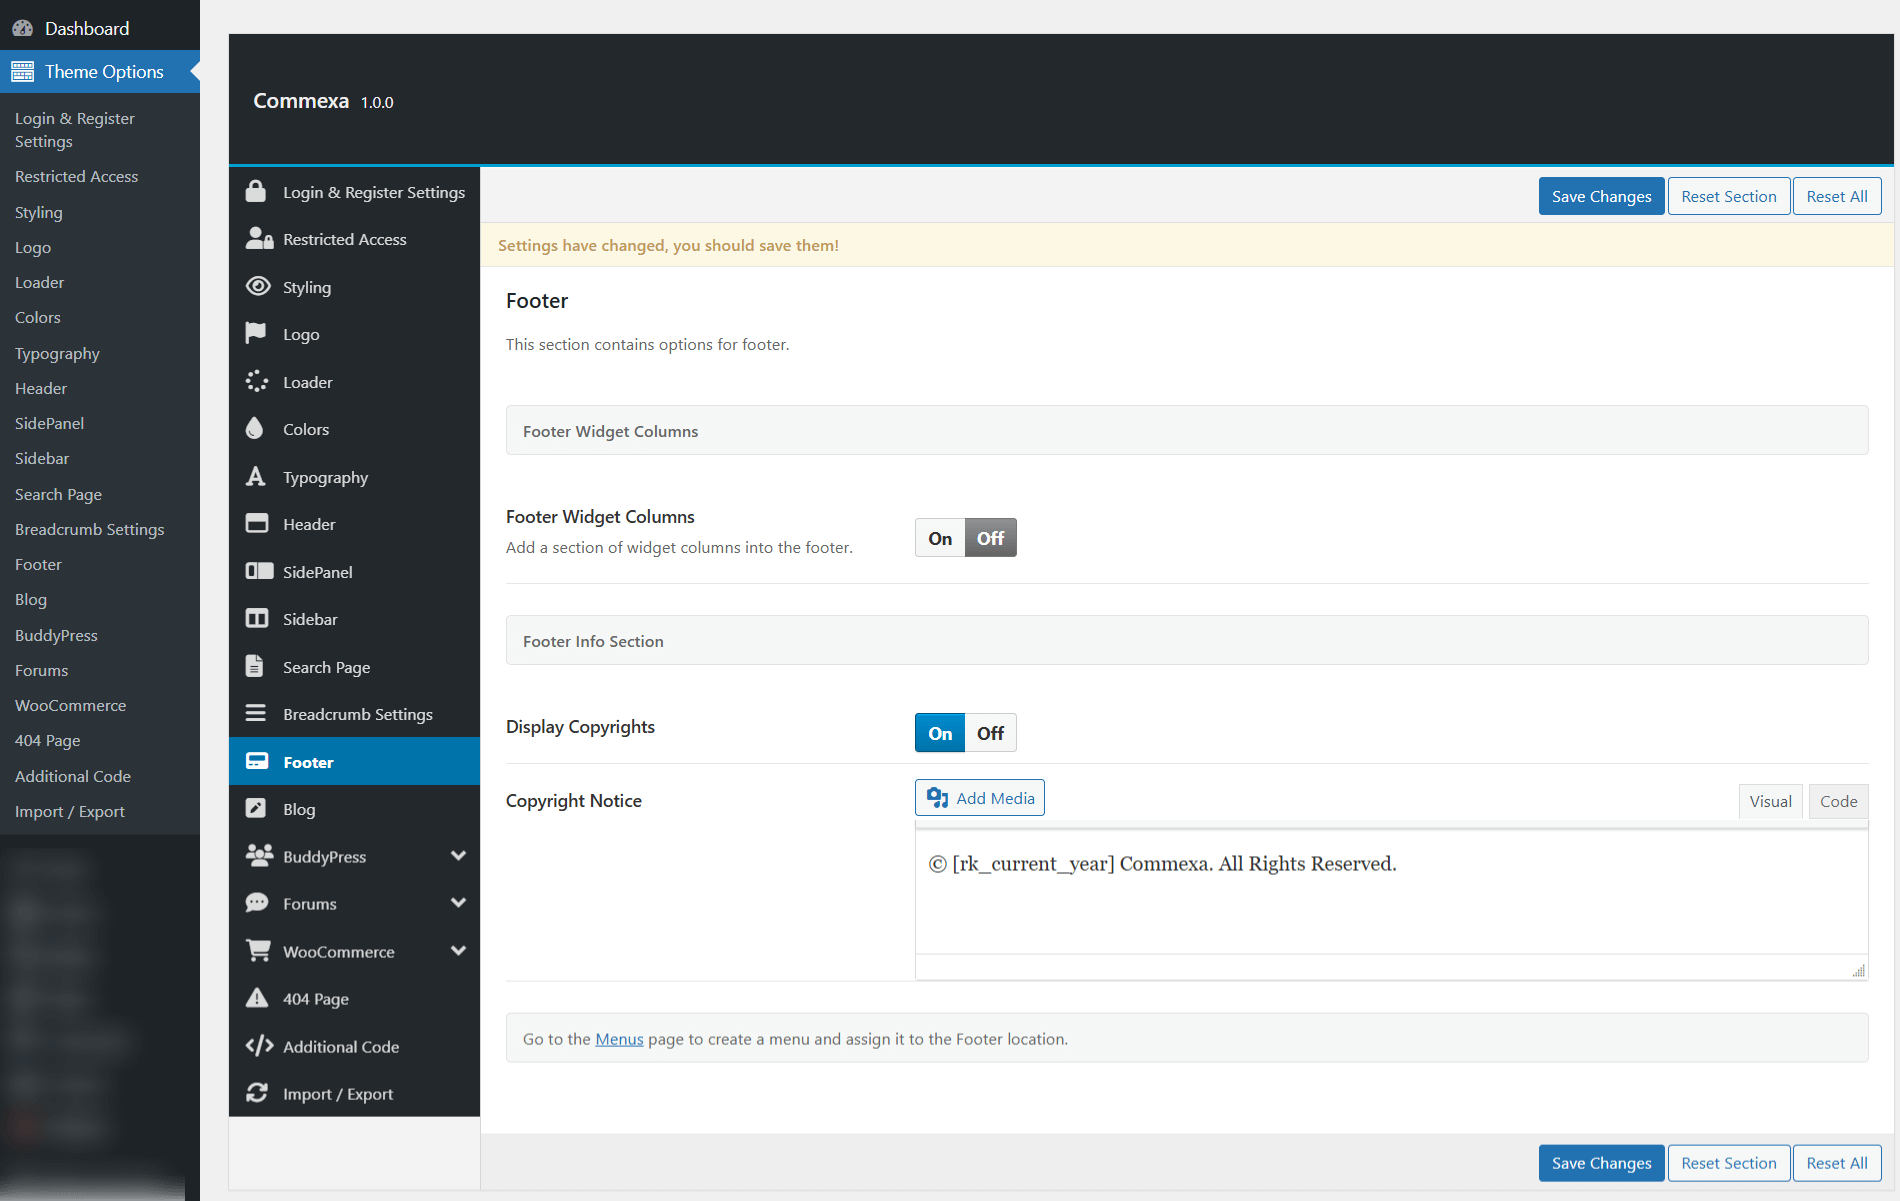
In the Theme Options > Footer , you can customize the footer of your site, including the copyright text, footer layout, and any additional content or widgets you'd like to display. This gives you control over the footer’s appearance and functionality.
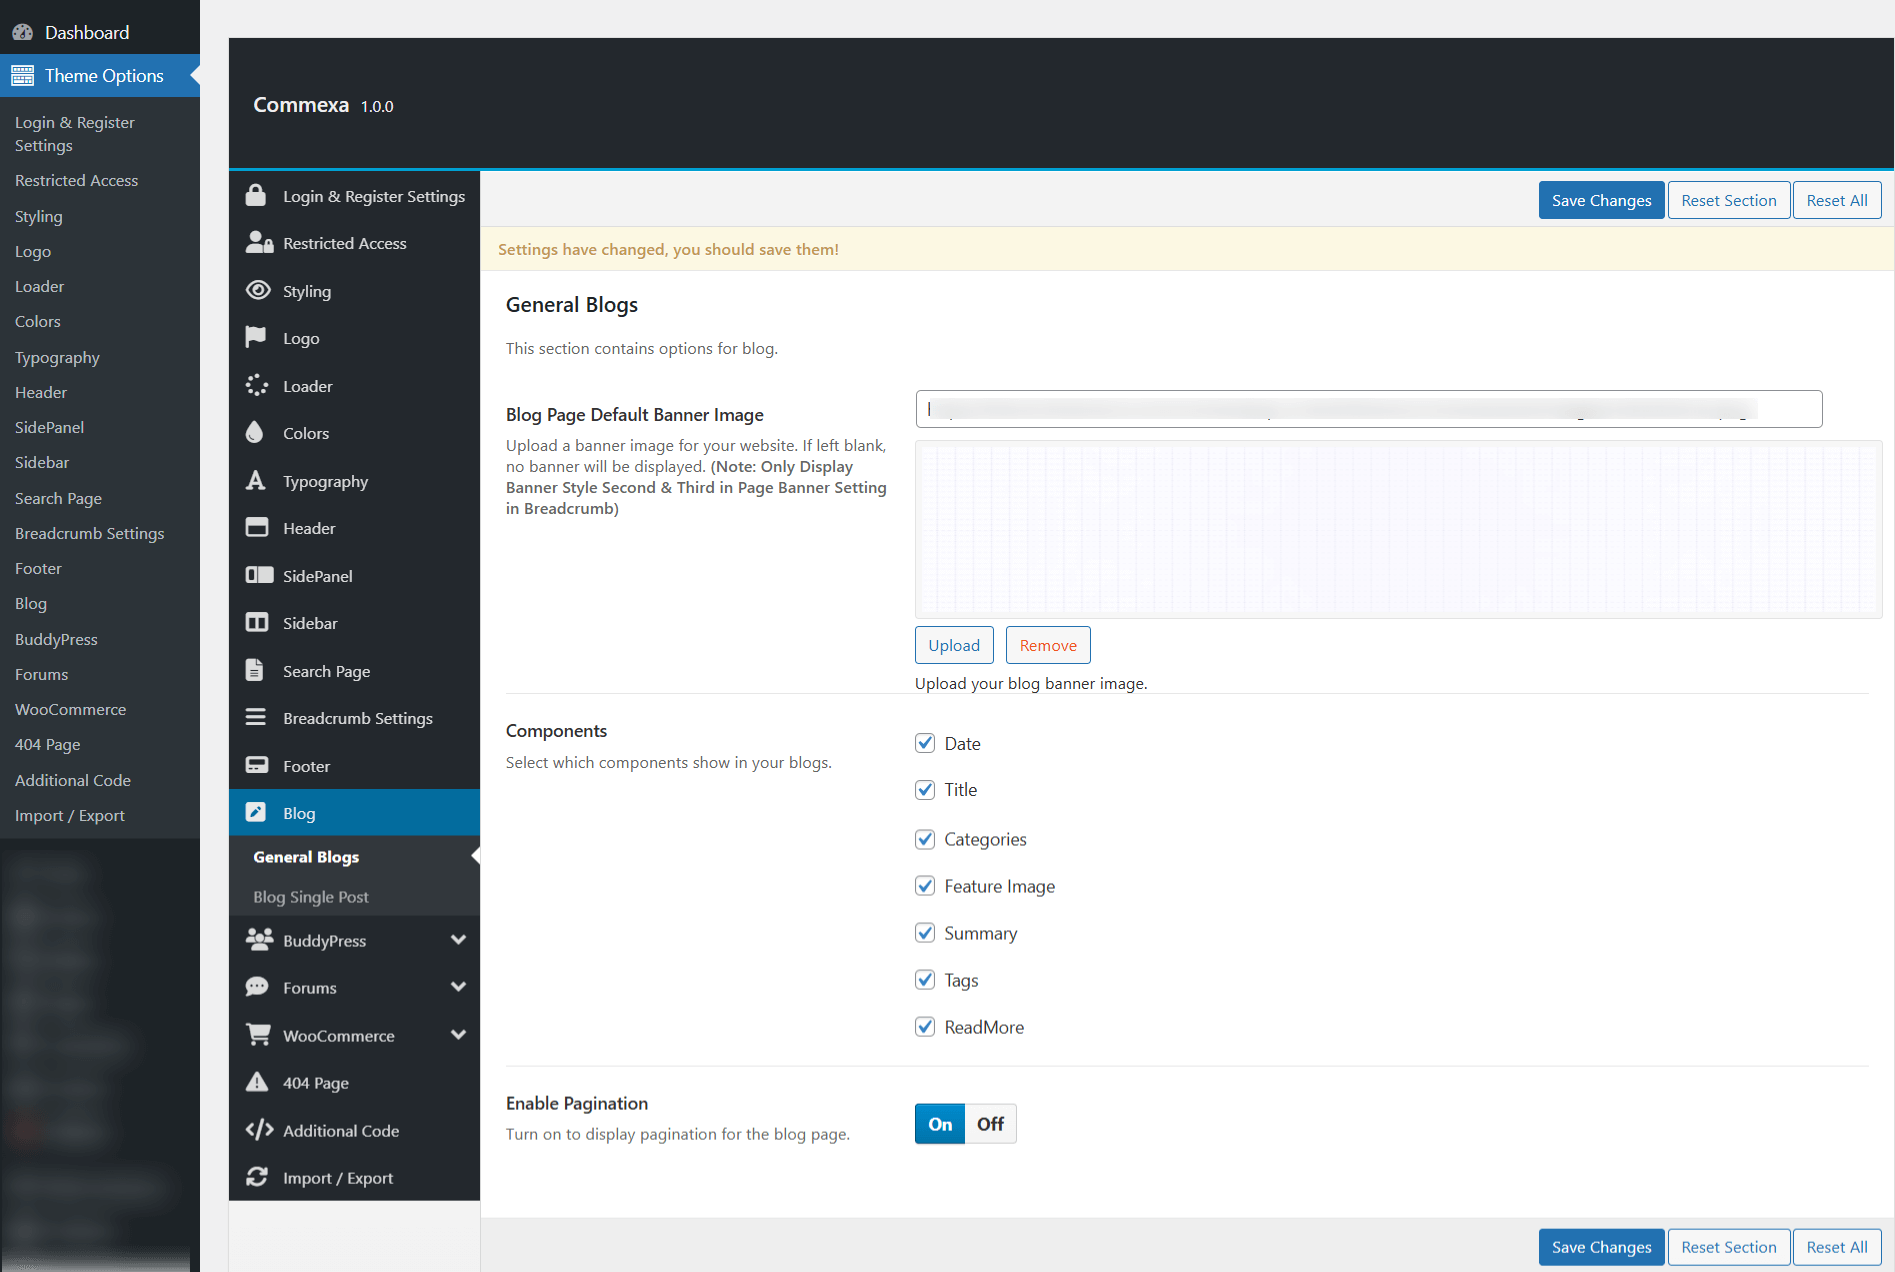
In the Theme Options > Blog , you can set the general blog page with specific styles, including the option for page layout. You can also configure settings for the single blog post page, such as toggling options for displaying details and choosing from different layout styles based on your preferences.
IMPORTANT! These general blog settings control the default blog style. If you need a custom grid or other blog layouts, you can create a new page and edit it using Elementor, adding the blog shortcode for the particular blog page.
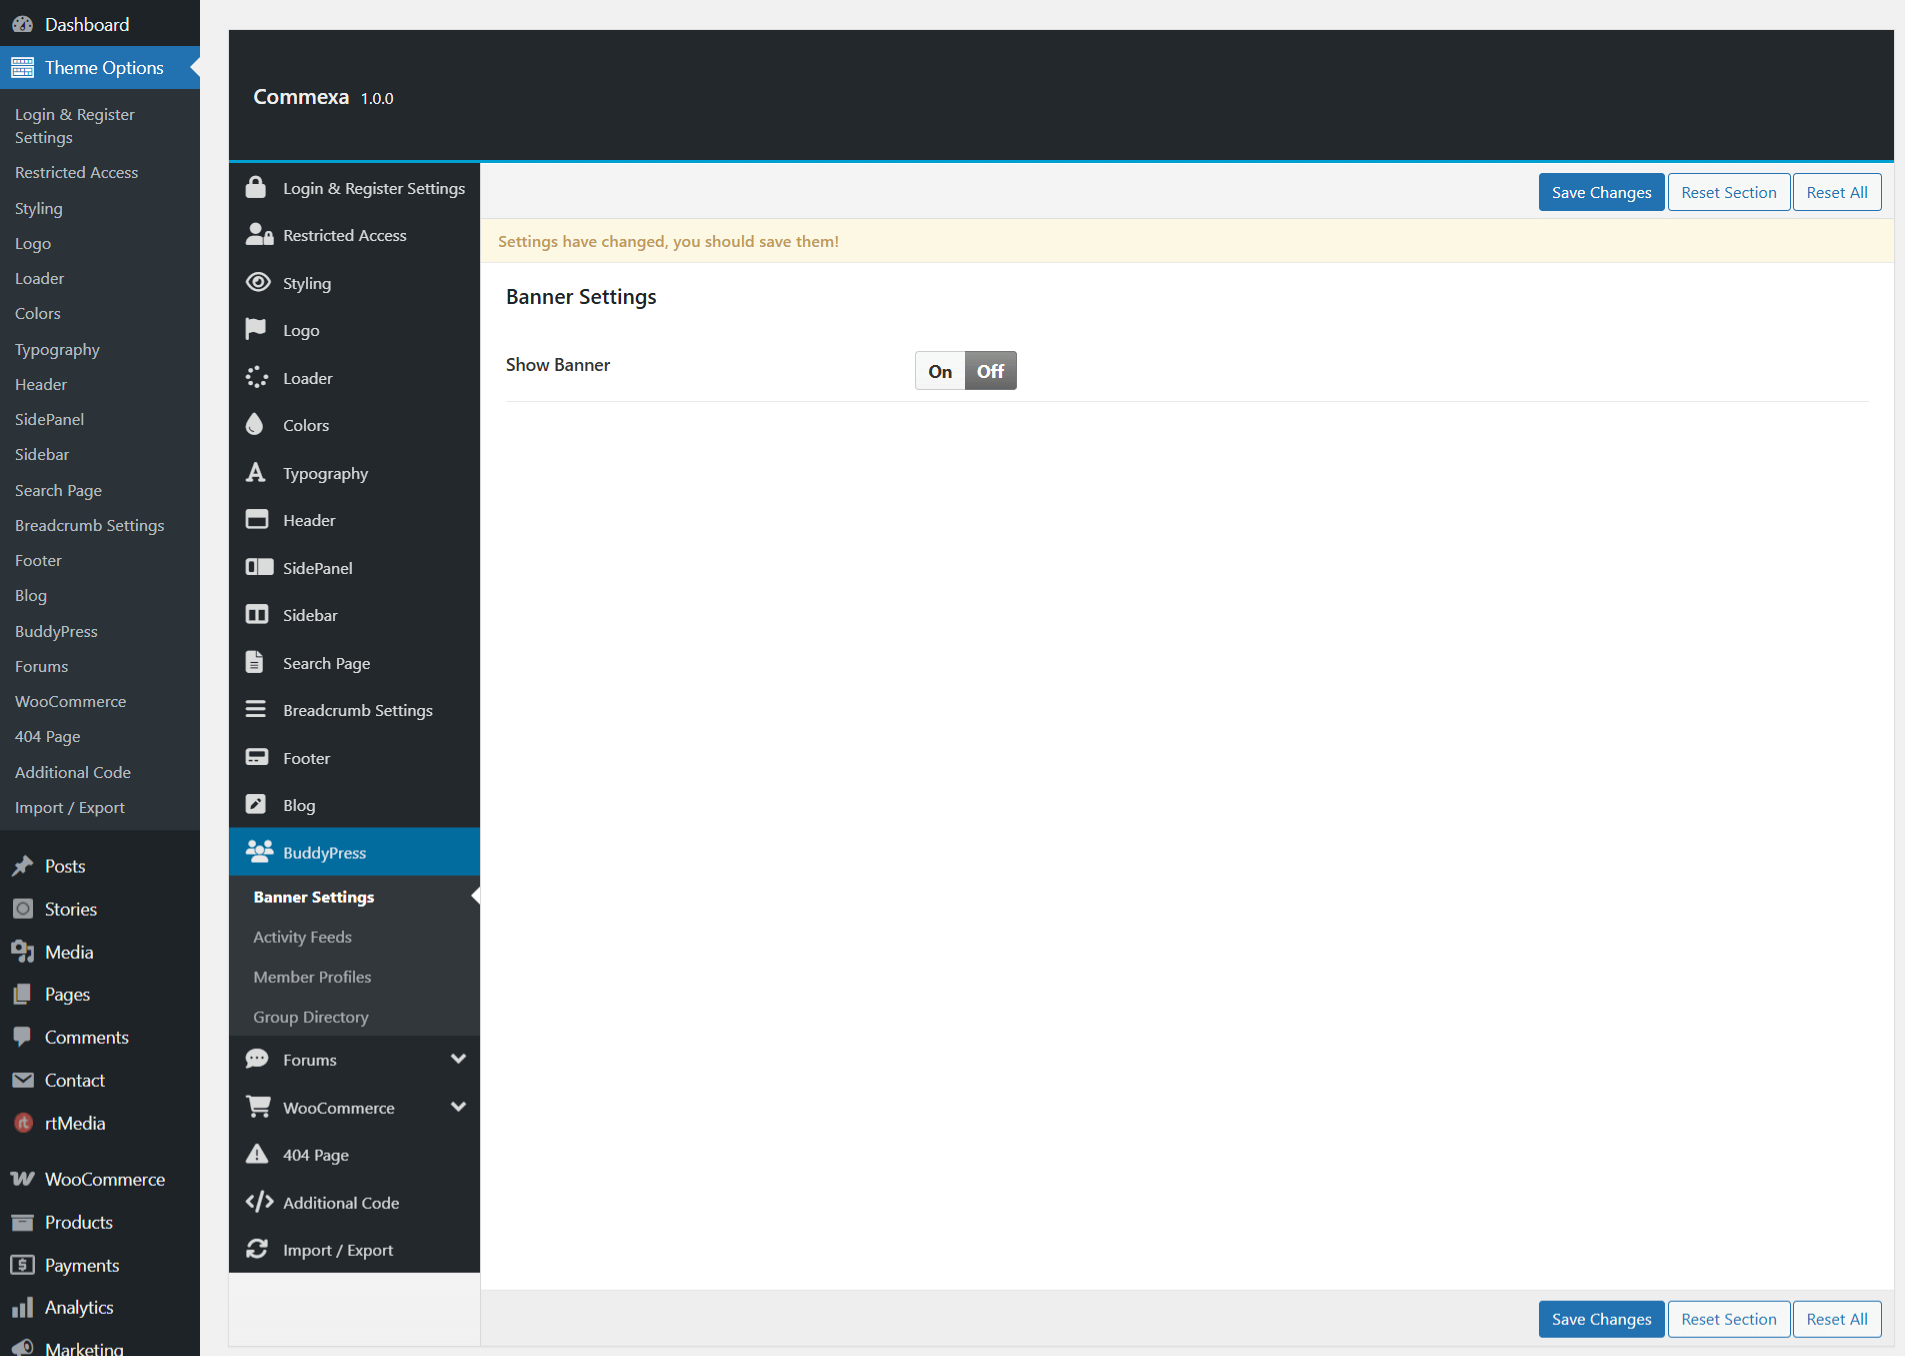
In the Theme Options > BuddyPress > Banner Settings , you can set custom banners for various BuddyPress pages, including the Activity, Members, and Groups pages. This option allows you to customize the banner content, style, and other settings across all these pages.
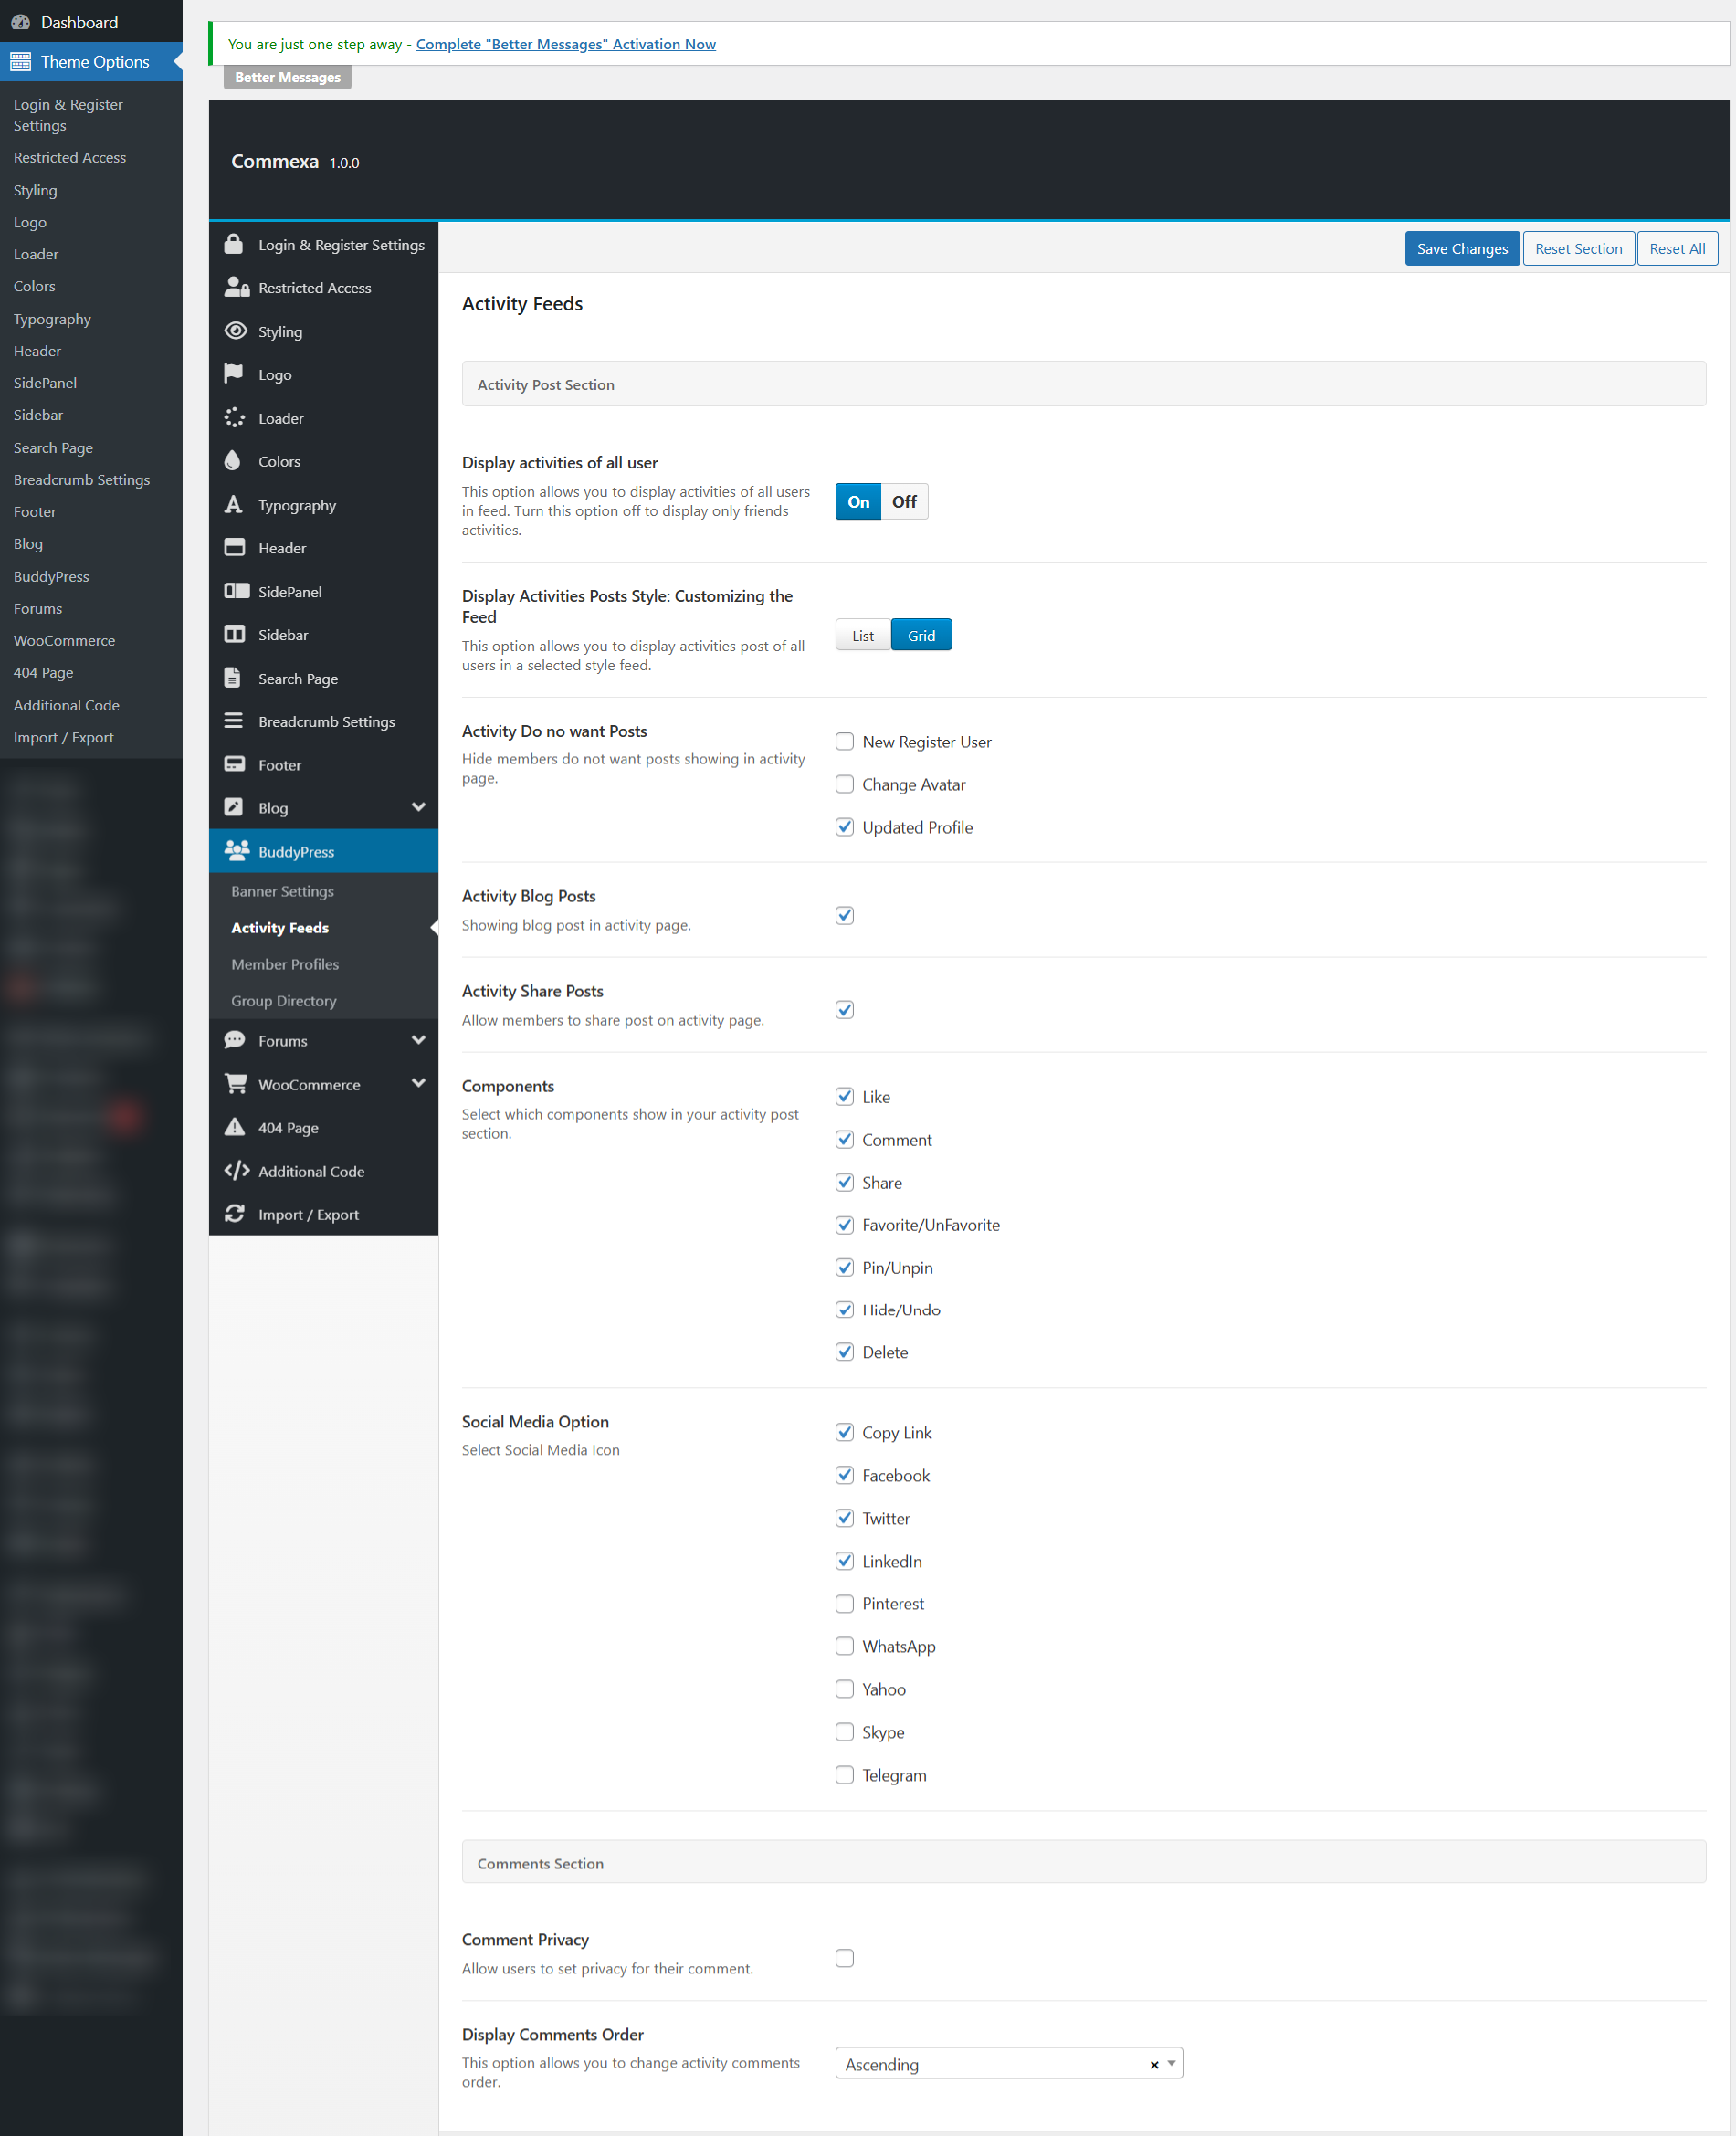
In the Theme Options > BuddyPress > Activity Feeds , you can configure the display of activity posts and actions. This option allows you to show or hide various actions such as "Favorite," "Undo," "Delete," "Pin," and other activity actions, giving you control over the visibility of these options in the activity feed.
In the Theme Options > BuddyPress > Member Profiles , you can customize the appearance of member avatars and profile pages. This option allows you to choose how the avatar is displayed (e.g., name-based, default, or custom), along with additional settings for the profile page layout, such as profile visibility, sections to display, and other profile-related options.

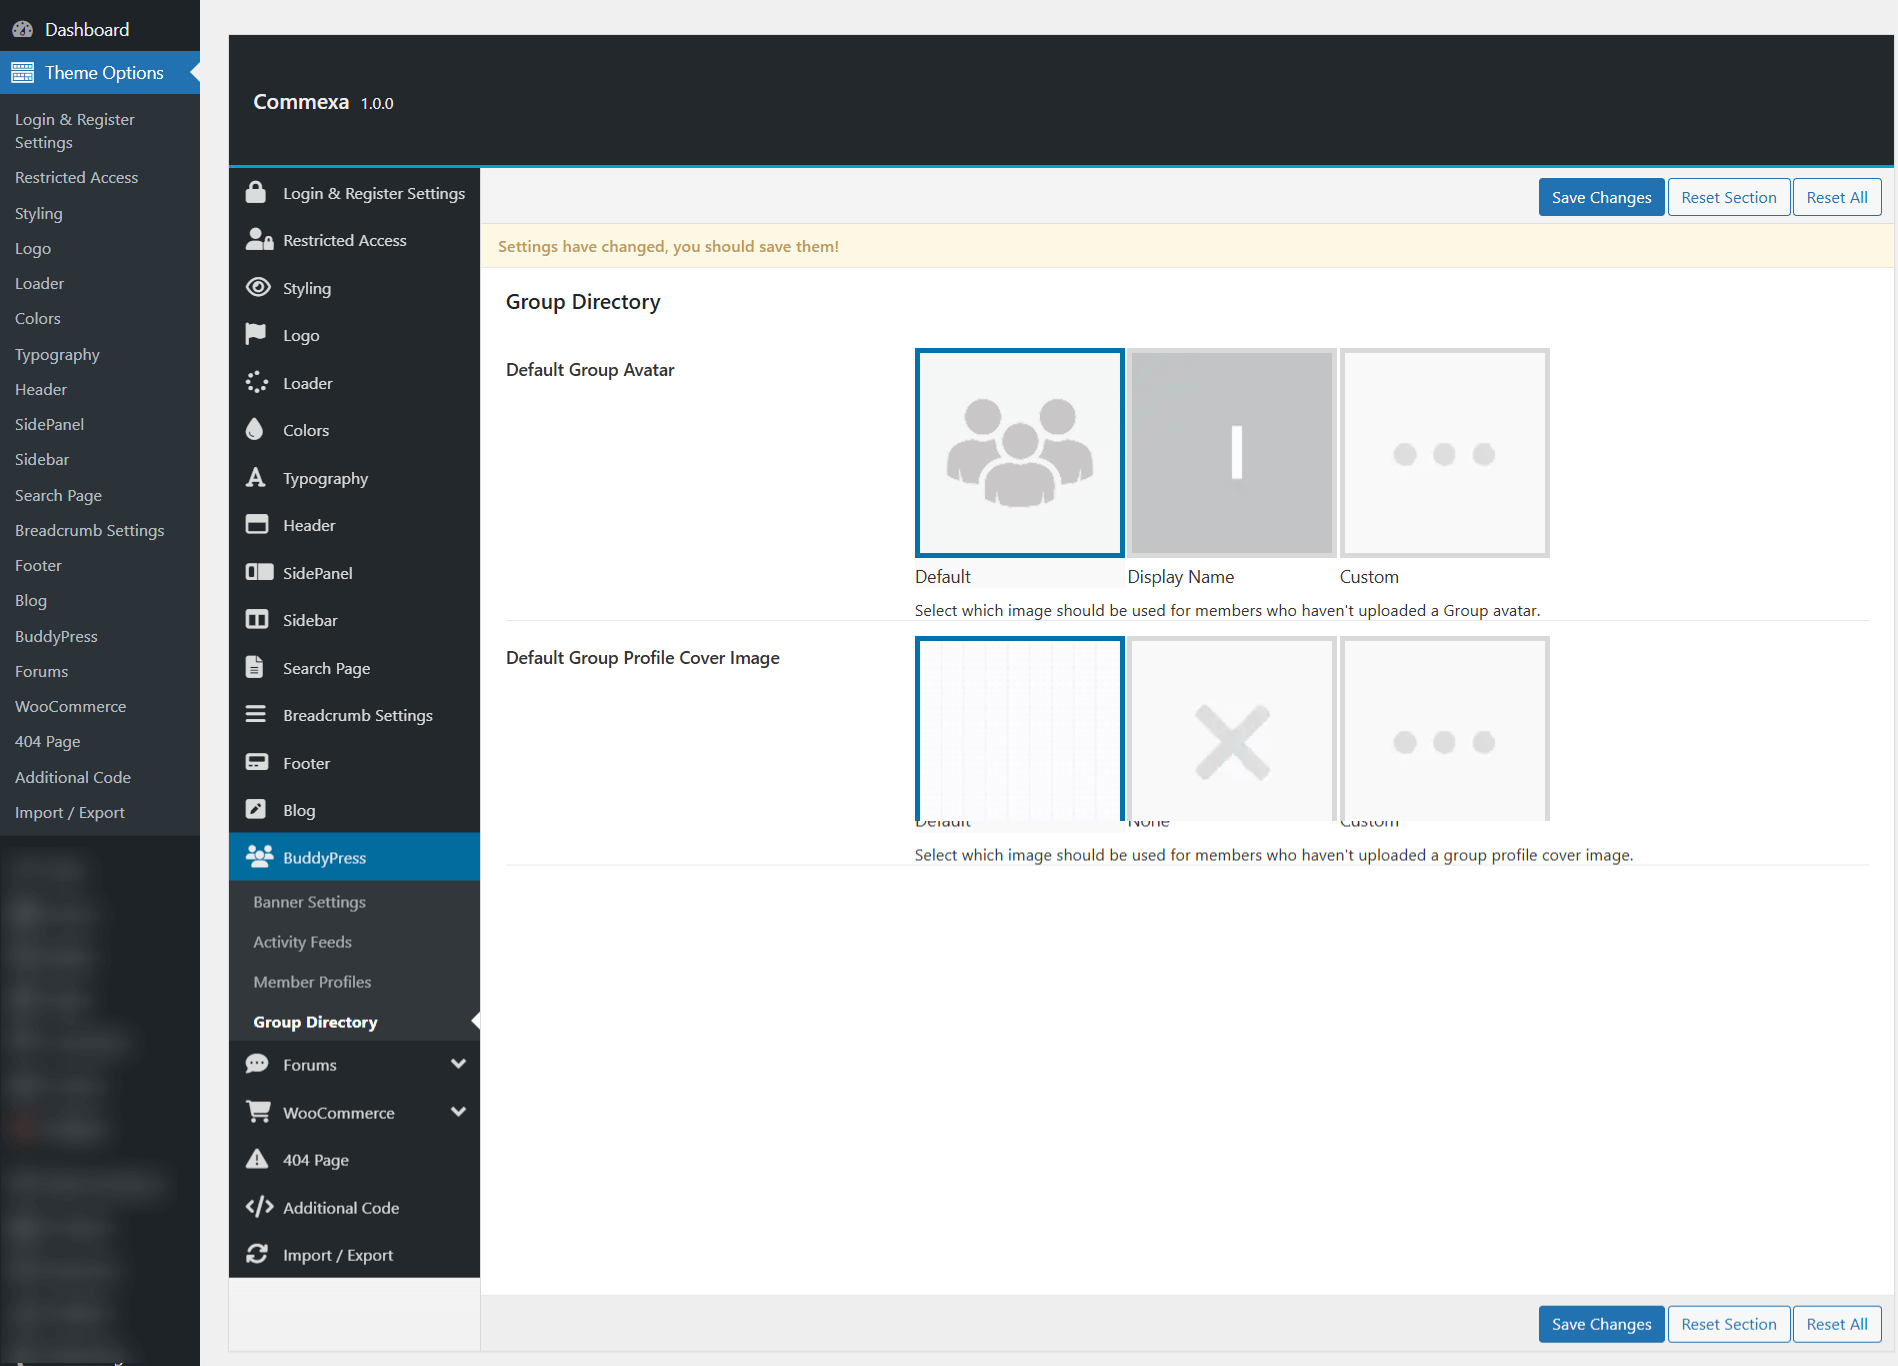
In the Theme Options > BuddyPress > Group Directory , you can customize the appearance and layout of the group directory page. This option allows you to choose how groups are displayed, including settings for the group avatar, group names, and visibility options. You can also configure additional settings for the group page, such as the layout style and sections to show or hide.
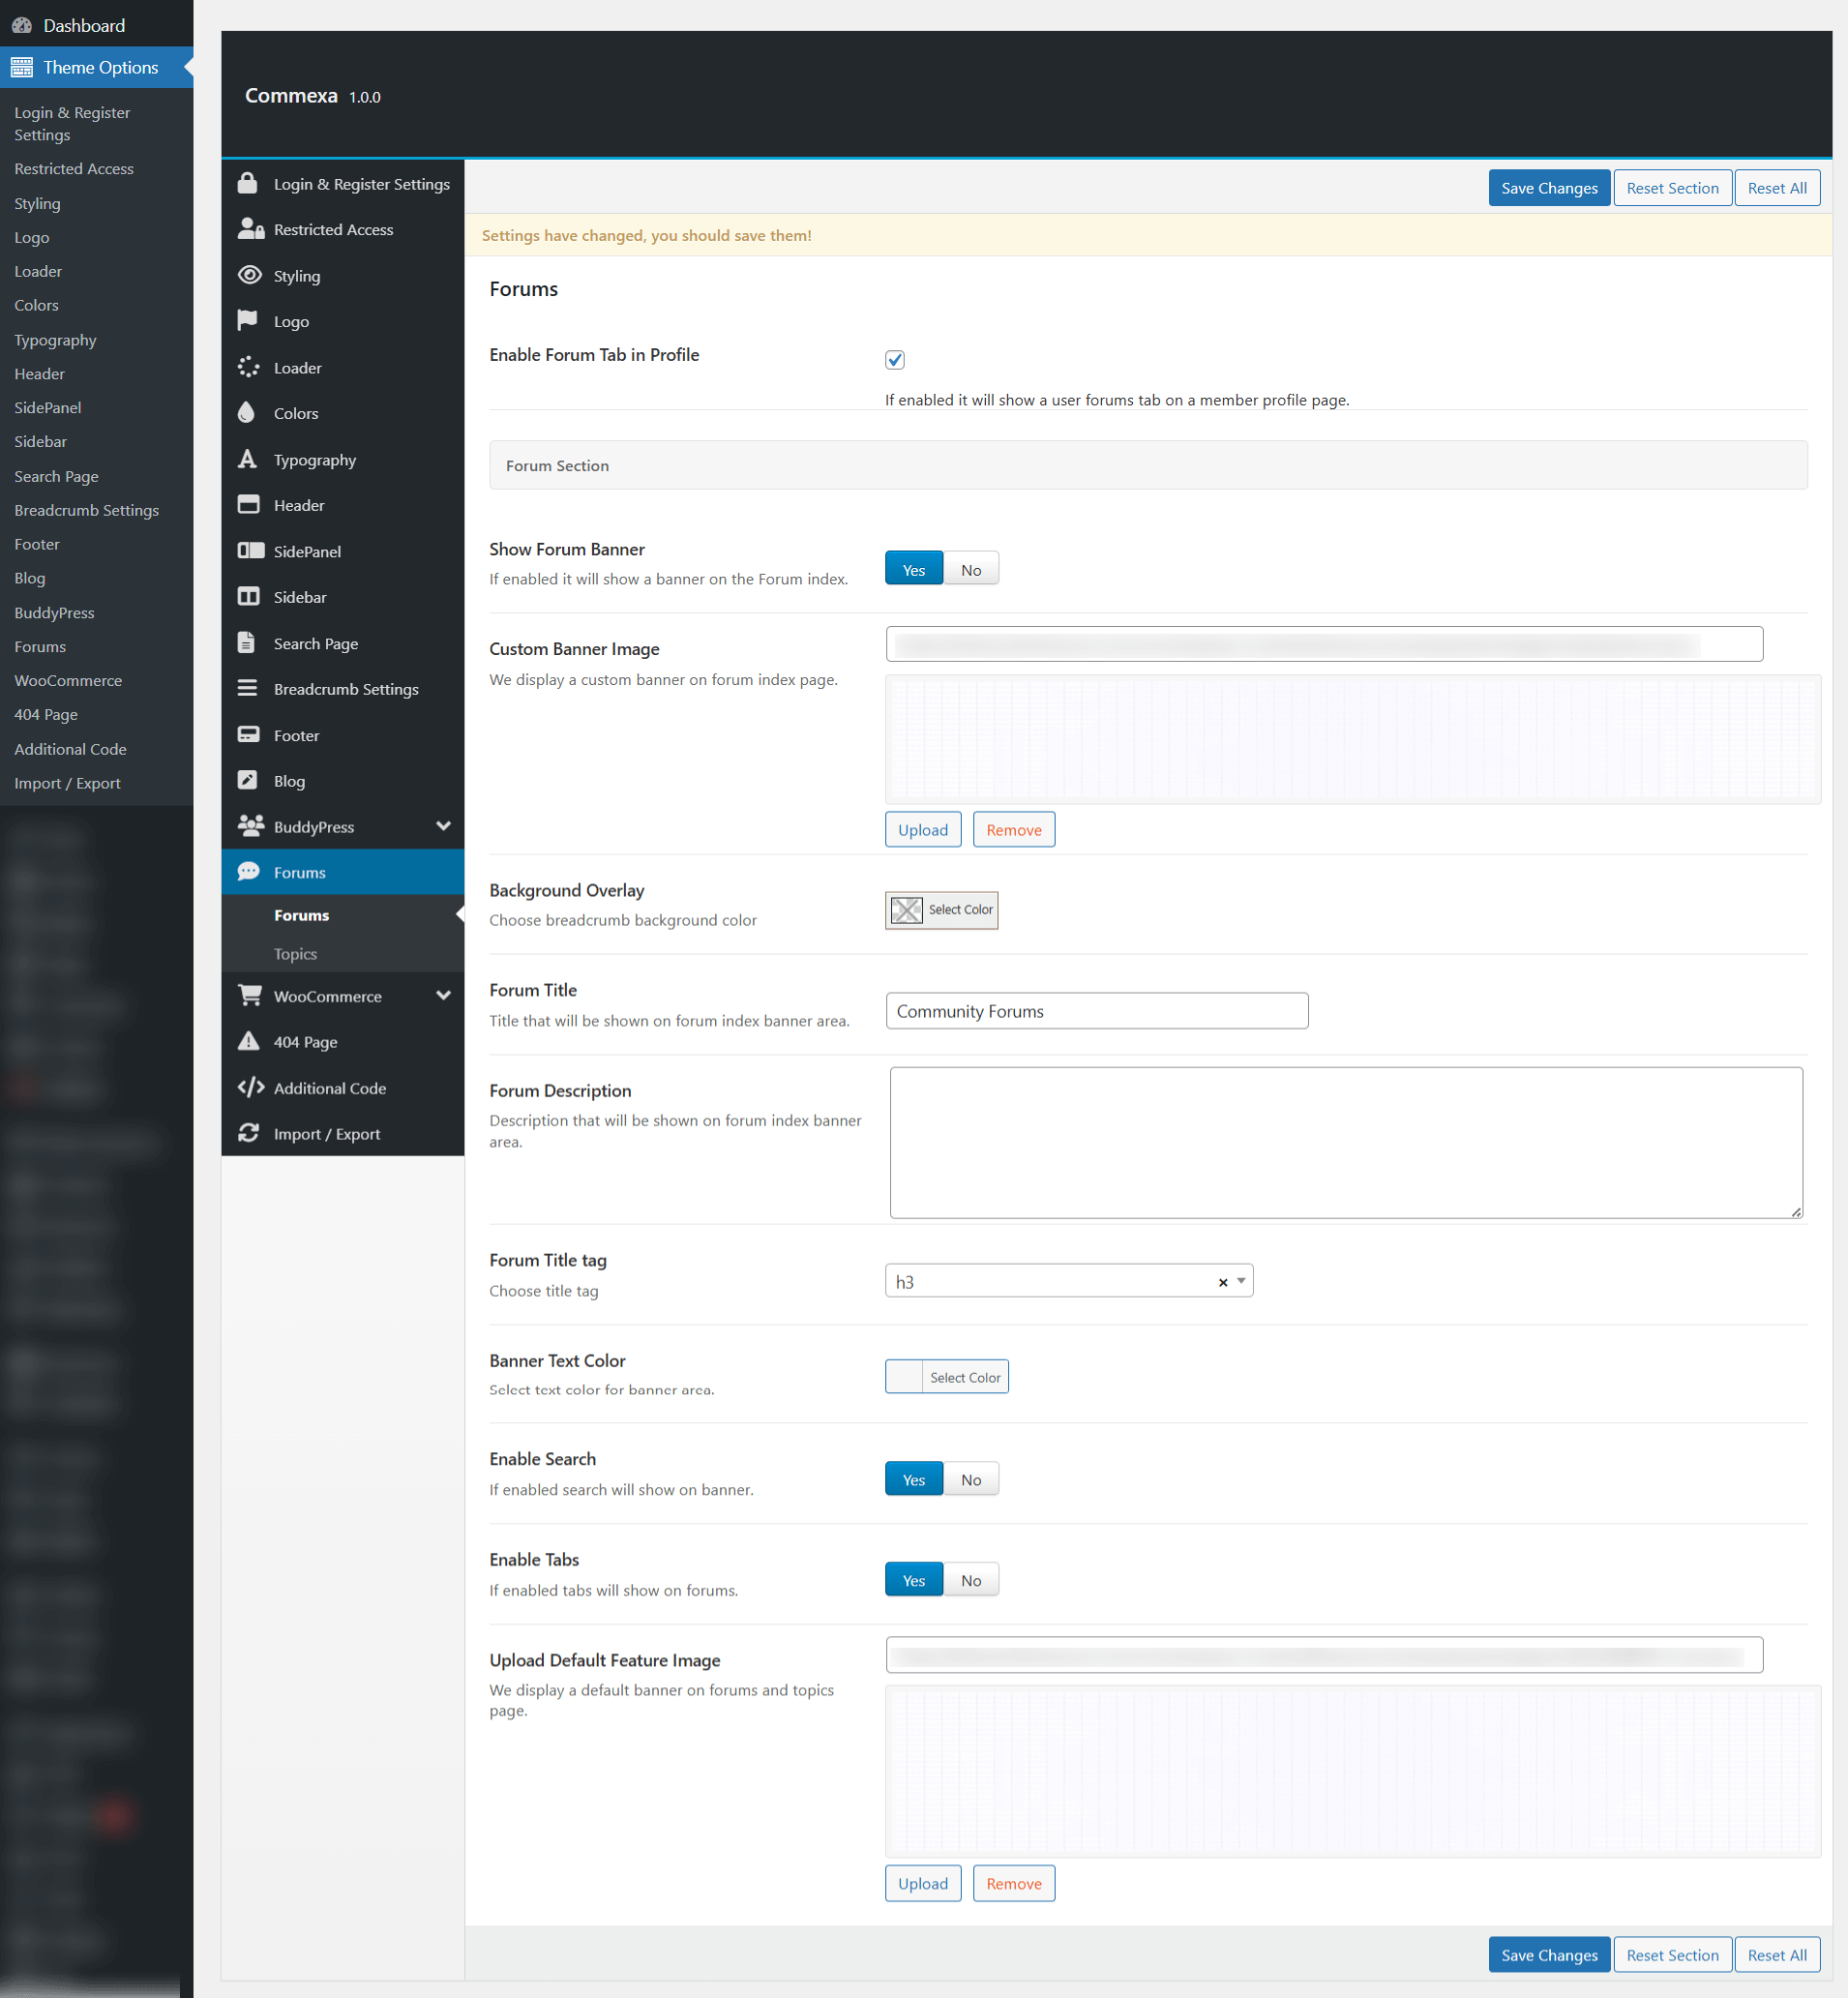
In the Theme Options > Forums , you can customize the forum page settings, including the option to set a custom banner for the forum page. Additionally, you can configure other options such as search settings, forum layout, and the display of forum topics and replies, giving you full control over the forum's appearance and functionality.
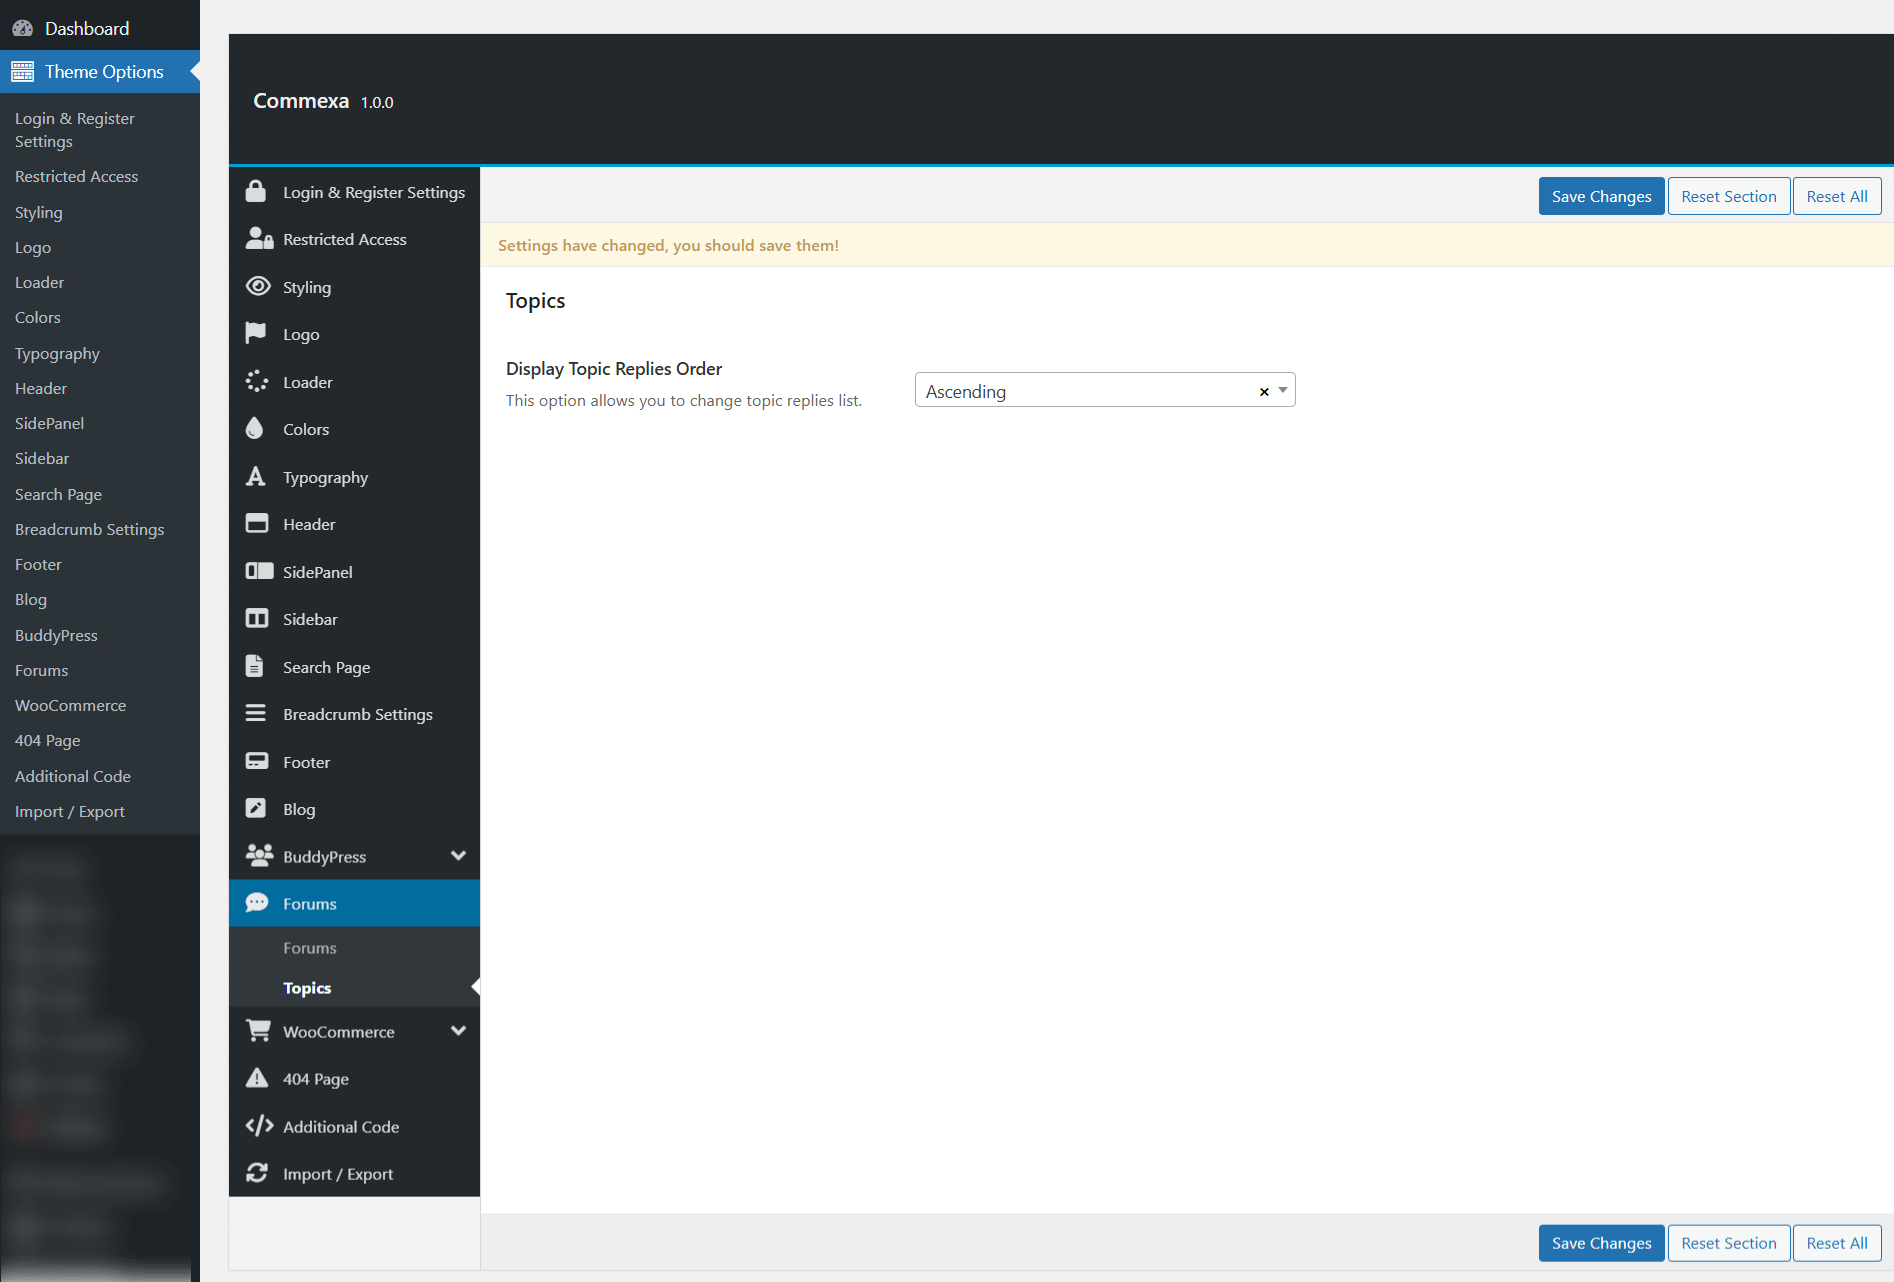
In the Theme Options > Forums > Topics , you can configure the order in which replies are displayed within forum topics. This setting allows you to set whether replies appear in chronological or reverse order, giving you control over the discussion flow.
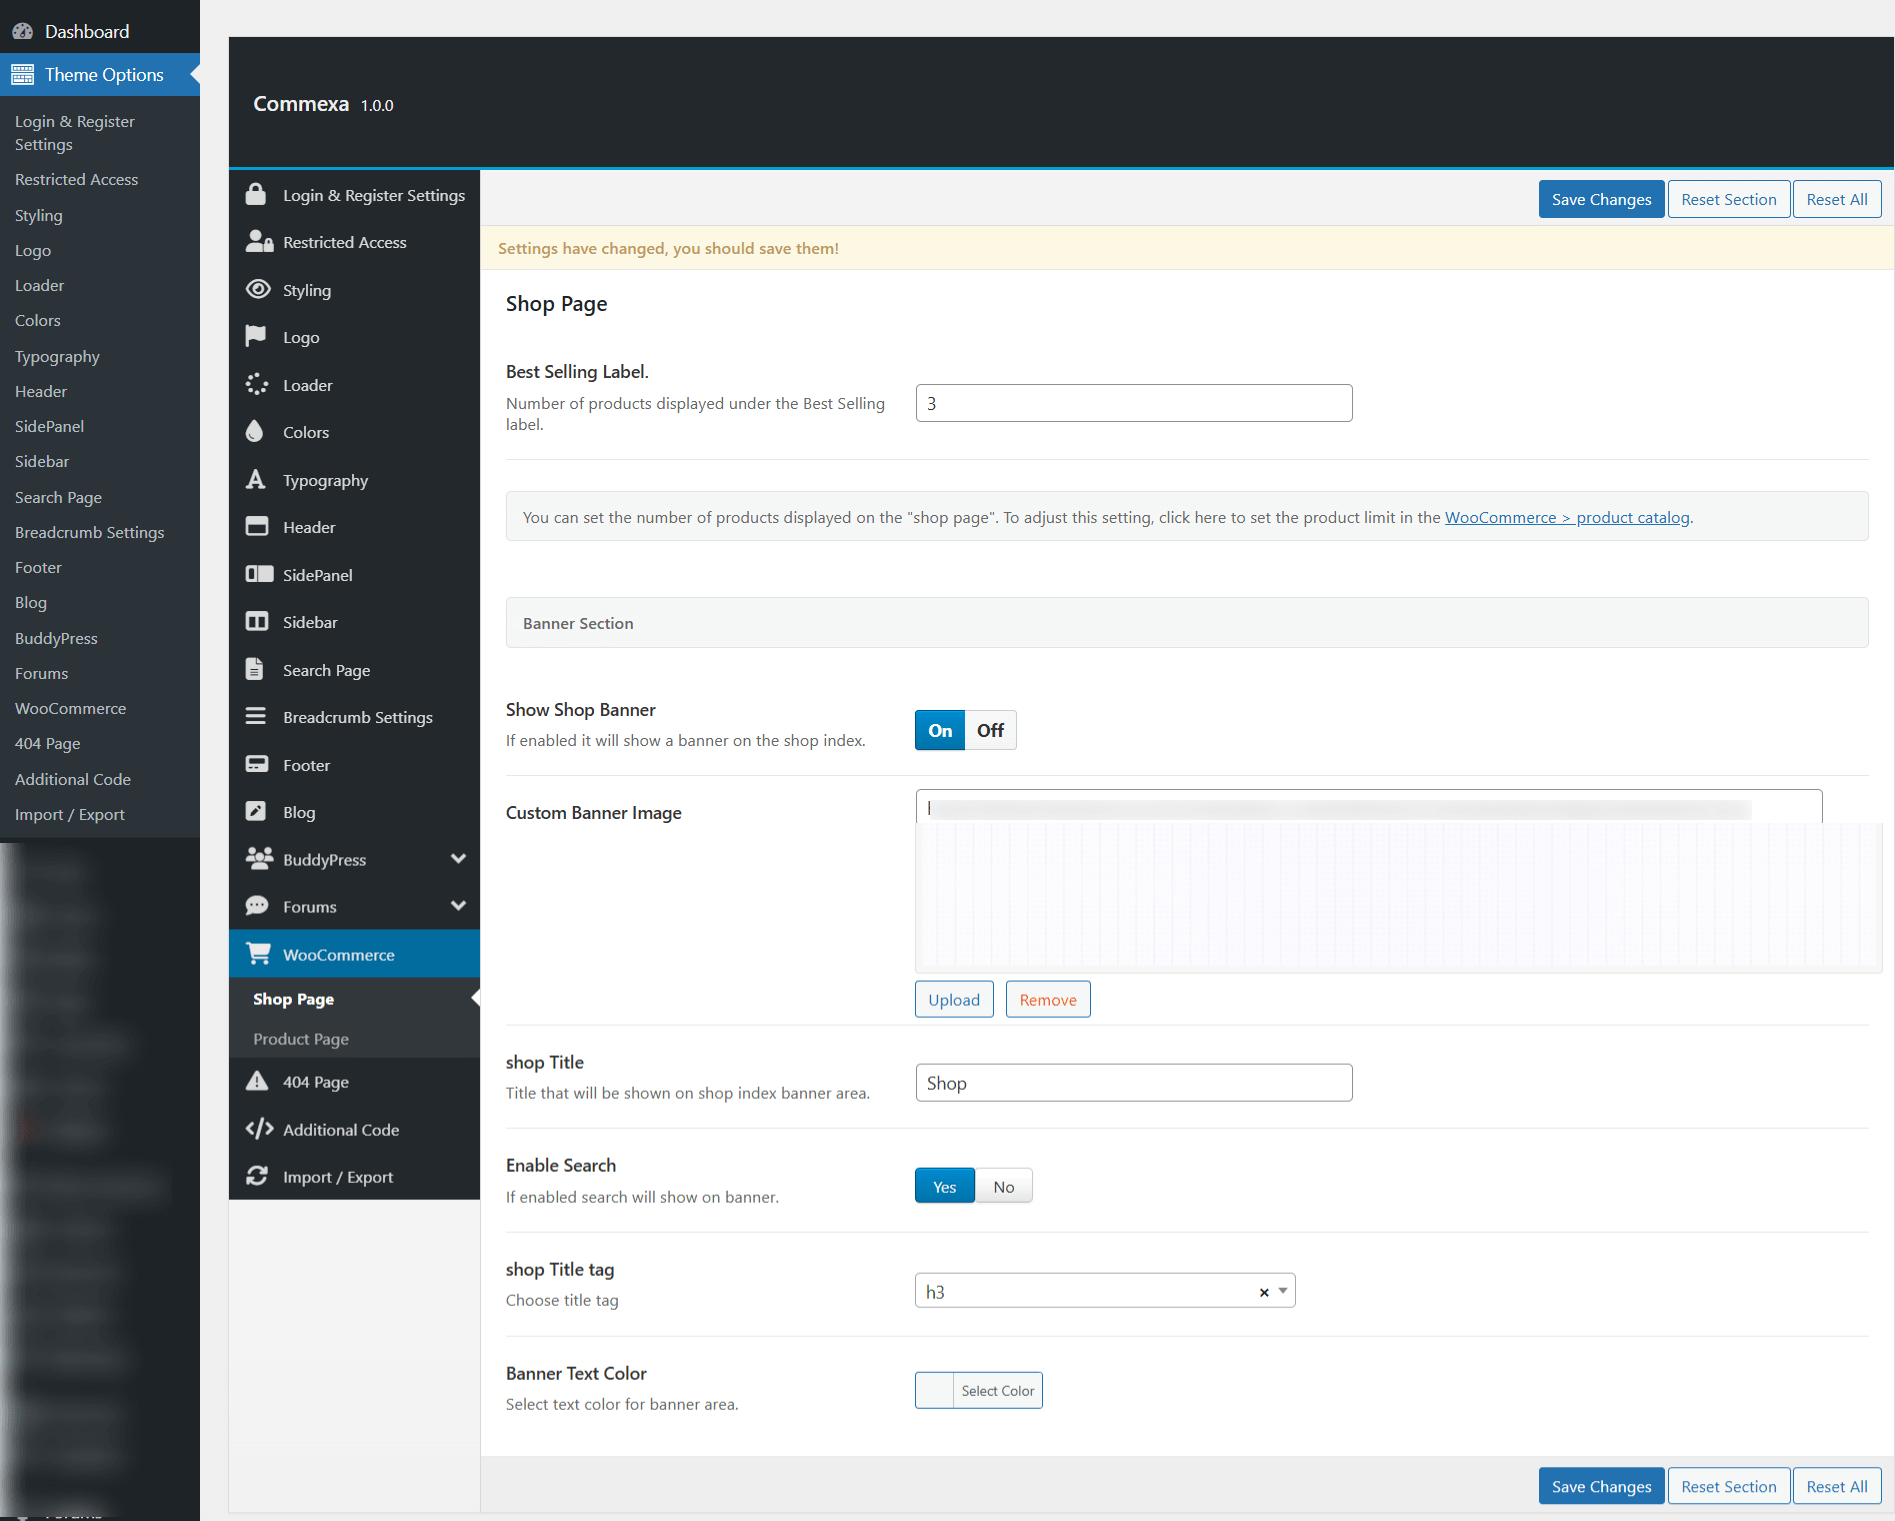
In the Theme Options > WooCommerce > Shop Page , you can customize the shop page settings, including the option to set a custom banner for the shop. This allows you to control the appearance of the shop page, including banner style and other visual elements to match your site’s design.
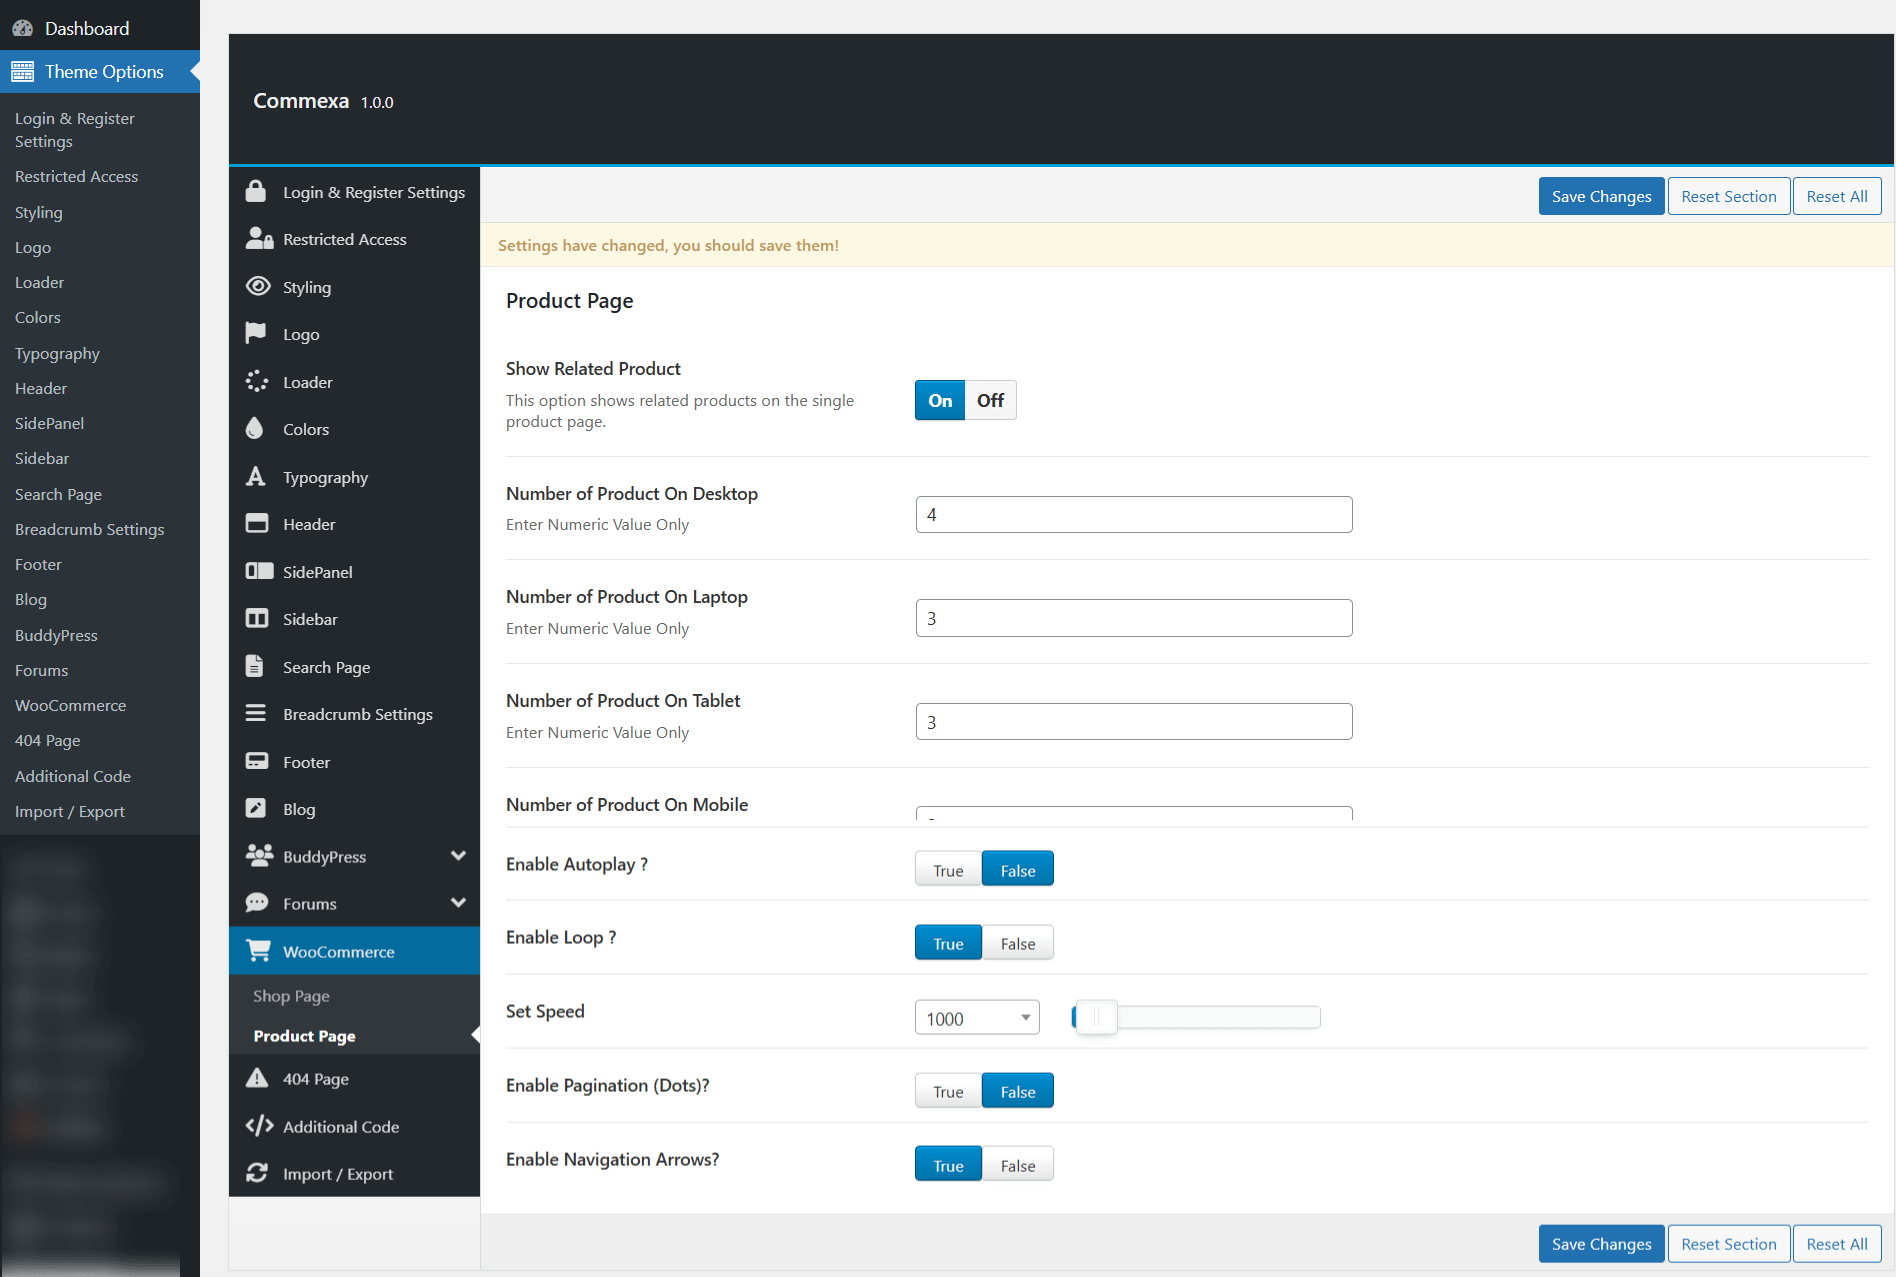
In the Theme Options > WooCommerce > Product Page , you can customize the product page settings, including options for displaying related products.This section allows you to configure how products appear on the single product page, including enabling or disabling related products, setting the number of products shown, and adjusting other display options to enhance the shopping experience.
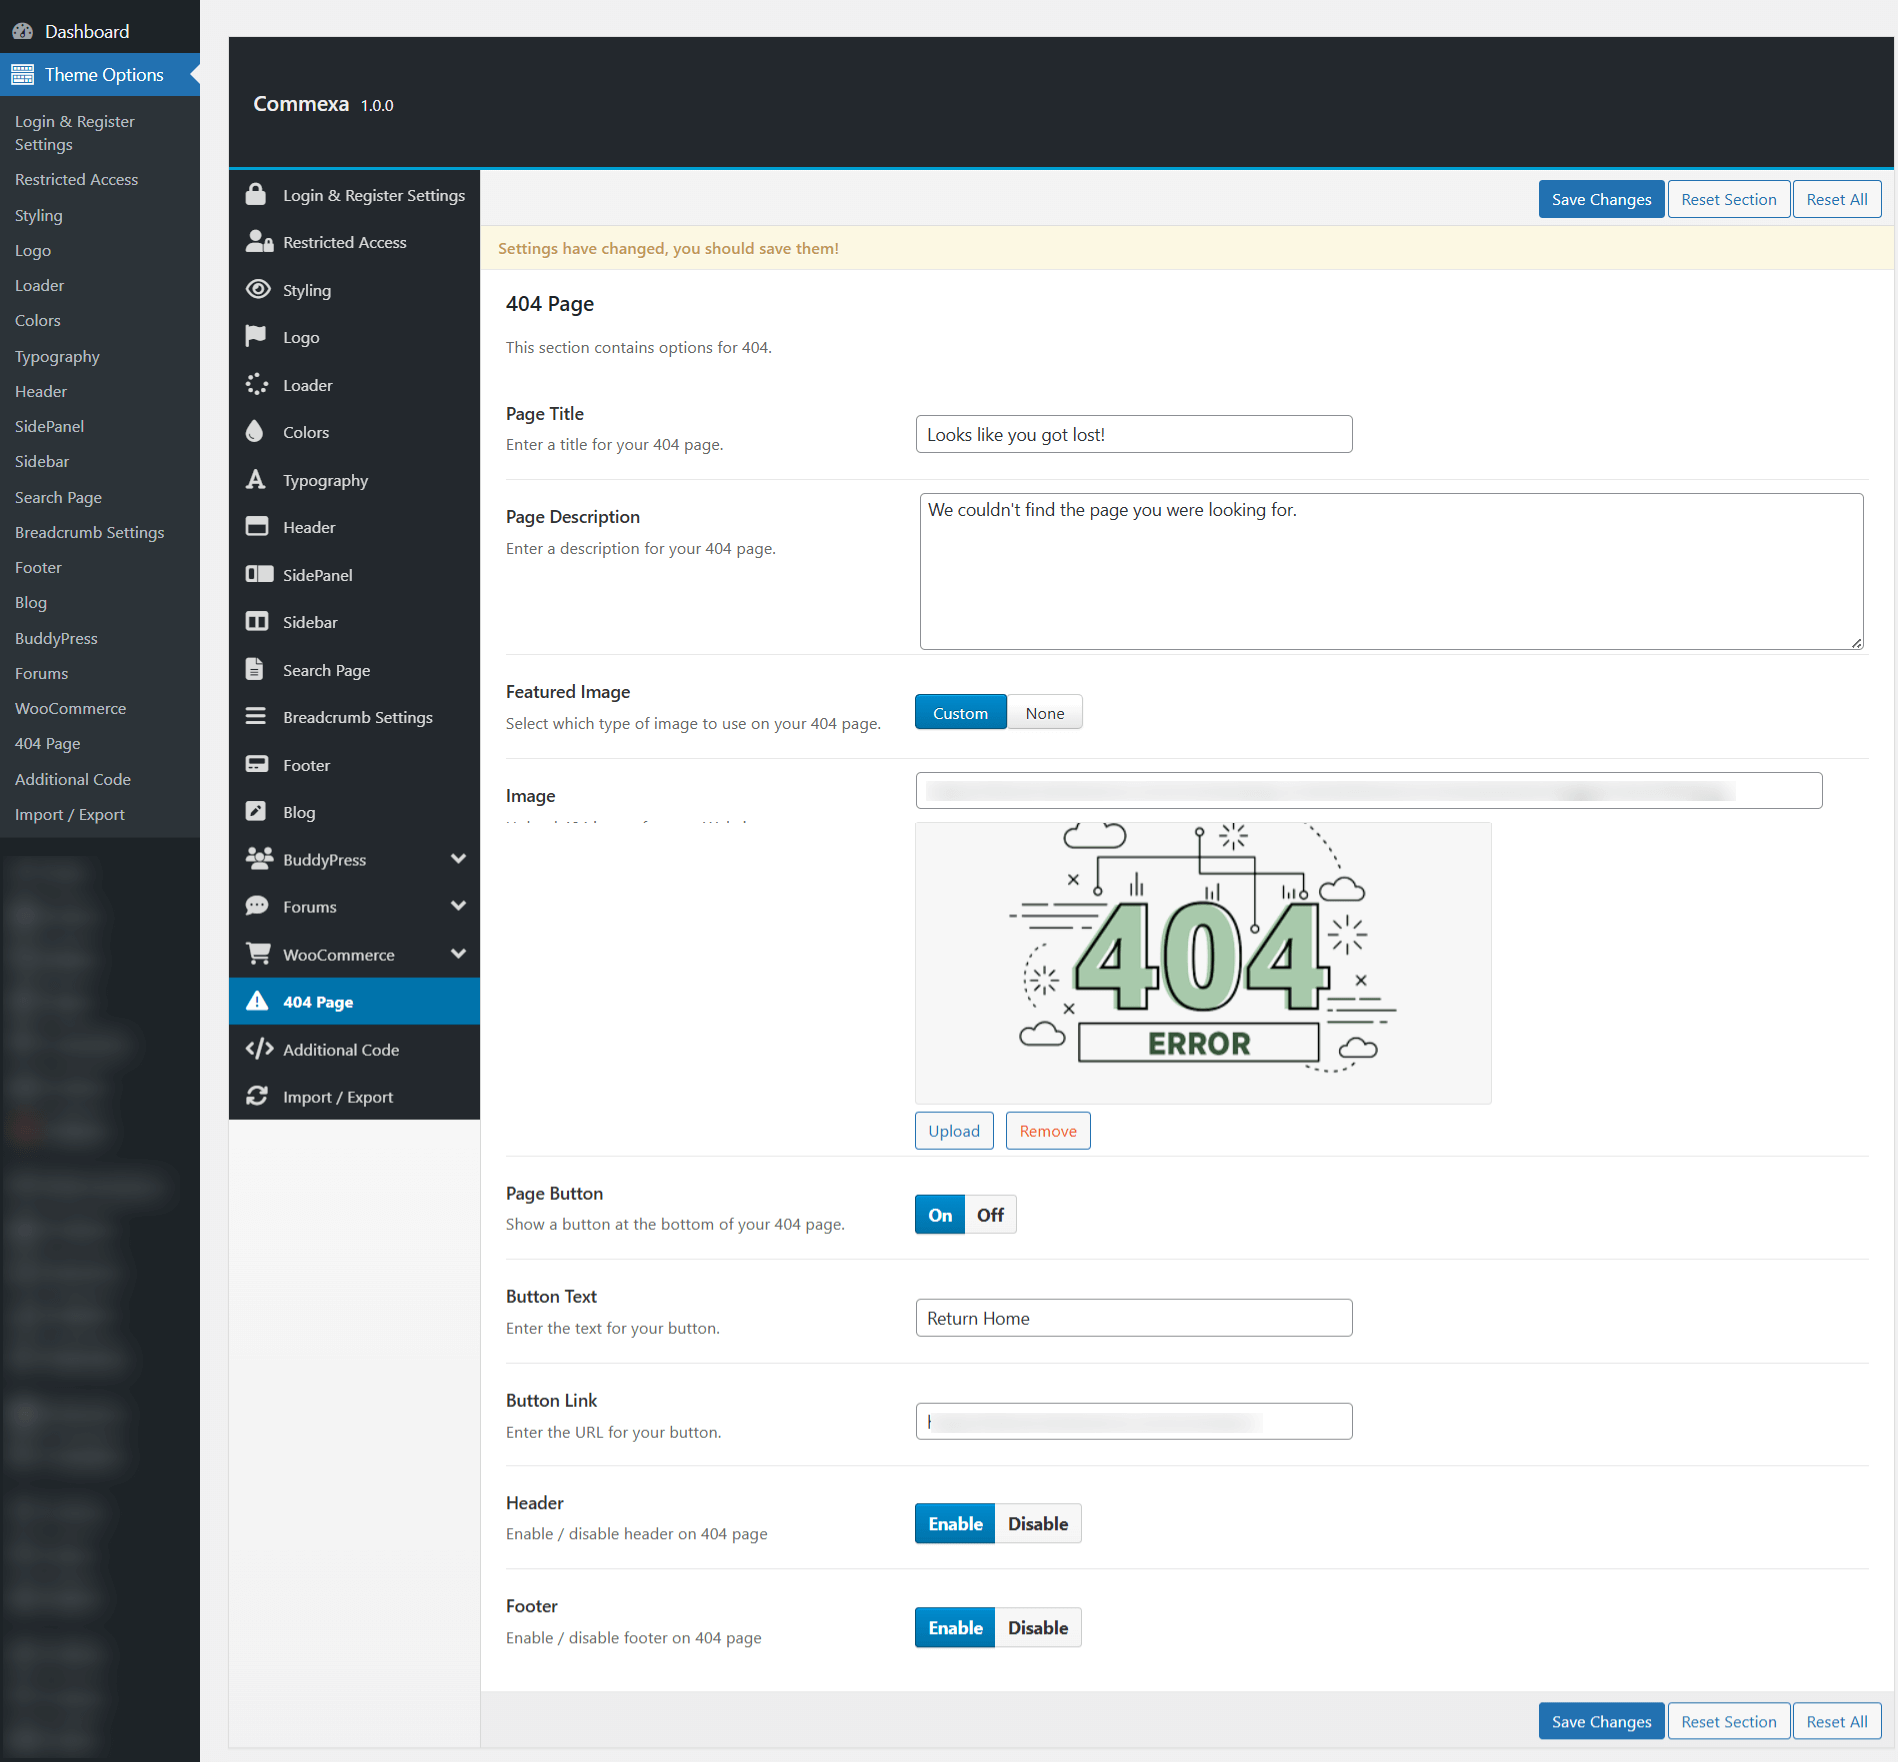
In the Theme Options > 404 Page , you can customize the content and appearance of the "Page Not Found" error page. This option allows you to set a custom message, add helpful links, or design the page to match your site's style, ensuring visitors have a better experience when encountering a missing page.
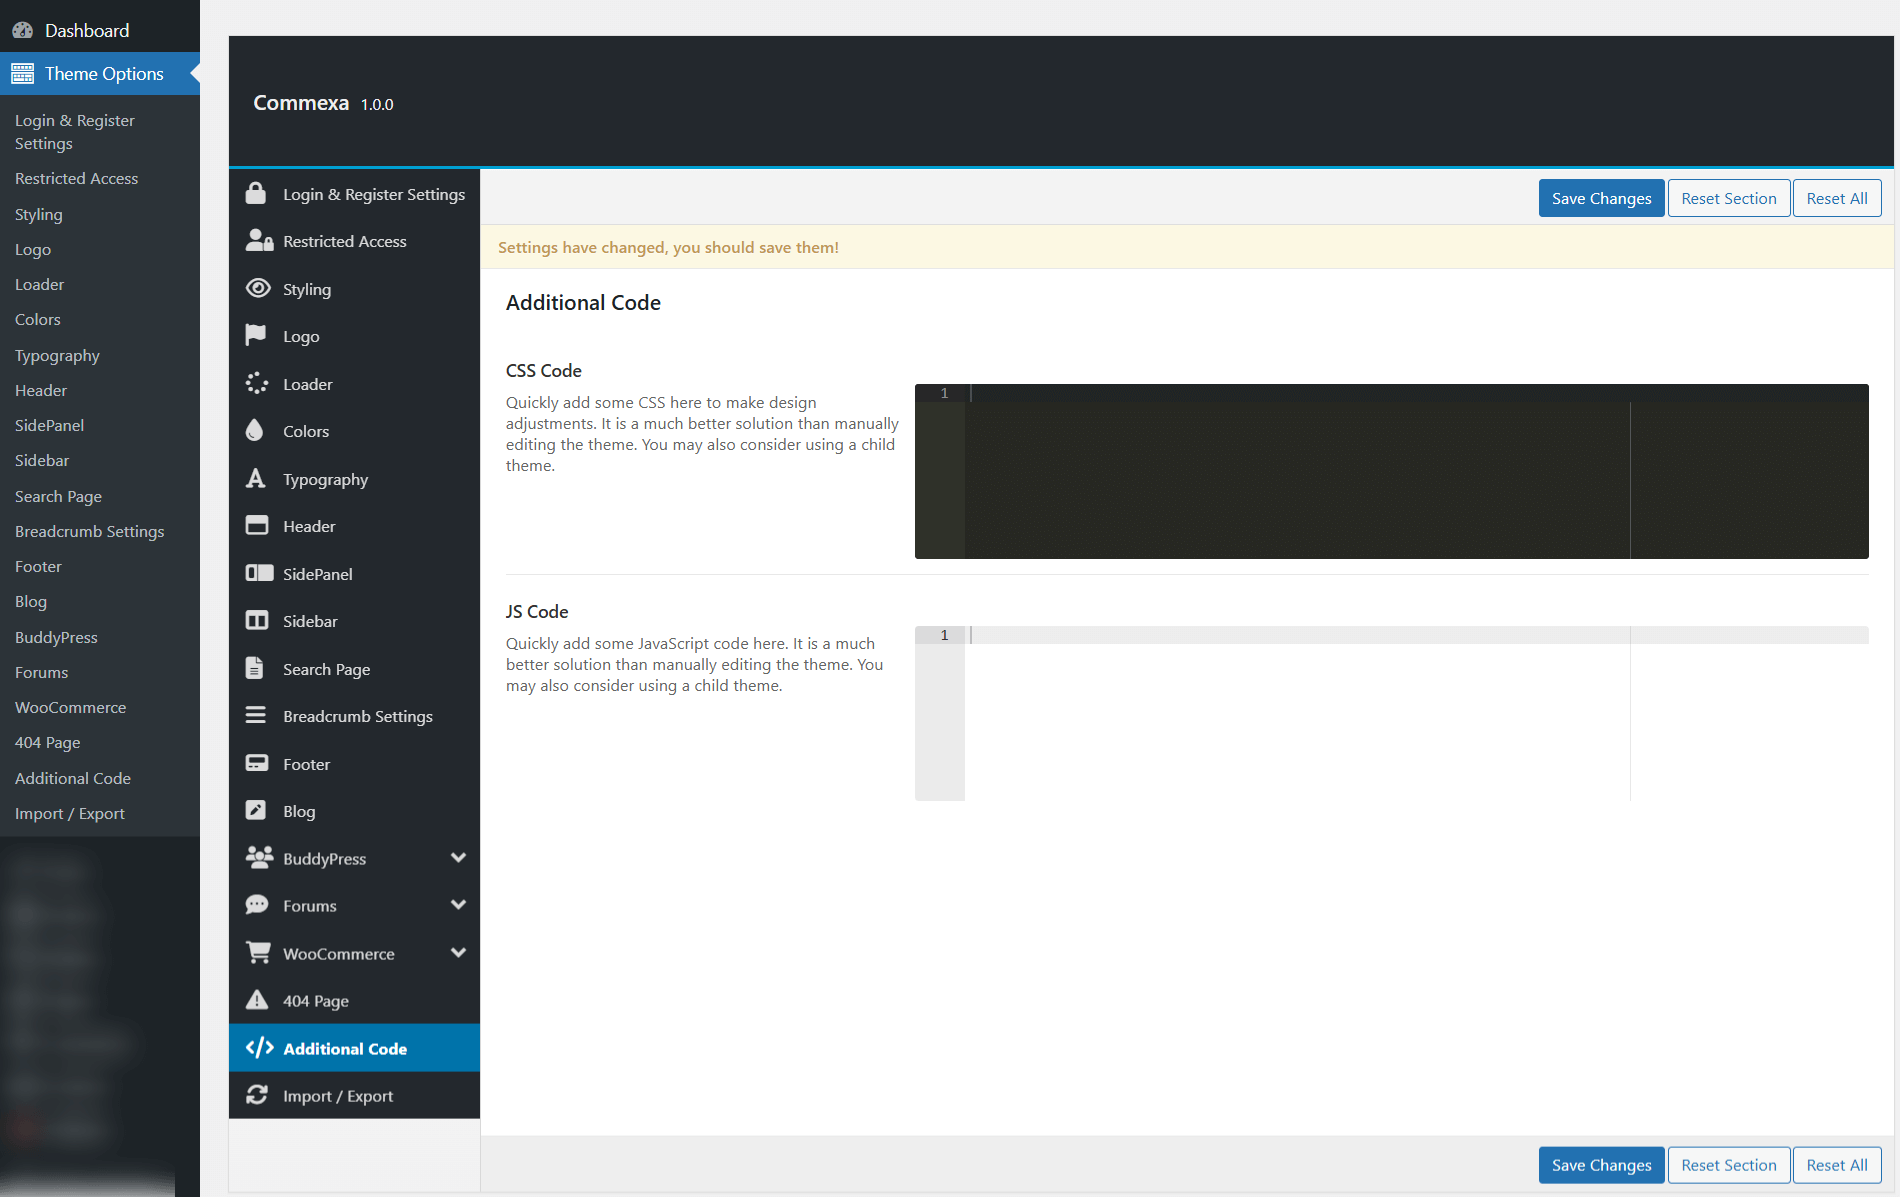
In the Theme Options > Additional CSS & JS , you can add custom CSS and JavaScript to further customize the appearance and functionality of your site. This section allows you to easily insert your own styles and scripts without modifying theme files directly, giving you the flexibility to make adjustments as needed.
To create a new page navigate to "Pages" dashboard menu item in your WordPress admin panel and click on
Add new
button.
The page is typically made up of Sections, Columns, Widgets, and other elements that can be easily edited with Elementor. Before getting started, we recommend reviewing the following tutorials:
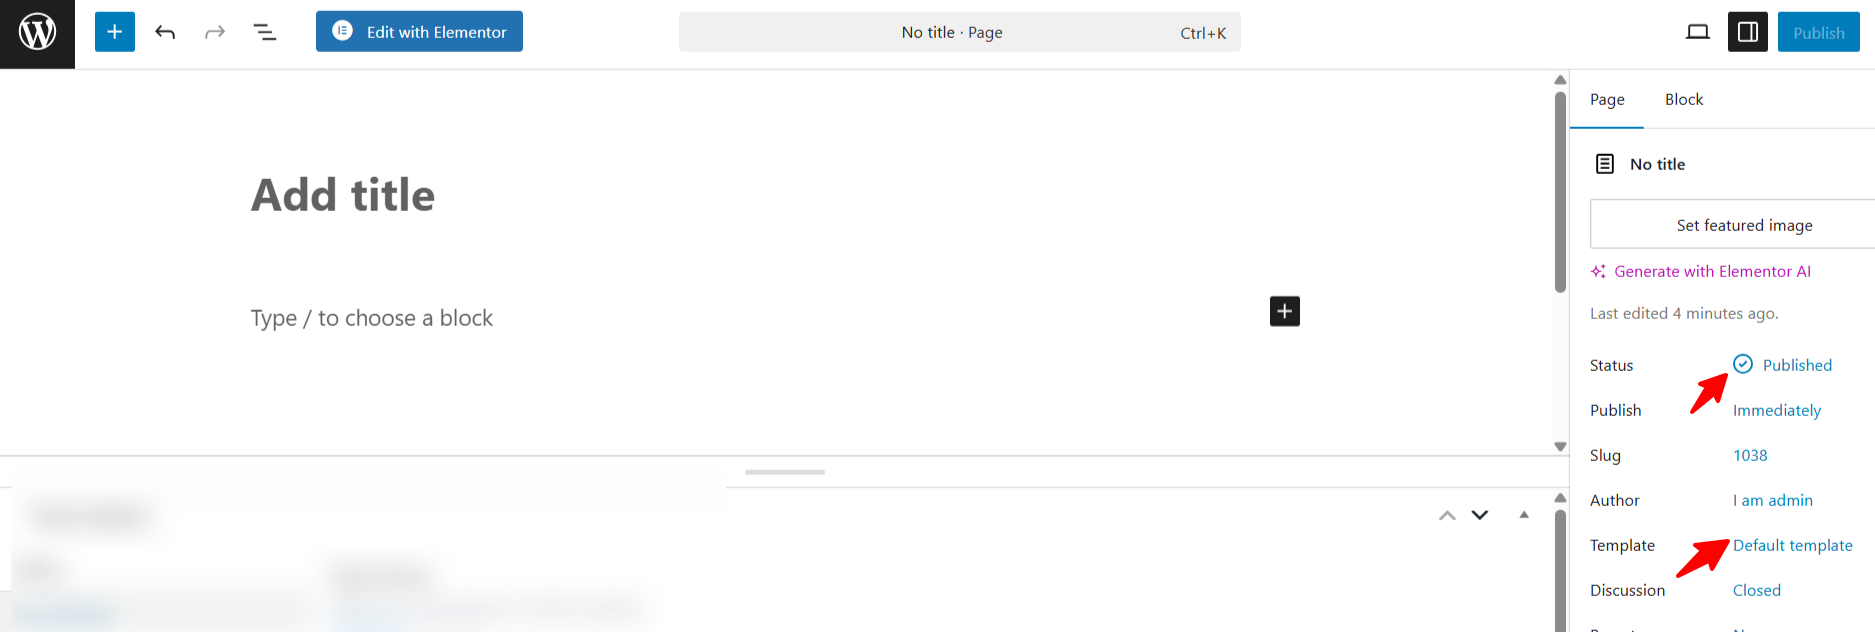
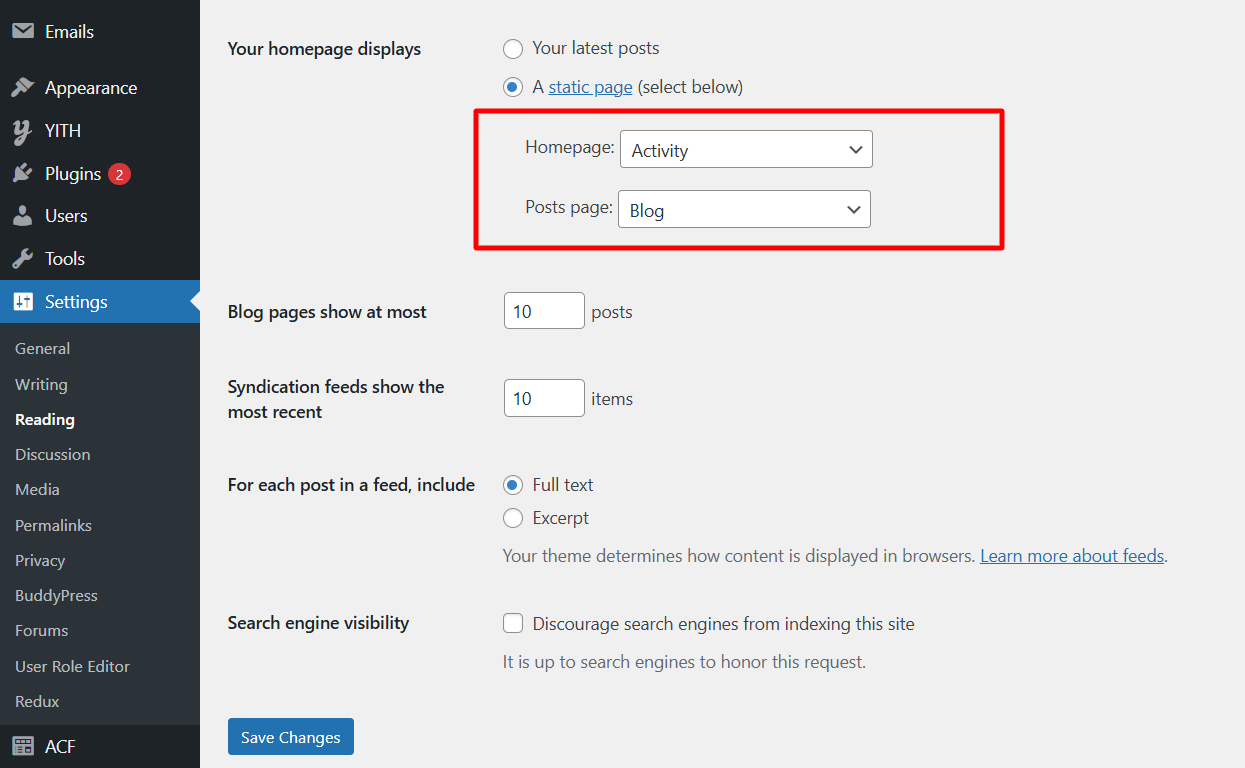
To set the homepage that users see after logging in, go to Settings > Reading in your WordPress dashboard and select your desired page as the homepage. This allows you to control which page is displayed for logged-in users as the homepage.
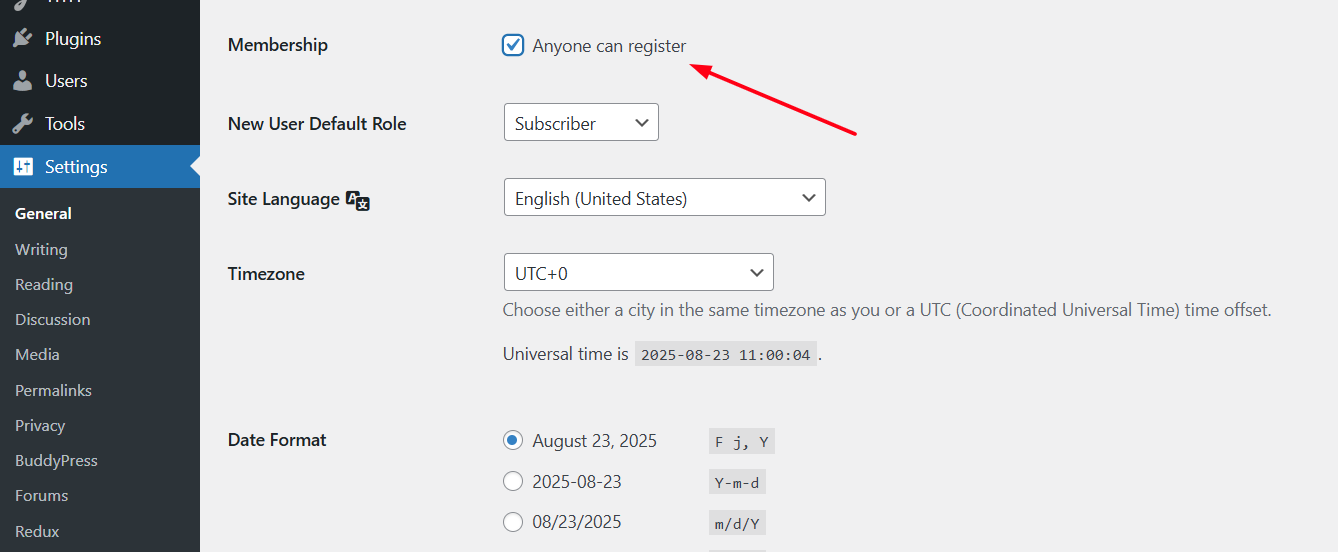
To enable user registration on your site, go to Settings > General in your WordPress dashboard and check the option Anyone can register. This will allow users to create accounts on your site through the registration page.
If you want to change the format, style, or content of any email sent by your site, go to Dashboard > Settings > Emails and select the appropriate email template. From here, you can customize the text, layout, and other elements of the email templates to fit your needs.

Advanced Custom Fields (ACF) is a powerful WordPress plugin that allows you to add custom fields to your content types such as posts, pages, users, taxonomy terms, media, and more.
The intuitive field builder lets you create flexible, structured content fields with ease — no coding required. These fields enhance the editing experience and make your content more dynamic.
Explore the links below to learn more about the Advanced Custom Fields plugin:
To view and manage field groups, navigate to Custom Fields > Field Groups in your WordPress dashboard.
The bbPress plugin allows you to easily add discussion forums to your WordPress site. bbPress is lightweight, fast, and designed to integrate seamlessly with any WordPress theme.
You can manage your forums, repair them, or import data from another forum platform by going to WP Dashboard > Tools > Forums .
Plugin settings are available under
WP Dashboard > Settings > Forums
.
To manage your forum content, use the
WP Dashboard > Forums / Topics / Replies
sections.
The Better Messages plugin enables real-time messaging features for your website, including live chat, private audio/video calls, group calls, and more. It can work independently or as a full replacement for the default BuddyPress Messages system.
Better Messages is fully compatible with existing BuddyPress message data, ensuring a smooth transition if you're switching from BuddyPress Messages.
For more information and downloads, visit:
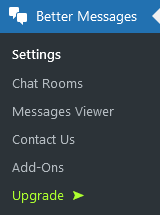
After installation, you’ll find the
Better Messages
settings panel in your WordPress Dashboard, where you can manage and configure all plugin options.
BuddyPress is a robust plugin that transforms your WordPress website into a fully functional social networking platform. It allows members to connect, interact, and build communities around shared interests within a multi-blog environment.
Whether you're building a niche community or a large-scale social platform, BuddyPress offers essential features such as user profiles, activity streams, groups, private messaging, and more.
You can find detailed documentation and usage guides on the official BuddyPress codex .
Below are some helpful video tutorials to get you started:
To configure BuddyPress settings, go to WP Dashboard > Settings > BuddyPress .
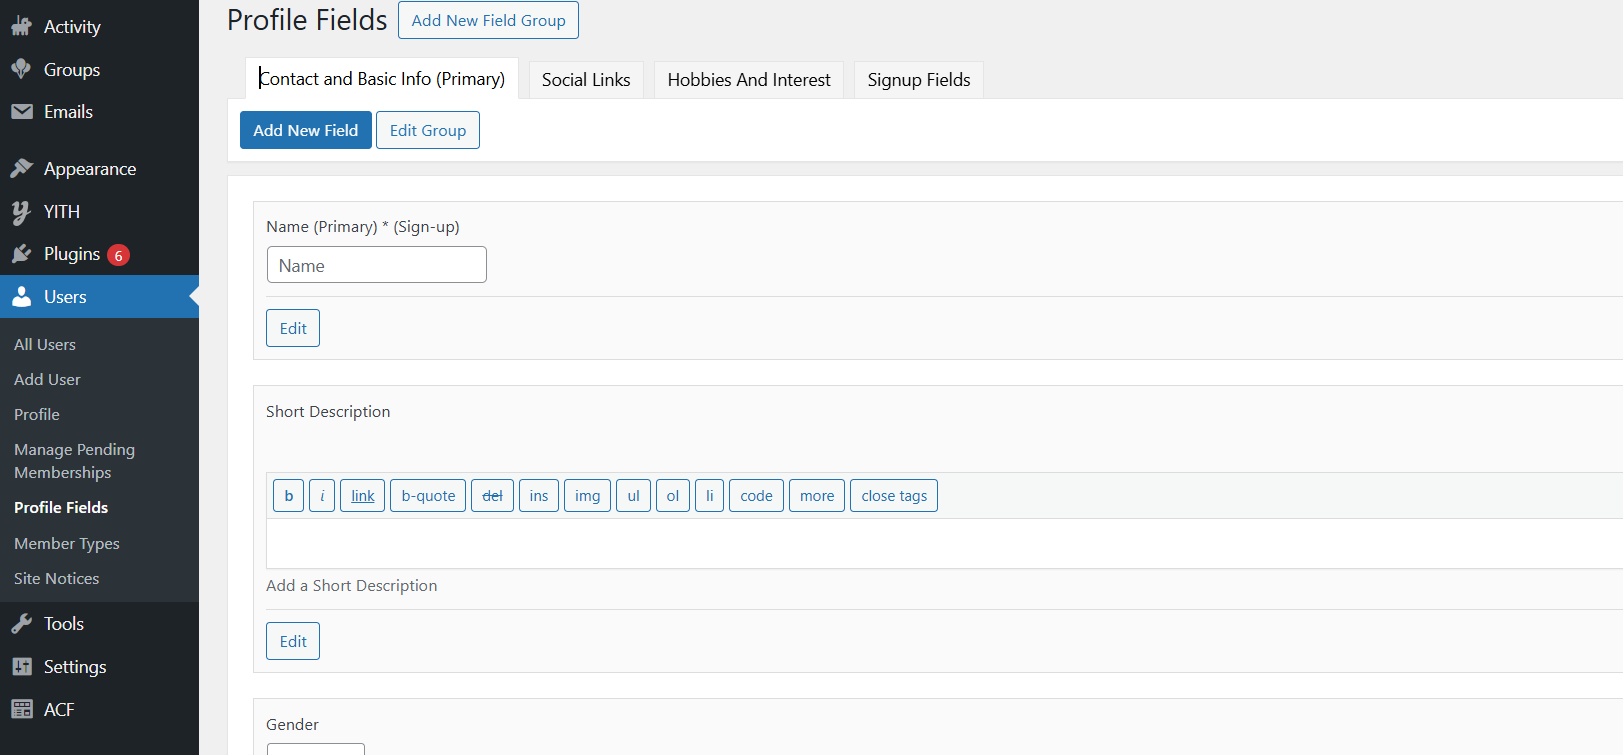
If you need any user custom field add or edit here: Wp Dashboard > Users > Profile Fields
The Verified Member for BuddyPress plugin allows administrators to assign a verified badge to selected users. This helps identify trusted or notable members within your BuddyPress community.
After activation, the plugin integrates with the WP Dashboard > Users section, where admins can manage verification status for each user.
This plugin is required to properly display verification badges and manage verified status across your site. Without it, the related badges and content will not appear correctly.
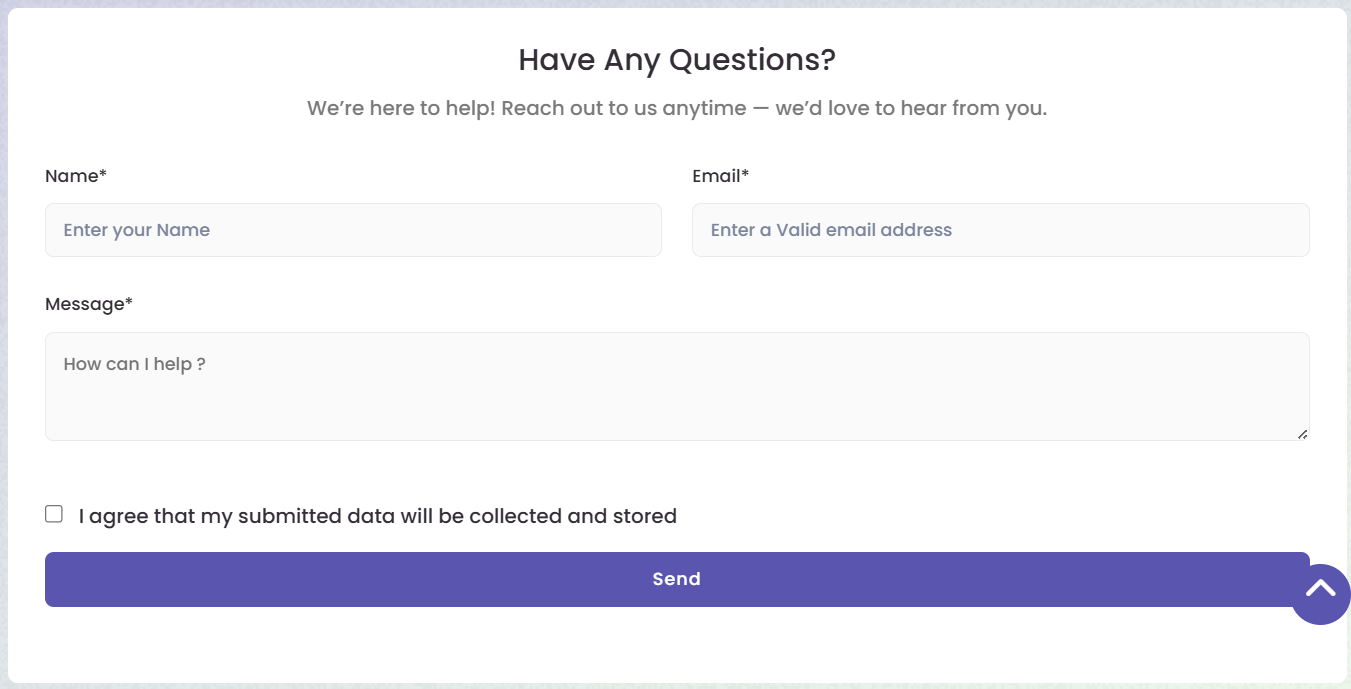
Contact Form 7 is a flexible and easy-to-use plugin that allows you to manage multiple contact forms on your website. You can customize each form and email message using simple markup.
It includes features like: AJAX-powered form submissions, CAPTCHA support, Akismet spam filtering , and more.
Learn more about the plugin from the following resources:
The theme includes a pre-built contact form, which you can customize by navigating to: WP Dashboard > Contact > Contact Forms .
Elementor is a powerful drag-and-drop page builder included with this theme to simplify your customization process. It allows you to design stunning pages visually without writing a single line of code.
Before getting started, we recommend reviewing the following tutorials to get familiar with how Elementor works:
rtMedia is an all-in-one media management solution for community-driven websites. It integrates seamlessly with WordPress, BuddyPress, and bbPress , providing features like:
For more details, visit the WordPress plugin page or the official rtMedia website .
The RK Theme Core plugin is a required plugin for this theme to function correctly. Without it, many core features of the theme will not work as expected.
In addition to essential functionality, it also provides an integrated system to manage updates for the theme and bundled plugins directly from the WordPress dashboard.
For more details, please refer to the Plugin Update section of this documentation, or visit.
WooCommerce is the leading e-commerce plugin for WordPress, allowing you to easily turn your website into a fully functional online store. Our theme offers full compatibility with WooCommerce, so you can start selling products quickly and efficiently.
To get started, simply install the plugin and allow it to automatically generate essential pages like Shop, Cart, Checkout, and My Account. Once done, you can begin adding product listings and categories.
For the best results, we recommend reviewing the comprehensive documentation provided by WooCommerce. It offers everything you need to create a feature-rich, professional online store.
The YITH WooCommerce Wishlist plugin lets users save their favorite products in personalized wishlists. Visitors can create multiple wishlists, organize products the way they like, and even share them with others via social media. This feature not only improves user experience but also increases potential conversions and sales.
For more guidance and support, check the following resources:
If you want to translate the theme into a different language, follow these steps:
Download and install the Poedit software on your computer.
Go to the theme's language folder:
wp-content/themes/commexa/languages
Find the
.pot
file in this folder.
Open the
.pot
file in Poedit.
Click on the "Create New Translation" button, select your language, and click OK .
Select a string from the "Source Text - English" field, then enter the translation in the "Translation" field. Repeat for each string.
Save the
.po
file using the language-country naming convention, e.g.,
pt_BR.po
for Portuguese (Brazil).
Important: Ensure you follow the correct naming convention.
Poedit will automatically generate a
.mo
file with the same naming convention.
Upload both the
.po
and
.mo
files to the
languages
folder in your theme's directory:
wp-content/themes/commexa/languages
If your theme uses the RK Theme Core plugin, you will need to translate additional language files located in:
wp-content/plugins/rk-theme-core/languages
Generate the
.po
and
.mo
files for the plugin with the same naming convention, e.g.,
rk-theme-core-pt_BR.po
.
For more information Additional Resources: , click the links below:
Thank you for choosing our theme! We're excited to have you on board.
If you need assistance beyond what’s covered in this documentation, our support team is here to help.
Please
submit a ticket
and we’ll get back to you within 24–48 hours (often sooner).
Support hours: Monday to Friday, 10:00 AM – 7:00 PM IST.